August 30, 2018

Photo Wrap-Up for August

Good grief, where has August gone to! It's hard to believe it's almost September, although some days felt like October! I'll close out the month with a few random photos that never made it into blog posts.

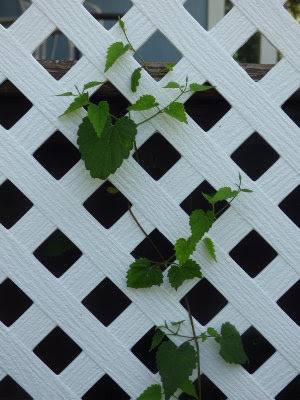
Young hops vine growing on a trellis.
Hops. This is my third try to grow it - success?!

1st watermelon

Hand threshing wheat with a box fan.
Winnowing wheat with a box fan.

A shot of my garden: sweet potatoes growing in a bed, pink 4 o'clocks next to that.
4 o'clocks and sweet potato vines

Several of my Kinder does.
My Kinder girls wanting me to take them for a walk.

Close-up of popcorn tassels.
Popcorn tasseling

Fresh salads are the order of the day.
Tomato, goat cheese, and sheep sorrel salad.

Savoy cabbage and clover mulched with wood chips.
Savoy cabbage that managed to survive the summer.

The Dutch door is a favorite place for our barn cats.
Sam in the barn door.

How about you? Are you ready for September?

Photo Wrap-Up for August © Aug. 2018 by

August 27, 2018

Carbon and Soil Building: Designing a Plan

So how are we going to apply the knowledge we've collected in "Carbon: What I Didn't Know?" How are we going to increase soil carbon and build our soils?

Soil building is a biological process which requires a symbiotic relationship between living plant roots and soil microorganisms. Some of these organisms break down organic matter, and others secrete a sticky substance called glomalin. Glomalin binds soil particles (sand, clay, and silt) with carbon-containing organic matter to make soil. In addition, carbon is what feeds these microorganisms, so by adding plenty of carbon to the soil, we build the soil.

The soil in the southeastern U.S. is extremely poor, so we have our work cut out for us. I've been researching various methods of building soil and have learned that how we're going to approach it will depend on how we want to use the land. To visualize that, I mapped it out.


We have three goals in regards to land usage: gardens (green in the map above), pasture (lavender), and areas for producing field crops such as wheat, hay and other winter feedstuffs. Those areas are blue. All of these are the areas for which we need to develop soil building strategies.

Gardens. I have a kitchen and canning garden ("the garden") for annual vegetables, a slowly expanding perennial herb garden, and a couple of permaculture hedgerows. These are our smallest areas and so easiest to work with. For the most part, we're already on the right track, because we compost,  mulch, and don't use synthetic fertilizers or weed or pest killers. The plan is to continue building my huglekultur swale beds and get back to more diverse companion planting.

Pastures. Another area in which we've done some things right is pasture. For these, I've had some success with my Modified Fukuoka Method. I broadcast seed on the bare ground and cover it soiled straw and wasted hay from the goat barn.

Mixture of pasture forage seeds growing through barn cleanings.

I've only been able to spot seed with this method, however, so progress is very slow. We need to address the entire pasture rather than small areas in it. Cattle people do this with intensive rotational grazing. Our situation presents a few challenges for their method, but this is the direction we're headed. The first step will be to further subdivide our pastures. I'll have more on that later.

Field crops. In farming lingo, these would be called "cash crops." But since we're using these crops ourselves instead of trading them for cash, I prefer to call them production crops. Production areas are similar to a garden in that the crop changes seasonally, but they are much larger than a garden and so need different methods for managing.

Sam walking through last summer's corn seedlings.

Large producers like Gabe Brown build soil on large acreage with cover crops and no-till planting. However, they have large equipment to do so. The smallest no-till seed drills for small tractors run about $7000 - $8000 on up, which is out of the question for us. However, we're not the only ones trying to figure this out. I've been reading and researching and have come up with some ideas to try. I'll blog more about that soon.

I feel like we've been trying to figure out a huge puzzle for the last several years, except that some of the pieces have been missing. Finally, those missing pieces seem to be falling into place. It will still require a lot of work and experimentation on our part, but at least I know we're headed in the right direction.

Next in this series, "Soil Building Experiment #1."

August 24, 2018

Carbon: What I Didn't Know

For as long as I can remember, gardeners have focused on nitrogen as the key element for a healthy garden. Followed by phosphorous and potassium (potash), most organic gardening books place a great deal of emphasis on nitrogen sources and compost to feed plants. One of the most important jobs our homestead critters have is to provide manure for compost. This has been my mindset ever since my very first garden.

I can't tell you how surprised I was, then, to watch a number of videos by rancher Gabe Brown. In video after video the emphasis wasn't on nitrogen to feed the plants, but on carbon to feed the soil. Or more specifically, to feed the soil microorganisms. His message was loud and clear: Feed the organisms and the rest will fall into place.

What ?????

The results were irrefutable. Gabe farms thousands of acres in arid North Dakota without any soil amendments. Yet he has rich moist soils, consistently lush growth, and excellent soil test results. His secret? Carbon.

How could I not have known this?

I had to go through my organic gardening books to look up carbon. While whole sections are devoted to nitrogen, about the only thing they say about carbon is a blurb about photosynthesis: plants take in carbon dioxide from the air and give off oxygen with sugar as a by-product.

carbon dioxide + water + light energy → oxygen + water + glucose

Glucose (C6H12O6), we're told, feeds the plant and accounts for the sweetness in the fruits and vegetables they produce. Excess glucose is stored in the roots, and that's where most explanations end. I'm not arguing that, but there's more. Plant roots don't just store it, but secrete it as liquid carbon to feed soil fungi, specifically mycorrhizal fungi.

Mychrrhizae are truly amazing. They form symbiotic relationships with plants and exchange that liquid carbon for other nutrients the plant needs. They do this by extending the root system of the plant so that these nutrients can be harvested from other areas and transported to the plant. More amazing, the fungi can network with one another to extend their resource harvesting in areas covering acres and miles.

Soil bacteria are the other key player. Most of us have heard of nitrogen-fixing bacteria (rhizobia) that form nodules on the roots of legumes to convert atmospheric nitrogen into a form that plants can use. Other bacteria (actinomycetes) are decomposers. They are soil builders, turning carbonaceous mulch into organic matter. Both kinds of bacteria feed on - carbon, either from the plant or from organic matter in or on the soil (i.e. mulch). 

Why had I never made the carbon connection?

But there's still more.

!!! Combined with water, soil carbon forms carbonic acid (H2CO3) which extracts rock minerals from the soil. This is the same principle as used in making bone broth. An acid such as vinegar is added to the stock pot to slowly dissolve the minerals from the bones. Carbonic acid is nature's way of mineralizing soil.

!!! Carbon stabilizes soil nitrogen. Nitrogen is volatile and if not utilized will escape into the atmosphere. Carbon is able to tie nitrogen to the soil, so to speak, keeping it stable until soil microbes need it. The magic ratio is 25 to 30 parts carbon to 1 part nitrogen. That should sound familiar to anyone who takes their composting seriously.

So how does Gabe Brown get all that carbon into his thousands of acres? Is it possible to mulch that much ground? Nope, he doesn't use mulch, he uses no-till cover cropping. Most of us are familiar with no-till in the context of raised bed vegetable gardening, but over acreage? That's a different challenge.

I'll stop with that while I'm contemplating that challenge for our homestead. But I do want to give you some links to the videos I mentioned:

Gabe Brown: Keys to Building a Healthy Soil
Sustainable Farming and Ranching in a Hotter, Drier Climate

Here's one by someone Gabe refers to frequently, agronomist Ray Archuleta.

Soil Health Principles

I also highly recommend Salad Bar Beef by Joel Salatin. It helped me put together several pieces of the carbon puzzle.

Next: "Carbon and Soil Building: Designing a Plan"

August 21, 2018

Carport Clean-Up, Dan's Workshop, and the Milking Room

It's been years since we kept a car in the carport. Instead it has been a storage area for tools, equipment, lawn mower, wheelbarrows, welding equipment, and everything else that needed a home. And as if that wasn't bad enough, there were several piles of building scraps and other paraphernalia that really gave the yard a cluttered, unkempt look.

Carport as it used to be

Funny how you know something is an eyesore, but as time passes you get used to it. We lamented that from time to time, but it wasn't until we got the goatie girls moved into their not-quite-finished new barn that we could do anything about it. Then it was time for a change.

It started with me moving the old milking room out of the former goat barn (aka "The Little Barn") and into the new. More space and a different room shape kept me busy for quite awhile, trying to figure the best place for everything and getting organized.


It hasn't worked out like I planned on paper, mostly because I hadn't planned on such a large drying rack for herbs (the shelves you see on the left in the photo above). I planned on a standard 18" x 36" shelving unit, until I found those shelves on craigslist for just $50.


They measure 24" x 48" so they take up quite a bit of room, but I'm not complaining!

While I worked on that, Dan tackled the carport. Everything got pulled out and either moved to the Little Barn or discarded. It's amazing how much junk can be accumulated over time; stuff that potentially might be useful someday and broken things that theoretically could be fixed.

His next step was setting up a proper workshop in the old milking room. His make-do space in the carport was finally at an end.

Dan's new workshop, still in the organizational phase.

And the carport?

Almost cleared out.

Well, the girders and ceiling joists are in pretty bad shape (photos here). They need repair, but it's still standing. I was pretty sure the only thing holding it up was the tarps we'd attached to serve as walls! The plan is to use it to store firewood on the pallets you see on the ground on the left.

All of these changes seem huge: the piles are gone, the junkiness is gone. It's a big visual change and a psychological one as well. All very welcome. 

August 17, 2018

Cheesemaking Challenges in a Hot Climate

A few of my does: Belle & Violet (front) Daisy & Jessie (back).
I love my Kinder goats!

Milk products are an important part of our diet, especially cheese and kefir. (Also ice cream!) Milk production is highest during summer, so that's when I work on making as much cheese as possible for the upcoming winter months. Because I don't have a cheese cave, I've had to learn what cheeses I can make in a hot, humid climate, and how to preserve them for winter eating.

What's a cheese cave? Commonly it's a small refrigerator set between 45 to 58°F (7 to 14.5°C) and 80 to 98% humidity. These are the conditions necessary to properly age cheese. People often keep a small fridge like a wine cooler for this purpose. I've thought about getting one, but I honestly don't have the room for it. Instead, I've experimented with cheeses I can make without controlled aging. Here are the ones that are working well so far. The names of the cheeses are hyperlinked to directions for making them.

Mozzarella

Grating homemade goats milk mozzarella.

Mozzarella is always first on my seasonal cheesemaking list. It's easy to make, requires no aging, freezes well, and is a must for Friday night pizza! I grate it, measure it, and freeze it in freezer bags. Each bag contains enough for one pizza. These individual bags are stored inside a large paper grocery bag in the freezer.

Paneer

A paneer cheese wrapped and ready for the freezer.
Paneer wrapped and ready for the freezer.

I first made this for fried cheese. Then we figured out it was great for snacking, for sandwiches, in eggs, and for added taste and texture in things like refried rice or spaghetti and meatballs. It is absolutely the easiest cheese in the world to make. Follow the link to learn how. The bonus is that it freezes well.

In the photo above you see my substitute for freezer paper. Freezer paper has really gone up in price, so I started wrapping things first in wax paper, then in a paper bag or packing paper. 

Feta

Last year I learned to make feta and experimented with ways to keep it. This is a brined cheese, native to the Mediterranean area where caves for aging and storing cheese aren't readily available. Instead, it is aged and stored in a salt brine solution. The aging requires no special temperature, which means it can be done in a refrigerator. Those things make it a good cheese for my climate.

Feta cheese curing in salt brine.
Feta curing for two weeks in brine.

I made several batches last year and tried two ways to store it: some in brine and some with herbs in olive oil. The feta stored in brine gradually got saltier as time passed. It can be rinsed off in cool water, but what I really liked was the feta stored in herbed olive oil.

Feta cheese stored in herbed olive oil.
Crock of feta, rosemary and oregano sprigs in olive oil.

The cheese kept a wonderful flavor and the oil's cheesy herb flavor makes it wonderful for sauteing vegetables, for cooking eggs, as a salad dressing, as the oil in pizza dough, or as a dipping oil with French bread. I'll make a couple of crocks-worth of feta in oil for winter eating.

Farmers (fresh) Cheese

Fresh farmers cheese.
Salting a Farmers Cheese

For a harder cheese I've been making farmers cheese. It's mild, tasty, and meltier than paneer. Farmers cheese is meant to be eaten fresh, so I make as needed. However, this same basic cheese can be waxed or bandaged and aged for a more flavorful hard cheese.

Aged Cheeses 

Since aging (curing) a hard cheese requires a specific temperature and humidity range, that means waiting for autumn when our daytime temps drop to facilitate curing cheese. Last fall I made one aged cheese, Farmhouse Sage. It was fantastic, so I'm hoping to make a variety of aged cheeses this year.

The problem is that winter is usually the time the does are dried up in anticipation of spring kidding. So my goal is to have at least one doe in milk at all times of year. You can read more about that in my "Year Around Milk" blog post. I'm planning to only breed two does this fall, and milk the other two throughout the winter. Plus, I have Ellie.

Ellie looking like she has a secret.
Hopefully Ellie has been bred for an October kidding.

She is my first attempt at an early summer breeding for a fall kidding. For that, we're on wait-and-see status, because I haven't had her pregnancy confirmed. But if I can vary when kids arrive, then that will help with that year around milk supply. Year around milk supply will not only add variety to my cheese making, but also let me keep a year around supply of kefir and chèvre. These are examples of dairy products that can't be stored and so need to be made fresh.

Part of seasonal living is learning how to adapt to one's seasonal challenges. It takes a bit of trial and error, but in the long run it's well worth it.
August 15, 2018

How To Preserve Eggs, Revised Edition

I'm pleased to announce that How To Preserve Eggs: freezing, pickling, dehydrating, larding, water glassing, & more from my The Little Series of Homestead How-Tos has been recently updated and revised. It's now available for free!

I hadn't planned to write a second edition, but while researching for Prepper's Livestock Handbook I found information that was perfect for this little eBook. As I read through the text once again I saw how it could be better organized. Before I knew it, I had a nice little second edition. You can download it from:

If you like it, please consider writing a review. Customer reviews are key to sales and ratings. Authors usually have to beg for reviews, and I guess I'm no exception. But if you like a book, any book, writing a review is a very small way to help the author out.

To those of you who do and have written reviews for me, a huge thank you! By doing so you are part of the 5 Acres & A Dream support team. My book sales enable us to do so much of what we do, and I'm grateful to everyone who is a part of that.

Oh! And if you've been wanting to buy a copy of 5 Acres & A Dream The Book, Amazon currently has it priced at $7.77. (Check it out here). That's the lowest price I've ever seen, but I don't know how long that price will last.

There are several other topics I've been researching, so I hope to have a few more updates to my homesteading series in the future.

August 12, 2018

Cheesecake Ice Cream

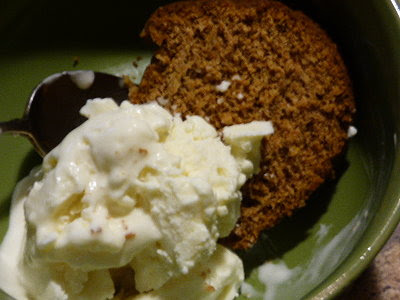
Cheesecake ice cream on carrot bundt cake.

Our days have turned hot again, so what better treat than ice cream! After my Heavenly Chèvre Cheesecake turned out so well, I got the idea for cheesecake ice cream. The cheesecake batter is so similar to the custard for making ice cream that it seemed a logical step!

Cheesecake Ice Cream

My ice cream freezer is a small Cuisinart. I love it because it makes it easy to make ice cream for just the two of us. The proportions in this recipe are for that and make about a quart and a half of ice cream. Adjust for a larger machine.
  • 2 cups chèvre* (how to make here)
  • 1 & 1/2 cups cream
  • 1/2 cup whole milk
  • 1/2 cup sugar
  • 3 egg yolks
  • pinch sea salt
  • 1 tsp vanilla or flavoring of your choice

In a sauce pan heat cream, milk, sugar, and salt until sugar melts. Beat egg yolks in a blender, continue blending and slowly add milk and cream mixture. Add the chèvre and flavoring. Blend well. Refrigerate overnight. Churn it up in the ice cream maker the following day.

This paired really well with carrot cake. I'm not keen on cream cheese frosting, so I bake carrot cake in a bundt pan and we enjoy it without frosting. The cheesecake ice cream, though, was better than frosting!

*If you don't have chèvre, ricotta or cream cheese would substitute nicely.

Cheesecake Ice Cream © August 2018 by

August 9, 2018

Dehydrating Cucumbers

Once upon a time I planned my food preservation according to how much of each food item I would need until the following harvest season. If I wanted to use a pint of pickles per week, then I would need 52 pint jars of canned pickles. It was a logical system, I thought, that should give me enough for year-round homestead eating.

Enter REALITY. The fact of the matter is that everything doesn't grow consistently every year. For a myriad of unfathomable reasons, some years are better than others when it comes to the harvest. So my philosophy changed. Now I just put by everything that's available and do some creative menu planning to suit.

This year's blue ribbon bounty winner is cucumbers. I had one volunteer plus planted a 16-foot row of them. Before the row I planted ever produced Cucumber One, we already had more cucumbers than I knew what to do with from that volunteer plant. We eat them at both lunch and dinner, I feed them to the chickens and goats, and I've been making pickles. Trouble is, we don't need a decade's worth of pickles and relishes. So I was casting about for something to do with the extras when I remembered a book I reviewed awhile back, Prepper's Dehydrator Handbook. One of the food items in it is cucumbers. So that's what I've been doing with our many extras.

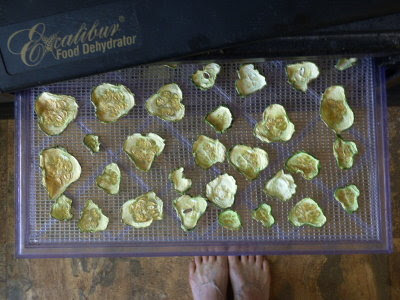
Slices of fresh cucumber on the food dehydrator tray.

Because of our high humidity this summer, it took a lot longer to completely dry the cucumbers than the book's suggested time of 4 to 6 hours. It took me more like 12 to 24.

Cucumber slices dried.

I also learned that I need to put these up as soon as they are cool. If I don't, our humidity makes them limp again in a very short time. After I put them in jars I vacuum seal them. (Details on how to do that in my "Dry-Pack Vacuum Canning" post.) The vacuum sealing keeps them fresh and keeps pantry moths out!

I kept some of the dried cucumbers in slices, some I powdered flaked. 

Half-gallon jar of dried cucumber slices and quart jar of dried cucumber flakes.

What will I do with them? I'm not sure! The Prepper's Dehydrator Handbook has recipes for dehydrated cucumber pickles and cucumber salad dressing, so I will be sure to try those.

How about you? Have you been preserving anything unusual lately? Something new for you?

Dehydrating Cucumbers © August 2018 by

August 5, 2018

Goat Barn: Moving-In Day for the Girls

No, the goat barn isn't finished yet, but it's close.

First of several windows to be installed.

We still have the rest of the windows and trims to do, but everything was ready for the girls to move in. With a forecast for several inches of rain on the horizon, indoor projects were in demand. What better thing to do than to get the goats out of the Little Barn so Dan could start turning it into a workshop and storage area.

I waited for a lull in the rain and then dragged Jessie (under protest, of course) over to the new barn. The rest followed reluctantly.

Ellie, Violet, and Anna. Curious but cautious.

Since it was raining out (and goats hate rain) no one was willing to run back "home." There was nothing else to do but explore their new quarters.


The hay feeder is working out very well. Being two-sided there is plenty of room for everybody to eat at the same time.


Filling it is working out well too.

Hay loft after our "Unexpected Hay Harvest."

I just drop the hay down the chute.

Hay chute works great!

To guard the hay loft we have Meowy.

Hay loft guard.

The gate to the hay loft is recycled from my original goat shed. It is the top half of the Dutch door Dan made eight year's ago to separate the goat stall from the milking room.

Hay loft anti-goat gate.

So far it's kept the goats from trying to climb the stairs (not that they still don't try.)

Belle and Baby.

Feeding time was a bit of a fiasco at first with a lot of balking, pushing, and shoving.

Every goat has her own spot.

The concrete pad the milking room is on is quite a bit higher than the ground, so there is a big step up from the barn floor into the milking room. Dan accommodated the girls by giving them a board for their front feet to stand on.


They don't mind and I really like that now they can't scratch their back sides on it and deposit poop in the feeders.

After a couple of days they got used to their new surroundings and were less skittish.


Violet (front), Belle, and Daisy (back).

While Dan has been working on organizing his new workshop I've been working on organizing my new milking room. I'm still trying out different arrangements in the milking room.


I love the how bright it is from the skylight, and I really like the concrete floor in this working area.

Three and a half inches of rain later the skies have cleared, and it's back to outdoor projects as usual. Hopefully the remaining items on the to-do list will be checked off soon. Then it's on to other projects.

August 3, 2018

Unexpected Hay Harvest

Dan standing at the back of a field that was supposed to be feed crops.

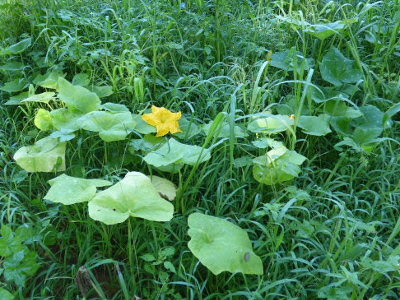
The paddock was thick with lush grass. The only thing was, that's not what I planted. What I planted was grain sorghum, cushaws, amaranth, black turtle beans, and a living mulch of ladino clover. But all we could see was grass; completely engulfing everything else, except some of the cushaws, which have managed to send out quite a few sprawling vines over the top. So much for weed control.

The cushaw squash rose wasn't daunted by the invasion of grass.

It looked really good though, and we wondered what it was. In looking through a website about native grasses, my best guess is Florida paspalum. I would have liked to turn the goats into it, except I didn't want them eating the few planted plants that actually made it. What else to do but cut it for hay.

Dan scything the grass.

Dan has both high-tech and low-tech tools for haying: a sickle mower and a scythe. This would be a good job for the sickle mower, but it's on the fritz (again) and at a point where replacement parts can't be found. That's the bad thing about buying older used equipment. Fortunately he still has the scythe.

European scythe with grass blade.

Actually, he has two scythes. The first he bought is an American scythe (shown in this blog post, "New hand Tools"). The one he prefers is pictured above, a European scythe (which I thought I had blogged about but apparently not because I can't find a post about it.) He prefers it for several reasons.

I don't know who manufacturers American scythes, but they are all the same size and have fixed hand grips. Unfortunately, that size is only appropriate for a very short person. Anyone taller has to stoop to use it. That's tiring! Comfortable scything is done with a straight back. The rhythmic swinging movement is in the hips. Because people are different sizes, there is no one-size-fits-all tool for the job. That means the American scythe is only going to be useful for a limited number of folks. 

European scythes are ordered according to one's height. The snath (wooden part) is straighter, lighter weight, and has hand grips that are adjustable. All of that makes it comfortable to use.

Unlike the American scythe, a variety of blades are available for European scythes. Dan has been slowly acquiring different blades and finds it's very helpful to have a choice depending on vegetation and terrain.

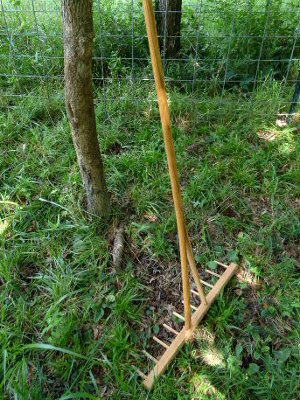
The other tool we've found extremely useful for haying is a hay rake.

A wooden hay rake is a huge plus for hay making.

Ours is wood but nylon hay rakes are also available. We used to use a garden rake, but the hard tines continually got caught in the underlying uncut vegetation. A proper hay rake makes the job of turning and raking up so much easier!

Dan tried to work around the cushaw vines and discovered one squash.

Green cushaw squash. It will turn pale orange as it ripens.

My black turtle beans were completely engulfed and didn't do well, but I managed to find a small harvest of dried bean pods. He left the grain sorghum too, which hasn't done well either. It looks pretty spindly and I suspect it's getting too much shade.

Lone sorghum plant looking poorly.

However, if I can at least get a seed crop out of it and the black turtle beans for next year, then I'll feel like I at least broke even. Ditto for the amaranth.

The funny thing is that Dan had recently suggested that we use this paddock for growing our hay next year. It appears nature got a jump start on that one.

The grass was thick and took several days of turning to dry it. It dried more brown than green, but had a very nice scent. Once dry, we raked it up and carted if off to the barn. That evening the goats all got a sample. Approved!

Native grasses tend to be regional. If you are interested in identifying some of your own native grasses, head on over to this article at On Pasture online magazine. It has links to good resources for identifying those native grasses by your region.

Unexpected Hay Harvest © August 2018 by