Showing posts with label haying. Show all posts

July 24, 2023

Dan's Power Scythe

Once upon a time we had a sickle mower.

our old sickle mower

It was a great alternative to the scythe, as it could cover more ground, more quickly. Not that we're always in a tearing hurry to get things done, but sometimes expediency is helpful. Unfortunately, this Troy Bilt was discontinued years ago, and replacement parts are impossible to find. Eventually, it stopped running and Dan couldn't fix it. So that was that. 

Since then, Dan's done all of the hay cutting, wheat harvesting, and tall pasture grass mowing with his scythe. But we've discussed options. Such as a new walk-behind sickle mower (selling for something like $6000), a sickle bar for the tractor (large and also expensive). or better yet, a sickle attachment for our old John Deere garden tractor. It will take attachments, except the small bars are now longer manufactured, and we have searched in vain for a used one. 

What about "inventing" something of our own? We discussed that for years. The best idea we could come up with was to somehow rig a hedge trimmer for sickle work. Here's Dan's first experiment.

Dan's power scythe, the prototype

He attached a hedge trimmer to the snath (handle) of his old American scythe (he prefers to use his European scythe) Here's it's first test run.

As you can see, it worked well. It even cuts through clump grass easily! (Something the scythe doesn't do well). Even so, it needed improvements. For one thing the wooden snath made it even heavier than it already is, and the controls couldn't be accessed except by bending over (not always convenient.)

Here's version 2. 

Lighter aluminum frame

Hand control for the throttle
 

Wiring for the throttle.

Here's version 2's test run.


That went well, so the next test was to put it to work, cutting a small patch of hay. It worked really well. He's able to catch the cut grass on the trimmer's blade guard and then lay it down in nice, neat rows. 

Can you see the rows? (Probably not enough contrast.)

As with most of our tools, we have both a power version and a manual version. We'll take advantage of the benefits of power tools while we can, but we have a backup in case we need it. 

April 24, 2023

Homestead Haying

Last week, the weather forecast promised perfect weather for haying. Good quality hay needs to be cut while the grasses are long, luscious, and green, but before it goes to seed. The exception is when we grow wheat or oats for hay. Then we let it form grain heads and cut it in the milk stage, before the seed can mature. This gives the benefit of both grain and hay from the same plant. 

After cutting, it needs enough time to dry thoroughly before being stored. Rain increases the risk of mold, so the forecast of a week of dry sunny weather meant this seasonal chore went to the top of the to-do list. Dan started Monday morning by scything it. 

Dan planted a deer forage mix last autumn. The forage
mixes are economical and grow things goats like too.

Even on sunny days, our challenge to drying hay is our heavy dew every morning. It often takes until noon before everything dries out. Dan turns it twice a day. In the morning he rakes it into windrows to let the ground dry off between the rows. Later, he turns the grass and spreads it out again until the next day. Happily, the weather cooperated by holding true to the forecast.

Monday through Friday were perfect: sunny, 70sF (low 20sC), and low humidity. Rain was in the forecast for early Saturday, so after Friday evening chores, we gathered in our hay crop.

First, it's raked again into windrows and then raked into piles for picking up.

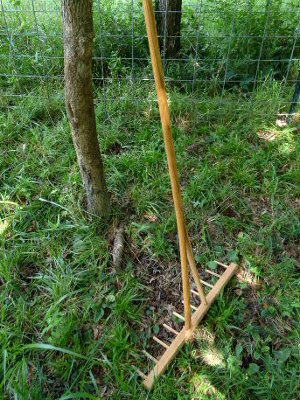
A wood hay rake really helps. Metal rake tines get caught on the stubble.

Dan raked and I packed it down into the box.

The box makes it easy to transport and . . .

easy to get into the hay loft.

We used to use tarps for this, but the box works much better.

Dan pushed and I pulled.

Tightly stuffed into the box, it took us three loads.

If I'm satisfied that it's thoroughly dry, I'll leave it in the bale-like shape the box makes. In this case, the thick oat stems weren't quite dry enough for my satisfaction, so I spread it out and will monitor it and turn it, to make sure it's dry enough and not producing heat.  


Feeding homegrown hay to our goats gives a wonderful sense of satisfaction. So far, we haven't been able to produce enough for a full year, but every little bit helps. We may get a second cutting, but we'll have to wait and see. Annuals like grains tend not to re-grow well after they're cut. 

For the goats, our homegrown hay is a favorite. It's the first thing they go for when it's in the hay feeder. Plus, every bit of waste, both as dropped hay and digested as manure, goes back to nurture the soil. (Details on how we do this are in How To One-Straw Revolutionize Your Pasture). It's one more step toward self-sustainability.

April 19, 2020

Spring Hay Harvest

About a month ago, I showed you photos of how our pastures are coming along since we began our soil building efforts (See "Pasture Soil Building Update.") Another area we've been working to improve soil is in our hay growing areas. The methods are different, but we've seen hopeful results there too.

Winter hay mix of wheat, oats, winter peas, vetch, and clover.

For these, we've been using green manure, plant diversity, and old hay to build the soil. Cooperative weather helps! It isn't fence-to-fence consistent in terms of growth, but this is the best hay crop I think we've had so far.

What I really wanted to show you, however, is Dan's idea for getting the cut and dried hay into the hay loft. We've come a long way from our very first attempts. Remember this?

Photo from "Hay Loft!" May 2018. I snapped
it and then ran up to help pull the load in.

Here's how he does it now.

This is the last load, so it's only partially full,
but the box hoists easily with a full load too.


The box was the one our chest fridge came in, and it's perfect for this job! I fill the box, he hauls it up, and dumps it.

Of our three patches of hay we have two harvested and one more to go.

We could use the box to make our own bales if we wanted to! Sometimes, however, the hay is still not completely cured. This is mostly because the thicker stalks of the peas and vetch are slower to dry than the blades of grass. If rain is threatening, we bring in the hay, I spread it out on the hayloft floor, lightly salt it with Himalayan Pink salt, and turn it twice a day until completely dry.

The challenges of homesteading are never-ending, and the solutions are rarely one-size-fits-all. We start with what's available and experiment. Eventually, we figure things out!

Spring Hay Harvest © April 2020 by Leigh

May 1, 2019

Soil Building Experiment #3: Hay Growing

Hay fields = hidey places for mice = good hunting.

Last year I started a series of blog posts on building better soil. Some of you may recall my map.

Photo from Carbon and Soil Building: Designing a Plan

I've blogged about building soil in our permanent pastures (in pink):

For hay and other field crops (in blue), we're doing something different. We're alternating green manure crops with harvest crops.

Fall planted green manure of oats, wheat, winter peas, and clover

In mid-April I broadcast a mixture of sorgham-sudan grass, crimson clover, and cowpeas. Then Dan mowed the winter's growth to cover the seed. The last thing we did was to cover this with a layer of old hay. This was an idea we picked up from a Greg Judy video (which now I can't find) as a way to quickly build soil.

I seeded, then Dan mowed. A cart of hay is at the ready for the next step.

The freshly cut grass and clover will provide nitrogen for plant growth, while the hay will provide carbon to feed soil microorganisms. These are key to building soil. (See Carbon: What I Didn't Know)

We had discussed buying hay for this purpose, but didn't actually do it until Dan went to buy hay for the goats.  The ad offered a choice of oat or millet hay advertised as covered. In our region that's important, because our intense southern sun leaches nutrients and rain spoils it. When Dan got there, he saw it had only been covered with plastic.

The bales looked like they'd been sitting wet for a long time.

We haven't found plastic to do a good job of keeping hay dry and this hay confirmed that. Dan told the seller our goats wouldn't eat it. So the fellow offered him two free bales. Thinking of feeding our pastures, Dan took him up on it. We wouldn't give it to the goats, but at $20 per round bale we could certainly use it for building our soil.

On the bale bottoms the hay had decomposed to rich black soil.

When I removed the netting and started peeling off the layers, I found that it probably would have been good hay had it been stored properly. Most of it was leafy and looked to have been cut while it was still alive.


However, it was full of seeds, which indicated that it was cut past its prime. The most nutritious hay must be harvested before the grass goes to seed, assuming cutting and drying conditions are ideal, i.e. about a week of dry sunny weather. Unfortunately that isn't always the case.

We covered the mown grasses with old hay, focusing on areas of bare soil. 

The seed looked to be browntop millet, an annual grass commonly grown for hay. If it's is viable, we got both mulch plus more hay seed!

Here it is two weeks later.

We did the same by our fruit trees

See Soil Building Experiment #1

and also where we grew our winter wheat.

See Saving the Wheat

Now we wait and hope for good hay cutting and curing weather when the time comes.

April 23, 2019

Saving the Wheat

I didn't know whether to call this blog post "Saving the Wheat" or "More Adventures in Haylofting." Why? Because of what happened to our beautiful stand of winter wheat.

One of our two small stands of winter wheat.

A mix of winter wheat, crimson clover, and vetch.

It was doing wonderfully until we got a series of heavy rains which flattened it. Last year some of our wheat lodged and while the kernels still dried, they also mildewed. With more thunderstorms on the way we decided to cut it. The kernels were still immature; in the milk stage with soft berries that squeeze out milk-like moisture. Because of that we decided to use it for hay.

Vetch is hard to cut with the scythe, so Dan used the sickle mower instead. We let it dry for two days and then with rain due again we raked it up. It amounted to two trailer loads, which were stored in the carport until the next round of rain was over. Then we had to figure out how to get it into the hayloft. We've somewhat "perfected" (I use that term loosely!) getting large round bales up there, but loose hay is another matter. This is what Dan came up with.

Extension ladder, plywood, and rope.

The tarp is one Dan used as a flat-bed driver.
It's much heavier than retail consumer tarps
and has d-rings as well as grommets.

Tarp tied to the plywood & sides bungeed together.

It was fairly easy to pull up then.

Because it wasn't fully cured, the concern was mold and the possibility of combustion from high heat decomposition within the piles of hay. In Salad Bar Beef, Joel Salatin mentions salting hay, so that's what I did.

I sprinkled a handful over each layer.

Spread out in the hayloft to finish drying.

So far this is working very well. I'm still turning it twice a day and am amazed at how quickly it's drying out. While it's a disappointment to lose the wheat for our consumption, this is really my favorite way to feed grain to goats. It's truly whole (plant) wheat. If SHTF and I can't buy wheat for flour this winter, we'll eat cornbread!

Meowy's favorite use for hay.

Weather is just one of those things we can't control! But a loss somewhere can be a gain somewhere else. All in all - no complaints.

August 3, 2018

Unexpected Hay Harvest

Dan standing at the back of a field that was supposed to be feed crops.

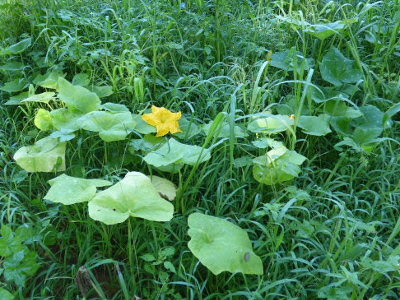
The paddock was thick with lush grass. The only thing was, that's not what I planted. What I planted was grain sorghum, cushaws, amaranth, black turtle beans, and a living mulch of ladino clover. But all we could see was grass; completely engulfing everything else, except some of the cushaws, which have managed to send out quite a few sprawling vines over the top. So much for weed control.

The cushaw squash rose wasn't daunted by the invasion of grass.

It looked really good though, and we wondered what it was. In looking through a website about native grasses, my best guess is Florida paspalum. I would have liked to turn the goats into it, except I didn't want them eating the few planted plants that actually made it. What else to do but cut it for hay.

Dan scything the grass.

Dan has both high-tech and low-tech tools for haying: a sickle mower and a scythe. This would be a good job for the sickle mower, but it's on the fritz (again) and at a point where replacement parts can't be found. That's the bad thing about buying older used equipment. Fortunately he still has the scythe.

European scythe with grass blade.

Actually, he has two scythes. The first he bought is an American scythe (shown in this blog post, "New hand Tools"). The one he prefers is pictured above, a European scythe (which I thought I had blogged about but apparently not because I can't find a post about it.) He prefers it for several reasons.

I don't know who manufacturers American scythes, but they are all the same size and have fixed hand grips. Unfortunately, that size is only appropriate for a very short person. Anyone taller has to stoop to use it. That's tiring! Comfortable scything is done with a straight back. The rhythmic swinging movement is in the hips. Because people are different sizes, there is no one-size-fits-all tool for the job. That means the American scythe is only going to be useful for a limited number of folks. 

European scythes are ordered according to one's height. The snath (wooden part) is straighter, lighter weight, and has hand grips that are adjustable. All of that makes it comfortable to use.

Unlike the American scythe, a variety of blades are available for European scythes. Dan has been slowly acquiring different blades and finds it's very helpful to have a choice depending on vegetation and terrain.

The other tool we've found extremely useful for haying is a hay rake.

A wooden hay rake is a huge plus for hay making.

Ours is wood but nylon hay rakes are also available. We used to use a garden rake, but the hard tines continually got caught in the underlying uncut vegetation. A proper hay rake makes the job of turning and raking up so much easier!

Dan tried to work around the cushaw vines and discovered one squash.

Green cushaw squash. It will turn pale orange as it ripens.

My black turtle beans were completely engulfed and didn't do well, but I managed to find a small harvest of dried bean pods. He left the grain sorghum too, which hasn't done well either. It looks pretty spindly and I suspect it's getting too much shade.

Lone sorghum plant looking poorly.

However, if I can at least get a seed crop out of it and the black turtle beans for next year, then I'll feel like I at least broke even. Ditto for the amaranth.

The funny thing is that Dan had recently suggested that we use this paddock for growing our hay next year. It appears nature got a jump start on that one.

The grass was thick and took several days of turning to dry it. It dried more brown than green, but had a very nice scent. Once dry, we raked it up and carted if off to the barn. That evening the goats all got a sample. Approved!

Native grasses tend to be regional. If you are interested in identifying some of your own native grasses, head on over to this article at On Pasture online magazine. It has links to good resources for identifying those native grasses by your region.

Unexpected Hay Harvest © August 2018 by