Showing posts with label solar energy. Show all posts

August 6, 2025

A New Adjustable Frame for the Solar Panels

This has been a year of maintenance and repair projects. Some of it has been pretty routine, like repairing fencing and repainting the barn. Other things have been more challenging, such as building a new frame for our solar panel array. 

Here's the original set-up.

Photo from 2019, when the system was first up and running.

The original panel frame was hinged at the top so we could
adjust the angle of the array depending on the time of year.
Close-up of hinges

You can see more photos of our original setup in this post, Adjusting Our Solar Panels. Being able to adjust them to the angle of the sun has really helped us get the most out of them. 

But. The posts were home-milled and not treated, so eventually they rotted out. No surprise there. In replacing them, Dan decided to try something a little different. One thing he wanted to address was how heavy the frame + array was. So after installing sturdier posts, he made a lighter weight frame. 


Instead of hinges, the frame swivels on a metal pipe.


He also used a different configuration for the panels.

Front

This puts more weight above the pivot point, so that it isn't so bottom heavy. This helps make the frame angle easier to adjust. 

Back

To hold the frame in place, Dan used slotted strut
channels and a steel dowel pounded into the frame.

Here it is adjusted for July. 


And of course, somebody had to claim it . . .

Katy

June 22, 2025

Solar Ventilation For the Little Chickens' Coop

 One last touch for the little chicken's coop was a small fan for ventilation. It's in a mostly shaded spot, except for a little sun in the morning. But Dan was concerned about helping keep the air fresh in the coop, so he added a ventilation fan. 

The fan he used came from an old 12-volt travel cooler. He used these coolers when he was on over-the-road truck driver. While they aren't true refrigerators, they keep the cooler contents cool by forcing air over a small fan with aluminum fins. It won't  actually cool the coop, but it will help keep a modest air flow going and that's the point. He just used what we had!


The fan is powered by a 20-watt solar panel, attached to one of the barn window covers.


It gets good sun in the afternoon, which is the hottest part of the day. Dan mentioned hooking the fan to a battery to run it at night, so that's a future possibility. 


No complaints from the chickens, at any rate. 

October 2, 2024

Prepper Check (Courtesy of Hurricane Helene)

Scenario:

We live about 400 miles inland from where Hurricane Helene made landfall. Earlier in the week we received almost 10 inches of rain, so when the remnants of the hurricane blew in before sunrise last Friday, trees came crashing down and we lost both power and internet.  

Intense wind and rain continued that day, but by mid-morning, folks were already out in their cars. My guess is that with no electricity, they went to get something to eat. But the power outage was so widespread that all the restaurants, stores, and gas stations were closed. 

By afternoon, the wind and rain had died down somewhat and Dan ventured out. Some roads were blocked by trees and downed power lines. He had to travel a distance to find anything open. Lines to the gas stations were blocks long. He talked to some folks who had traveled down from a neighboring state, trying to find gas and food. 

On Saturday, the wind and rain had died down, so I went out because I'd missed my regular Friday shopping trip. We really didn't need anything, so it was mostly curiosity. I saw numerous trees caught up in power lines and one power pole that had snapped in half and dumped a transformer on the ground. Not a utility truck was in sight. Stores with electricity were now open, but traffic was blocked by long lines at the gas stations; many people were hauling gas cans or generators to fill. 

I passed Walmart and noted that the parking lot was packed. I doubt there was a parking place to be found. But I was headed to Aldi where there was plenty of parking, and with the exception of bread and bakery products, the store was well stocked. Typically, after a power-out event, store shelves are stripped bare of anything that doesn't have to be cooked: bread, rolls, buns, bakery goods, lunch meats, cheeses, plus fruits and vegetables that can be eaten in hand, anything and everything that doesn't require heating or cooking. 

Besides numerous trees down in the woods, our only property damage was a fence.

Sadly, it was our only wild persimmon tree. The fruits were always
too astringent for us, but the goats and wildlife ate the ripe ones.

Three days without electricity was a real good reality check of our level of preparedness. I've never claimed to be a Prepper, but I've always pointed out the practicality of being prepared. We don't have a generator, but we did have some items that really helped. In this blog post, I'd like to share some things we're glad we had, small things that even apartment dwellers or house renters can have to ease the discomfort of emergencies. 

Things I'm glad we had

emergency candles

These are short, 5-hour dripless candles that I got at Dollar Tree. Regular candles will work too, but they burn faster and usually drip, so I prefer these. Also needed is a candle holder and a way to light them. Lots of people like to use lighters, but I prefer wooden matches because there is no plastic to throw away and no worry about whether the lighter fluid has evaporated. If you don't live near a Dollar Tree, they are fairly economical at Amazon too. 

Of course one needs safety smarts to use candles, but I was able to place one in rooms we visit frequently at night so we weren't stumbling around in the dark. To amplify the light, place the candlestick in front of a mirror. 

solar light bulbs

I was so happy to have these. They come with their own little solar panel, so they can be recharged in a sunny window. I kept one in the bathroom and one above the kitchen sink, which we moved to our little kitchen dining table when we ate breakfast. The hook on top makes them easy to place. They are estimated to burn 4 to 6 hours on a full charge, although we rarely kept them on for more than 30 to 60  minutes. 

I recommend getting ones without remote controls. Remotes seem more convenient, but they require watch batteries to operate, which is another thing to keep on hand. And I don't think watch batteries are rechargeable. The bulbs are easy to turn on and off with a button on the top, and offer much brighter light than a candle. 

You can find them at Amazon. I think they are an excellent option for small children in the house or wherever there are candle safety concerns. 

Most people have flashlights, which require a supply of batteries. We used to have a nice little solar flashlight (like this one at Amazon), but the problem was the on and off switch. Flashlight switches used to be hard plastic, but they've all gone to a soft cover over a teeny-tiny switch and it was this teeny-tiny switch that failed and made the flashlight useless. We've been much happier with our solar rechargeable headlamps. 

rechargeable solar head lamps

I couldn't find the original brand I bought on Amazon, but this link is to something similar. Head lamps leave both hands free and give a good strong light. They are rechargeable via a USB cord, but they last quite awhile. We use them regularly. 

Cooking and heating water can be more challenging, especially for apartment dwellers. I know some folks BBQ on their balcony, so that might be an option. Plenty of fuel is a good prepper item for that. Campfire cooking is good, but requires a campfire, no rain, dry firewood, and cast iron cookware. Table top camping stoves are another option, with Coleman being the standard (look-see at Amazon here). It's a double burner, but requires Coleman propane cylinders to operate. Less expensive ones are at Amazon too, just search camp stoves.

If we'd had sun, I would have used my solar oven.

Sun Oven solar cooker

But it was rainy and cloudy, so Dan cooked some of our meals on his big BBQ. For water heating and one pan cooking, we used this . . .

rocket stove type cooker

The company I bought ours from no longer seems to be around, but a similar model can be seen at Amazon. That link will take you to the wood stick model, but you can see a dual-fuel wood or charcoal model there as well.

Girl Scout tip: rub the bottom of the kettle, pot, or pan with dishwashing liquid before cooking. Makes washing off the soot a lot easier. 

The nice thing about one of these is that they only require sticks, and not very many at that. The caveat is that sticks and kindling need to be dry! (That's a prepper note to self; thankfully we had plenty in the house). It can become tedious to keep feeding them to cook say, something like rice, but for that, it can be paired with a haybox cooker. 

You can see more photos and how Dan made it in this post.

Mine is in a cooler with scraps of wall insulation to help keep in heat. Hay or straw was used traditionally, but people use old quilts or comforters to good effect. It continues the cooking the food and frees up the rocket cooker for another dish or the water kettle.

Morning coffee? That wake-up cup was one indulgence we didn't have to give up without electricity. We have a stovetop percolator, but found it quicker to make it the night before using the kettle, French press, and Thermos. 

2-mug French press and 40-ounce Thermos vacuum bottle

The French press link is actually the one on my wish list, a 34 ounce size. Mine is 21 ounces, but it would be nice to get seconds for us in one press. You can find one-mug sizes as well.

The secret to keeping coffee hot overnight in the Thermos is to preheat it with hot water before pouring your hot beverage of choice into it. These simple accessories solved the waiting-on-the-water-to-boil-for-coffee-first-thing-in-the-morning dilemma. 

Next up is battery charging. Rechargeable batteries are typically plugged into a wall socket to recharge off the grid. But what are the options when the power goes out? 

Our set-up is a little more complicated than many may want, but it has some distinct advantages.

It was originally set up for a back porch kitchen vent fan.
The problem was the fan was too much for the battery, so it
got moved to the greenhouse. We use the battery for recharging.

Our setup consists of

The charger has two USB ports to charge batteries or anything with a USB hookup, like a cell phone. The advantage of having a 21-volt battery is that we can still recharge things without sun. I use it for the solar light bulbs and headlamps above, plus I have a multiple battery charger for our rechargeable AA and AAAs. 

PowerOwl 8-bay battery charger

And I run a USB solar light bulb from it for over the stove. This set-up is very handy.

Other options are solar phone chargers and a standalone solar AA and AAA battery charger. Those links will show you some options. The caveat is that without sun, no electricity is made. 

One last option for a home emergency kit is a solar and handcrank radio, flashlight, and phone recharger with USB ports. The one I'm linking to has a pre-programmed NOAA weather alert channel. The handcrank feature is really nice to power it up with no sun. More information at this Amazon link. I've added it to my own wish list.

But by relying on simple, inexpensive things, we were able to maintain a comfortable three days with little impact to our lifestyle.  Maybe some of them will be useful to you too.

Our internet just came back up yesterday evening, but it's still spotty as they continue to get the rest of the region back online. So I'll hit "publish" now while I've got the chance. 

December 11, 2023

Greenhouse Ventilation

In case you missed it, here's the last greenhouse photo I shared.

Photo from Garden Notes: November 2023

At the top of the greenhouse roofline, a vent covers a solar attic ventilation fan.


We finally assembled all the pieces needed to hook it up to solar, and now have functional ventilation in the greenhouse.


It's powered by a 12-volt 100-watt solar panel on the roof above the greenhouse. No battery, so it runs when there's sun and doesn't when there isn't. Fan speed is regulated by the amount of sun hitting the panel. This is okay, because I need ventilation when the sun is bright and heating up the greenhouse more than I want! This is ultimately why my hoophouse failed for winter growing. It's not uncommon to get 60°F (16°C) days or warmer during winter here, which meant the hoophouse got too hot for cool weather plants. I had no means of ventilation other than opening the end flaps. This wan't effective, and everything bolted! I'm hoping the vent fan will help with that.

If it's cold out and we don't want to lose warmth, there's a switch to turn it off.

The solar panel is wired to the switch,
and the switch is wired to the fan.

The fan will be on during warm winter days and probably run all summer. Not because I plan on using the greenhouse for plants then, but to help vent hot air stacked up right next to the house and warming up my studio/sewing room!

The jalousie window on the backside of the greenhouse provides cooler outside air for the draft.


There's more shade and hence cooler air on this side of the greenhouse, so it makes sense to draw from this side and vent out on the hotter sunny side.

The big question was, will it work?!? The next day we had a chance to test it out. After lunch, the outside thermometer read 52°F (11°C). The greenhouse thermometer read 80°F (27°C). I turned on the fan and opened the jalousie window. Two hours later the outside temp was up to 55°F (13°C), but the greenhouse temp had dropped to 75°F (24°C). That's promising! The following day was another warm one in the greenhouse. When the temp got up to 80°F (27°C), I turned on the fan but left the door open instead of the window, to experiment. Two hours later it was down to 70°F (21°C). My conclusion is that the 80-watt fan has a good air draw.

Of our overnight lows, the coldest night we've had so far was 22°F (-5.5°C). The greenhouse got down to 32°F (0°C), with no frost or freeze damage to the cherry tomato (my only warm weather plant).

Summer cooling may be another story, but that remains to be seen. I'm not planning on growing anything in the greenhouse in summer anyway, but it would be nice to keep it as cool as possible to keep the heat from transferring to the house.

I'm calling this first year our test year. I'll keep track of temps and we'll experiment. Our coldest weather is yet to come, but we have a few ideas to try.  Hopefully, we'll learn some things about how to regulate greenhouse temperatures (both cold and hot).

May 20, 2022

Upgrading Our Solar Set-Up

One of the things I've regretted about our solar set-up is not spending more on batteries. It made sense at the time, because we were looking to stretch our limited budget as far as we could. However, our battery bank isn't large enough to power the freezer and fridge for more than a day and a half without sun. Fortunately, we usually have the grid to plug back into, but the primary reason for this small system is to preserve food in our hot climate if the power is out for an extended period of time. 
 
In the back of my mind, I've thought that if we were ever able to utilize our remaining two solar panels, we could use the original battery bank for those and invest in a larger one for the fridge/freezer set-up. Now that we finally have those panels up, that's what we decided to do.
 
Ordering batteries off the internet is the most expensive option, so we went back to the same folks who sold us our first set of batteries. Originally, we got 6-volt golf cart batteries. With the help of the sales guy, we were able get industrial 6-volt floor scrubber/sweeper batteries.
 

 Our six golf cart batteries are 235 amp hours each, with a total of 705 amp hours for the battery bank. These floor scrubber batteries are 330 amp hours each, so we can increase our electricity storage quite a bit. Of course, more amp hours meant they are more expensive, and it took some discussion to decide on how many. Pairs are required for solar wiring, and six would give us approximately 990 amp hours. But eight would give us 1320 amp hours!

 For technophiles, here's how that works:

Wiring components in series increases voltage.
Wiring components in parallel increases amperage.
 
Our system is small, so 12 volts is perfect. To create a 12-volt system from 6-volt batteries, we connect pairs of batteries in series (connecting negative terminals to positive). That increases voltage.

6 volts + 6 volts = 12 volts 

To increase amperage, we connect the pairs in parallel (connecting all the negative terminals together, and all the positive terminals together). That increases amperage.
 
330 amp hours x 4 pairs = 1320 amp hours
 
The result is a 12-volt, 1320 AH battery bank.
 
For a visual example of how the wiring is done, here is our original battery bank. The blue is series wiring (neg to pos). The green is parallel wiring (neg to neg and pos to pos).
 
Diagram from Solar Pantry Project: Batteries

Anyway, even though the money had been earmarked for this purpose, it's still difficult to make expensive purchases because we do it so rarely. Finally, Dan asked what would give me the most peace of mind, so we got eight!

Batteries do have a lifespan, which was something to consider when making this switch. We've taken good care of our first battery bank by regularly checking the specific gravity and water level of each cell, plus not discharging too deeply. So we should still get quite a few years out of the old bank.

Now that we have the batteries, the next step is to build a box to house them. Dan's working on that.

May 8, 2022

Expanding Our Solar

A couple of years ago we got our freezer and secondary fridge on solar. At the time, we only used three of the five solar panels we bought off Craigslist. That's left two panels that we've wanted to put to use. One of our miscellaneous spring projects was to make a start on getting those up and running. While the project isn't completed, we've made progress!

Solar panels on the roof and concrete
pad for the battery bank on the ground.

For the battery bank, what we've decided to do is to use the bank we originally set up for the freezer and fridge. At 705 amp-hours, it just isn't enough when we have a dark, cloudy spell. But it will be perfect for this system, where we plan to use it to power radios and computers, and for emergency auxiliary lighting if the power goes out. For the freezer and fridge, we will install a new, larger amp-hour batter bank.

For now, the project is on hold because "food first." We hope to make more progress as soon as planting season is over. 

January 17, 2022

Definitely Winter

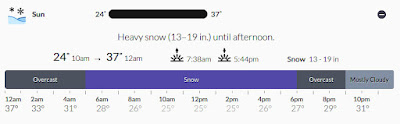
December was mild, but almost on cue, January turned down the temps and turned up the rain. Winter had arrived. In the middle of last week, our customized local ten-day forecast included this little "wow, really?" for Sunday—13 to 19 inches of snow!

I think it will enlarge if you click on it.

Now, I realize that this might be unremarkable for some of you, but here in the Southeastern US, it's almost unheard of. Our annual snow event is typically 2 to 4 inches and usually melts within a day or two. In the 13 winters we've lived here, our homestead snow record stands at 7.5 inches in January 2011, before turning to rain. This snow to rain pattern is typical for us, so our real winter weather hazard is freezing rain and ice as temperatures drop at night. Ice can coat power lines and tree branches, which then crash down on roads and power lines, and knock out electricity.

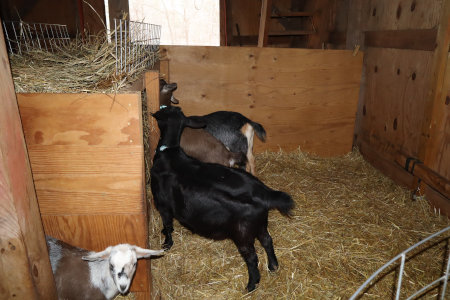
Of this forecast, we took note, but didn't get too excited because we've had predictions of a foot or more snow before, and haven't found the computer generated prediction models to be terribly accurate. Even so, we made sure we had everything ready for frigid temps, lots of precipitation, and possibly a power outage. I filled a wheelbarrow with kindling while Dan filled the wood boxes. I did a quick pantry check and decided to do my shopping early. Folks were mostly buying up foods they could prepare without electricity: fresh and canned fruit, breads, crackers, snacks, canned and lunch meats. We topped off the straw bedding for the critters and put up the plywood draft blocker.

Most of the year the hay feeder is open on all four sides. In winter, the plywood
blocks drafts from the door and provides a cozy sleeping spot for the girls.

Even though we close the barn doors at night, they aren't airtight and let in cold drafts when the wind blows from the north. Blocking those keeps the barn warmer.

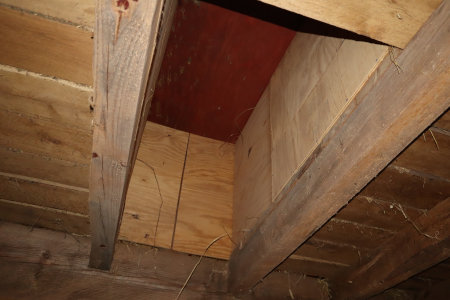
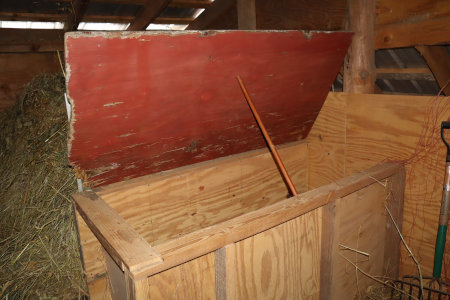
We also decided to cover the hay chute.

View from by the hayfeeder.

We discovered that it acts like a chimney and creates a cold draft!

Seasonal hay chute cover in the hay loft. I prop it open to drop down hay.

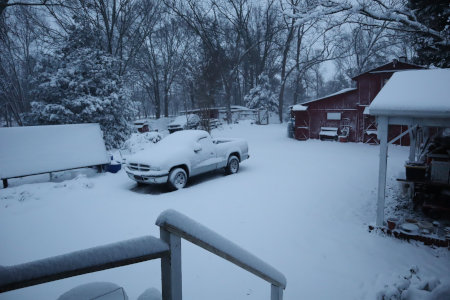
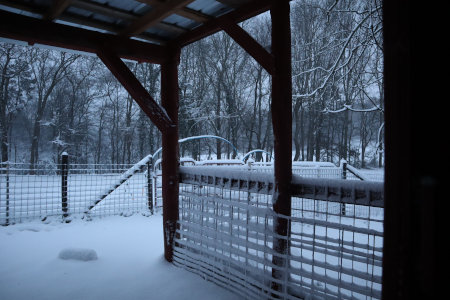
The next morning we awoke to 5.5 inches of snow, which was still falling. 

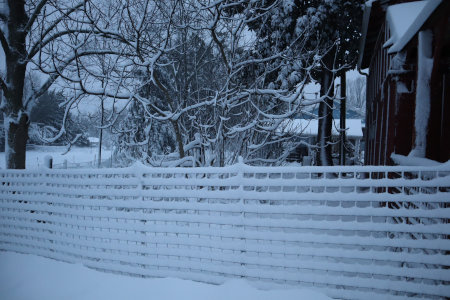
Early morning view from the back door.

I don't know how much rain we got before turning to snow, nor the actual snowfall, since the ground was warm and initially melted it, like it does. 

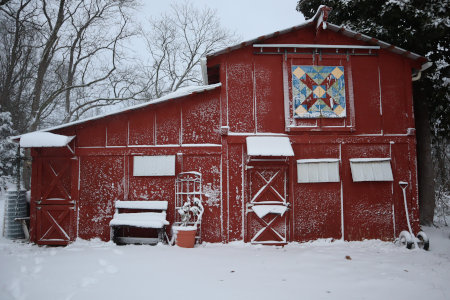
The protected side of the barn, facing south.

The outdoor temp was 28⁰F (-2⁰C), while it was 34⁰F (1⁰C) in the barn. A sharp frigid wind was blowing out of the northeast. 

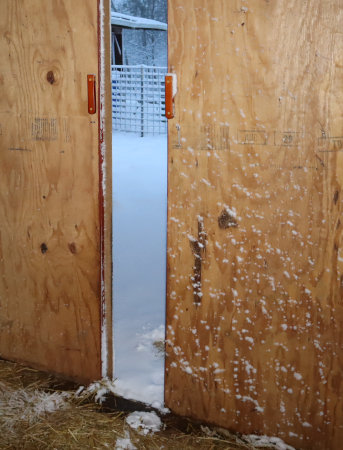
A first, snow on the inside of the barn,
even though the barn doors were closed!


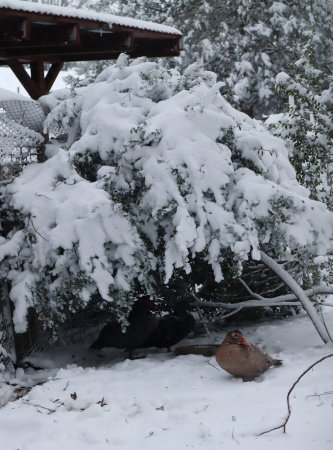
The chickens refused to come out and the ducks refused
to go in. You just can't make up a critter's mind for them.

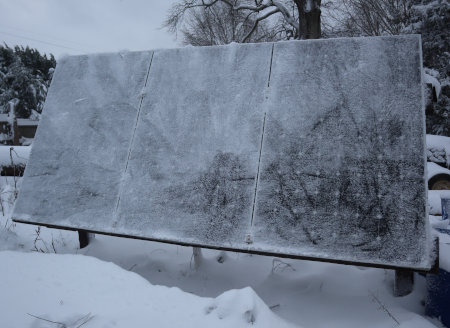
After barn chores, I swept off the solar panels.

Not just snow, the solar panels were coated with ice.

Our panels make electricity as long as conditions are bright, but I'm not sure about the ice. I'll have to watch the charge controller read-out to see. By afternoon the precipitation changed from freezing rain to fluffy falling flakes.

How much snow did we actually get? By the time it stopped snowing, our measurable amount was 7.25 inches. That doesn't beat our homestead record, but that's okay too. The sky brightened enough for the panels to top the batteries off, and two chickens finally made it outside to check it out. The goats just looked at it.

The forecast for the next several days is nighttime temps falling down into the teens, with maybe more snow next weekend. Winter is definitely here.

October 15, 2020

An Experiment With Solar Dehydrating

Something I researched early on was solar dehydrators. I have my Excalibur, which I love, but being able to dry foods with just the sun always interested me. What I learned from my early research was that solar dehydrators have limited usefulness in areas of high humidity.

Most of our weather comes up off the Gulf of Mexico, which means most of our weather includes a high level of humidity. That's not always the case, but humid days outnumber dry ones and changes in our humidity are unpredictable. The other problem is that our sunny summer days often turn cloudy by mid-afternoon. More than once I've had to take a solar started dinner and finish it on the stove. Between those two factors, I've not been inclined to invest the time and money to either make or buy a solar dehydrator.

My solar oven is a Sun Oven. The other day, I recalled the solar cooking webinar I hosted several years ago for that brand's manufacturer. (Does anyone remember that? It's still available online, here.) I remembered that one of the things discussed was how to use the oven as a solar food dehydrator. The technique is different from using it for cooking, so I knew there would be a learning curve. Before the remnants of hurricane Delta blew through, we had a week of day-long sunshine; perfect weather to give this a try.

I chose something inexpensive for my experiment, onions. My first go-round was not successful; I cooked the onions rather than dehydrate them. But we still ate them and I learned from that experience. My second try turned out much better.

I started with two pounds of whole onions.

Three things turn the Sun Oven into a solar dehydrator. The first is the optional baking/dehydrating rack. Parchment paper keeps the food from falling through the wire.


The second is to set the oven lid on top of the lid latches. To use as a cooker, the latches hold the oven door firmly in place, allowing it to do its moist heat magic. Leaving the lid ajar allows moisture to escape.


The third difference, is to offset the direction the oven is facing, so that it is not pointed directly at the sun. The holes in the door handle enable tracking of the sun to maintain baking temperatures.


By offsetting the direction of the oven to the east, the temperature can be kept at a lower dehydrating temperature. The recommended adjustment is about six inches, and I soon figured out how to adjust it to keep the oven temp in the dehydration range.

Sun Oven in dehydrator mode. 

With my electric dehydrator, I can just set it and forget it. Using the Sun Oven required frequent checking and adjusting. I learned to rotate the trays and remove onions as they became dry enough.


It took three full days to dry the first batch of onions. Final yield for two pounds of fresh onions was about ¾  of a quart jar dry.

My solar dried onions.

The main disadvantage is that the Sun Oven doesn't hold much. I had five trays-worth of sliced onions, but only have four trays. But I combined trays as the onions shriveled, and added a new tray of fresh as room allowed. I'm not on a time schedule, so it really doesn't matter unless humid or cloudy days push in!

So! After this success, I found a DIY solar dehydrator that is claimed to work even in humid weather. It's at this website. It would still be a huge project to acquire materials and build, but I'm no longer assuming that solar dehydrating isn't feasible for me. Maybe someday?