September 30, 2018

Photo Wrap-Up for September

It's the last day of September! Here's a look back to wrap it up. 

Sam

Blue mistflower

Cushaws

Cushaw pie (tastes like pumpkin)

Fancy bindweed aka morning glory
on Jerusalem artichokes.

Fancy bindweed on corn.

Dehydrated okra

September salad: fresh daikon greens, baby daikon
radishes, tomato, hard boiled egg, and feta cheese.


Cantaloupe

Window progress on the barn

First hint of fall color

Firewood

Photo Wrap-Up for September © Sept. 2018 by

September 26, 2018

What I'm Learning About Fall Gardening

Volunteers grew up through the mulch in my newest Hugelkultur swale bed.
 The Hugelkultur swale we dug in July was intended for fall planting, but it
couldn't wait & filled itself with volunteer radishes, corn, & a cushaw vine

Every August I start thinking about the fall garden. My planting chart from the cooperative extension office says I can start fall planting in August, but I have to admit that August just doesn't feel right, because it's too hot. On the other hand, I've learned that waiting too long isn't good, because I never know what kind of winter we're going to get. Some years our first frost is mid-October, other years it's closer to December 1st. Some years our winter temps are mild enough to grow winter greens for us and winter pasture for the goats. Other years everything freezes out. So I'm always in a quandary over when to plant.

Recently I read an article at the Sow True Seed website, "Fall Gardening Know How: Root Crops." It shed some light on my gardening dilemma, explaining things I've observed but couldn't figure out why. I've been contemplating this as I clear out space to plant a winter garden.

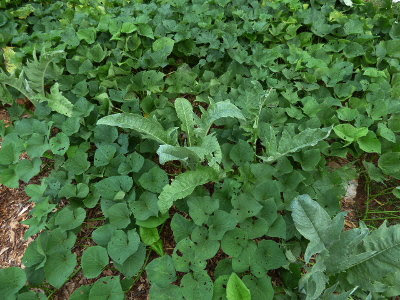
Sprawling sweet potato vines have overtaken the cardoon plants.
Sprawling sweet potato vines and cardoons.

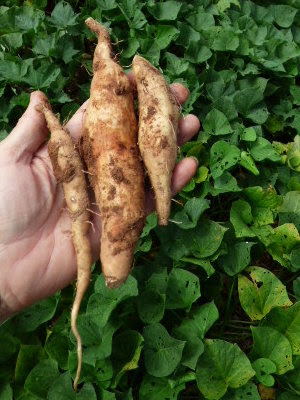
1st sampling of sweet potatoes found growing under the sprawling vines.
I cleared out the outermost vines to plant peas
and discovered a few sweet potatoes for sampling.

Sprawling sweet potato vines also hid sweet basil I thought didn't make it.
Sweet basil hidden under the sweet potato vines I cut back.

According to the article, cool weather crops need warm soil to germinate and begin to grow, but prefer cooler temps as they mature. So if the soil temperature remains above 70°F (21°C) at that time, the roots become tough and woody and the plants bolt (go to seed).

This explains why some years my fall garden barely grows but goes right to seed. It happens in spring too. If we have a cool spring I get a harvest. If we skip spring and go right into summer, I get seed instead. So even though I plant according to the suggested dates for my garden zone, our unpredictable seasons don't always cooperate.

A handful carrots found in the turnip and
 radish bed I let grow for saving the seed.

This year I decided to stop planting according to the calendar, and start planting according to soil temperature. I bought a cheap soil thermometer and started monitoring my garden soil.

Soil thermometer.
The thermometer has a nice knob so you know where it is.

I checked it almost daily throughout August and early September, but even under the mulch it remained around 84°F (29°C). Finally, after the remnants of Hurricane Florence passed through, the thermometer read below 80°F (26.6°C).

I prefer the old-fashioned kind of thermometer, rather than a digital.
Mid-September soil temp reading: 78°F (25.5°C)

That's when I started planting. Hopefully by the time the plants are starting to mature, the soil will be just right for them.

Speaking of Florence, our only casualty was my popcorn.

Wondering if the ears will still mature.
Lodged popcorn.

I have a lot of planting to do this year, but between the garden and pasture I won't get finished until October. Even so, I'm hoping for a productive winter garden.

Is anyone else planting a fall garden?

September 23, 2018

Learning to Adjust to Retirement Income

It's been almost nine months since Dan's accident and about six months since Social Security retirement kicked in. I have to say that even though he no longer goes to work, he's busier now and works harder than he ever has. And he couldn't be happier.

There have been several aspects of learning to adjust to our new income. We always knew it would be quite a bit less than what were were used to, but that's part of why we took up homesteading in the first place. By meeting more of our own needs we don't have to be as dependent on money. "Retirement" came earlier than we expected, but since a financial scaling down has always been a goal, it wasn't that difficult to adapt. The more challenging adjustment has been in the pay schedule.

As a truck driver Dan got paid once a week. We calculated our budget monthly and put weekly amounts into our budget categories: bills, tithe, groceries, fuel, household expenses, etc. Most months have four weeks, which was how our budget cycle was set. An occasional fifth Friday in the month was like a bonus, with an extra paycheck for the month.

Social Security pays out monthly. We still work off of a monthly budget with weekly spending categories, but some months are longer than others. Out of habit I still start our budget week on Friday, and if there are four Fridays in the month, all is well. But the occasional fifth Friday is no longer a bonus. It's an extra week we have to wait before we get paid again, so we had to figure out something. 

We discussed a number of ways to deal with it. Choosing another day to start our budget week wouldn't change anything, because those extra days can hit anyplace. We could do monthly spending adjustments to compensate for a 5th week, but that seems like too much trouble. We finally decided to make all 5th Fridays no-spend weeks.

As it turns out, occasional no-spend weeks really aren't that difficult. A large part of our diet is homegrown and I'm a stock-up shopper anyway. So it only takes a little planning beforehand, and really, no extra spending. The best part is that I get an occasional week off from shopping and running errands. I like that part a lot!

September 19, 2018

Soil Building Experiment #2: Pastures

Pasture improvement is one of our homestead goals for 2018. Actually, sustainable pasture has always been a goal, but there's been a huge learning curve to go along with that goal, and so far I haven't seen the results I hoped for. In fact, I admit that this year I was discouraged because of our lack of progress in growing good forage. We seem to grow more weeds! Finally, my recent research into carbon and soil building has given me information, answers, and the motivation I needed to tackle this year's goal with new hope. 

We have five subgoals for pasture improvement:
  1. Build the soil.
  2. Establish a polyculture of predominantly perennial forage.
  3. Subdivide large paddocks for better grazing rotation.
  4. Trim low tree branches shading our pastures. (I've observed that our forage does best with filtered sunlight from a high canopy.)
  5. Develop a management plan to keep it in the best condition.

The first two are interdependent and since September is the month we designated for fall planting, that's what this blog post is about. I'll share more about subdividing, rotation, and our idea for a management plan in upcoming posts.

It's going to take a several weeks to get it all planted, but I thought I'd make a blog record of the first two we did, outlined in red below.


This first photo is of the "buck pasture."

 
It's been tilled twice in the nine years we've lived here. The first time was to remineralize and plant corn the other time to plant pasture. I've used my modified Fukuoka spot seeding method here for several years, so it has some nice grasses, herbs, and clovers growing. But they are scanty, which points to problems I'm trying to correct.

The first isn't so much a problem as part of my learning curve. When I first started working on pasture improvement, the only seed available was tall fescue for winter and Bermuda for summer. Both are popular, because they tend to dominate an area to make a good monoculture pasture. But tall fescue has problems with endophytes, and Bermuda is too invasive (AKA "wiregrass!"). So I did my first pasture planting with deer forage mixes, which are annuals.

Theoretically seasonal annuals should work if one can coordinate planting with their life cycles and so have continual forage. But somehow it never worked out that way, and every year we had long stretches with little for the goats to eat. 

The other problem is weeds which tend to grow fast, shade out forage, and completely overtake grazing areas. Hopefully we can choke some of them out, but the weeds are one of the reasons I need a management plan implemented. More on that in an upcoming post.

This second photo is labeled "Front pasture" on my little map.

It's called "front" pasture because it's closest to the house.

It's never been tilled, nor had organic minerals applied. Yet it grows more forage and has less weeds than any other place the goats graze. Like the other paddocks, I've spot seeded with manure and mulch from time to time, but it lacks forage diversity, so that's a goal here. 

As with Soil Building Experiment #1, we started with soil samples.

Buck pasture soil sample

This one is very similar to the samples we took near the fruit trees, isn't it? On the surface it's a little darker, but otherwise there is no organic matter and it's pretty lifeless looking. However, it contains roots! You can see them peeking out at the bottom of the sample. Roots are important for soil building, because (1) soil microorganisms need roots to live, and (2) as plants die their roots leave organic matter in the soil.

Here's the "front pasture" for comparison.

Soil sample from front pasture.

It is darker in the top couple of inches which indicates more organic matter, but other than that, the sample doesn't look much different from the other samples we've dug. I had hoped it would look better because it's never been tilled. What that tells me, is that the soil biology on our property is severely lacking.

How do we fix that? By adding carbon. Remember my soil biology summary from Soil Building Experiment #1?
  • Soil bacteria break down compost and mulch into organic matter
  • Soil fungi build organic matter into new soil
  • Both feed on carbon provided by
    • the plants
    • the mulch
  • Conclusion: Feeding soil microorganisms = building the soil

To facilitate that, our experimental pasture planting method is no soil preparation, just broadcast the seed, then mow. The clippings mulch the seed, providing protection and carbon.

My seed mix has been the most diverse I could manage, a combination of both perennials and annuals: wheat, oats, winter peas, perennial rye, hairy vetch, chicory, radish (both garden and Daikon), turnip, timothy, orchardgrass, non-endophyte fescue, alfalfa, birdsfoot trefoil, rape, small burnet, sanfoin, kale, buckwheat, phacelia, sorghum-sudangrass, and a variety of clovers (red, crimson, sweet, and several kinds of white). In all of that, growing conditions should be right for at least some of it to grow!

So that's the plan. We'll plant the other pastures the same way. We've had nice rainfall so these first two are just starting to show new growth. Hopefully I'll have nice forage photos to show you soon.

Next - Developing a Pasture Rotation Plan, Part 1


September 16, 2018

Super Easy Pasta Cheesy


When I was a little girl one of my favorite foods was my mother's homemade macaroni and cheese. I loved the stuff. But then, that was back in the day when nobody thought about Velveeta not being real food. Back then, nobody really cared. At some point I grew up and tried to make a more "grown up" version of mac and cheese, but let's face it, real cheese doesn't compare in texture and meltiness to Velveeta. That means that all the grown-up versions of mac and cheese just aren't the same.

The other day I wanted to cook some pasta to go with our barbecue duck legs and had an idea. I cooked some pasta, drained it, stirred in a chunk of butter and some chevre cheese, and served it to Dan. We both loved it! No, it isn't the same as macaroni and Velveeta, but then, my tastes have changed over the years. Most of the industrially processed stuff doesn't taste all that great. This simple combination of tastes and textures was satisfying to the point where I will no longer miss my childhood favorite. Here's the recipe.

Pasta Cheesy
  • 2 cups uncooked pasta
  • 1 cup chevre (or any soft cheese)
  • 2 tbsp butter
  • 1/4 cup fresh, shredded Parmesan cheese

Cook the pasta according to directions on the package. Drain and return to cooking pan. Over low heat stir in butter and cheeses until melted. Serve immediately.

Does anyone else have a childhood favorite that just isn't the same anymore? Have you been able to make acceptable substitutions? Or find something even better? Do tell!

Super Easy Pasta Cheesy © Sept. 2018 by

September 13, 2018

Reconsidering Australorps


We've had a variety of chicken breeds since we started homesteading: Delawares, Welsummers, Ameraucanas, Barred Hollands, Silver Laced Wyandottes, Buff Orpingtons, Speckled Sussex, and Black Australorps. Our intention was to try out different dual-purpose breeds and eventually choose one as our permanent homestead breed. We wanted to stick with one breed because we raise our own replacements, and we want our replacements to be full breed chickens. Eventually we settled on the Australorps.

The Australorps have been excellent chickens. They provide lots of eggs and the oldest are still laying well in their third year. Besides good production in summer, they give us a small but steady supply of eggs all winter. They are good foragers, have been excellent with the compost, and produce good meat. Our Australorp rooster is an excellent fellow, everything one could want in a good rooster: keenly watchful and protective of his hens, yet respectful of the humans. His only fault is that he dislikes a couple of the youngest hens and is relentless in chasing them away. Other than that, he's perfect.


So why are we reconsidering the Australorps? For one reason and one reason only - hatch rate. Every year we have at least one broody hen, often two or three. The problem? They keep switching nest boxes. They'll set in one box for a week or two and then abandon it. Sometimes for a different nest box, sometimes they just give up being broody.

Last year was our best hatching, with four hens hatching nine chicks. I suspect this success was because all nest boxes were occupied by broody hens and there was no where else to go! The Australorps do make good mothers when they have chicks, it's just getting them to stay put until they hatch them.

We keep a small mixed-age flock, hatching a few new chicks every year to replace the oldest. We have fairly predictable egg production this way. This year, however, we've gotten no chicks but should be replacing our oldest hens. Dan has suggested perhaps we ought to consider a different breed, one that hopefully will be more consistent in brooding.

Some people do well in the hatching department with Australorps, so I can't say this is a breed trait. As with all animals there are breed tendencies, but there are individual tendencies as well. And sometimes those individuals have very different personalities!

Of all the hens we've had the Buff Orpingtons were the best at brooding and chick raising, so they're a consideration. Dan's favorite chicken was a Speckled Sussex named "Sister." At this point, though, I don't know what breed he'll want to go with. I think he's interested in trying a chicken tractor next year, so it looks like I'll have all kinds of upcoming chicken news. Stay tuned.

Reconsidering Australorps © Sept. 2018 by

September 9, 2018

Soil Building Experiment #1

Last month I shared what I've been learning about soil building ("Carbon: What I Didn't Know"). The nutshell version is that soil microorganisms are what make (build) new soil. Here's what I've learned summarized:
  • Soil bacteria break down compost and mulch into organic matter
  • Soil fungi build organic matter into new soil
  • Both feed on carbon provided by
    • the plants
    • the mulch
  • Conclusion: Feeding soil microorganisms = building the soil

Building soil in a small area such as a garden is relatively easy. The gardener applies compost and mulch, and the microorganisms do the rest. We can further facilitate the process by allowing the mycorrhizal fungi to grow and create a network. This is where the no-till technique comes in, because tillage destroys the network.

I will readily admit that we have been tilling, so a big part of these experiments is trying to figure out how to switch to no-till, especially for larger production areas where garden beds aren't practical.

The area we chose for our first soil building experiment is where our row of fruit trees grow, outlined in red in the map below.

See "Carbon and Soil Building: Designing a Plan" for map details.

There are two apple trees, two pear trees, and a small cherry tree down the middle with elderberry bushes along the fence. In the past we've cut the grass there and dried if for hay. Here's how it looked from the bottom of the slope (right edge on the map) before we began.

Planted with sorghum-sudan grass for a hay crop.

Before we did anything we took a look at the soil itself. We dug two samples, one at the top and one at the bottom.

Sample dug at the top of the area.

This sample is typical of soils in the southeastern United States. Any place on our property where we've had to dig (for fence posts, huglekulture swale beds, etc.) this is what it looks like: sandy loam topsoil and red clay subsoil. The sand doesn't hold water, so in hot weather our topsoil dries out quickly after a rain. And it contains just enough silt so when it dries out, it's as hard as concrete!

The bottom sample looks a little better.

Sample dug at the bottom of the area.

The top inch or two has roots and clumps of soil clinging to the roots (clumps are good; they mean soil microorganisms have been busy), but it contains little organic matter and is mostly the same sandy loam.

Excellent soils are said to look like black cottage cheese, and obviously we have a long way to go! It is possible to build soil with only cover crops, but we hoped to give it a jump start. We took stock of our own resources and decided to add some of this...

Aged manure from cleaning out the old goat barn.

This is what Dan scraped out of the former goat barn after we moved the goats. Some of that manure is years old, but it's been under roof, so there has been no nutrient leaching.

Also this...

Mulch pile from the tree trimming company.

Earlier this summer our electric company hired tree trimmers to clear everything away from the utility lines. Dan asked if we could have some, and they dropped off two loads of chipped wood and leaves. Here's what we decided to do.

First I trimmed back the trees and bushes. Then I broadcast a cool season cover crop mix of wheat, oats, winter peas, Daikon radishes, and crimson clover. The fibrous roots of the small grains add biomass below the soil surface, the peas and clover are legumes which fix nitrogen in the soil, and the large roots of the Daikons help loosen the soil. I also read they are nitrogen accumulators and store nitrogen in their roots.

Next Dan cut the grass back with our mulching lawn mower.

Trimmed back, planted, and mowed. The brown patch
at the bottom wasn't from tilling. That's the grass you
saw in the "before" photo, dead and brown from mowing.

The grass clippings covered the seed like a light layer of mulch. I covered that with a layer of the old manure,


then a layer wood and leaf chips.


A week later it was starting to grow.


We hit a hot dry spell about that time, so I was concerned about the seedlings drying up. Even with hot days and no rain for three weeks it continued to grow well.


Here's how it looks now.

One month after planting.

The plan is to let this cover crop grow all winter, then underseed it in the spring. The cover crop will be cut down, leaving the clippings to mulch the new seed and add more carbon to the soil. The idea is to alternate cover with harvest crops to build healthy, productive soil.

Soil building is a slow process, usually measured in years, so I realize it may take awhile to see improvement in future soil samples. Even so, we've  already seen a response.

Ten inches of new growth.

New growth on one of the apple trees! I can't tell you how much that lifted my spirits.

This is a long post, I know, but it will serve as a record of what we did, as well as our starting point for measuring progress in the future.

Soil Building Experiment #1 © September 2018

September 6, 2018

R.I.P. Old Truck


Dan's old Chevy S-10 has finally given up the ghost. It quit on him a couple of weeks ago, so we towed it home. He thought he knew what the problem was and worked on that; no joy. Then he tried something else, then something else, until he reached the point where any of the remaining possibilities were all major fixes. Major expensive fixes. It was time to decide if it was worth it.

Dan bought the truck new in May of 1988, so it is a good 30 years old. It's had no major overhauls and has driven all over the country. It's been a true workhorse for us. A pickup truck is truly a handy vehicle for our kind of lifestyle. The question was, can we live with only one vehicle? Can we live with just my Jeep?

Original miles.

When I was a kid my family had one car. My grandparents had one car. In Dan's family, everyone had their own car, and I think that's pretty common nowadays. Busy lifestyles and jobs pretty much necessitate it, and it's an easy thing to get used to. But also, there's a feeling of security with an extra vehicle. With old cars, especially, because if one breaks down, the other is needed to pick up the stranded driver and make trips to the automotive store for parts.

If the problem with Dan's truck had been simple and he'd been able to fix it without a lot of time and money involved, we would have kept it running. But it had reached the point where problems were frequent. Now, facing a major repair, the question of what would happen after that had to be addressed. How much time and expense were we willing to continue to pour into it? What were the alternatives?

There is no new vehicle on our horizon. We're both home full time so there isn't a need for separate vehicles for jobs. We have a trailer for the Jeep and so can fetch and haul anything we could with the truck. We'll save about $100 a year on insurance and a little on tags and taxes. Fuel will be about the same because we'll make the same number of trips, just with one vehicle.

We knew this day would get here eventually, and it did. Such is life, eh?

R.I.P. Old Truck © September 2018 by

September 2, 2018

Progress on the Barn: The Home Stretch

Even though we've moved the girls into their new home, work on the barn has continued. Dan took a brief break to move his workshop; then he started working on windows, trims, and rainwater catchment.

We now have two small tanks to catch rain from the milking room roof,

Milking room with new windows, battens, and rainwater tanks.

and a large one for the hayloft and loafing area roofs.

Larger tank for larger roof area.

I have to say that we've learned a lot since we put in our first catchment system in 2013. For that one we didn't install a filter, just an extended PVC pipe with a clean-out plug.

Clean-out for each roof surface.

The PVC clean-out pipe catches initial runoff from the gutter. It fills with water plus any dirt and leaves washed off the roof. Once it fills, the rest of the rain goes into the tank. Theoretically that should keep the water in the tanks clean, but it didn't always work out that way. It requires cleaning out after each rainfall, which isn't always practical. From that we learned we needed a filter.

When he installed our second large house tank, Dan made a filter from half of a 55-gallon barrel filled with several sizes of gravel. That worked well, but it had to be positioned above the tank, making it difficult to clean out due to its weight.

When we researched filters for the barn tanks, we found instructions for making a PVC pipe filter. (That link will take you there.) It's placed horizontally and filled with layers of rocks and gravel. Periodically it can be removed and cleaned out. This is our experimental model, and we're curious as to how well it will work.

One of two horizontal pipe filters going into the big tank.

All tanks still need valves. Dan's plan is to run a pipe from the big tank directly into the barn to water the goats. The water from the smaller tanks will be for the ducks and chickens. That will still require carrying buckets, but he is very happy about the prospect of not having to haul all the water from the house any more!

Clean-out plug (vertical) and pipe filter (horizontal).

There are a few more windows to put in and more trimming and painting to do, but the goat barn is almost officially done! We're both looking forward to that.