Showing posts with label sewing. Show all posts

May 2, 2023

Sewing Room?

Last winter's sort, purge, and organize project turned out to be more successful than I expected. I focused on the two rooms we use for storage as we slowly continue working on the house. Not surprisingly, these have become chaotic catch-alls because, well, out of sight - out of mind. Dan moved all of the construction related stuff to the workshop, and I was able to significantly pare down the number of boxes we had. The remaining boxes are mostly weaving yarns, spinning fibers, sewing fabrics, and all of my knitting and sewing supplies. I was able to organize these in the front bedroom, leaving the other room clear and free. That room is the sun room (formerly my studio). 

The room has been like this since Dan replaced the old windows with a new one.
You can see the original windows plus other original photos of this room here.

The current state of the room is the result of upgrading the exterior of the house, i.e. new windows and siding. We left the interior for a future project.

There was originally a door here going out to the front porch.
We eliminated it when we put new siding on the porch walls.

You can't see it, but the greenhouse adjoins that left-hand wall on the outside.

I don't know why I never thought of it before, but as I looked at the newly reclaimed space I wondered if it could become a little sewing room. Actually, I do know why I never thought of it before. It's because I always imagined my studio to include not only sewing, spinning, and needlework, but also my loom and weaving supplies. It never occurred to me to simply set up a space dedicated to sewing and handwork—until now.

Renovating this room has been on the project list, but it's nowhere near the top. We have the greenhouse to finish (if it ever stops raining) and a masonry stove to build this summer. Plus, when Dan talks about finishing this room, he talks about gutting it and replacing ceiling, walls, and floor. But that would be a lengthy, major project, so I was perfectly happy with the idea of using the room as is, for now. I just want to use the space. When Dan took a look, he said at the very least, we ought to cover the exposed insulation. That, plus fresh paint on the ceiling and walls, and an area rug for the floor will give it a facelift. The major renovation can wait until some distant year in the future.

So that became our rainy day project. Next time, I'll show our progress so far. (Click here!)

Parting shot:

"May" from my cross-stitch calendar Christmas present.

Once I get my sewing room set up, I'll have my sewing, needlework, and knitting supplies organized and easily accessible. I'm looking forward to that!

March 20, 2023

Making a Zokin (Or Two Or Four)

March is the month when we start to spend more time outside. The earth is awakening, the weather is milder, and it's lovely to be out of the house. But there are still plenty of cold and rainy days. Days that are good for indoor projects, like sewing zokin.

Zokin is Japanese for "cleaning cloth." It is made from old, torn, or stained cloth, and has become a somewhat universal term for this style of cleaning cloth. But it has an interesting cultural background, and the best explanation comes from Atsushi Futatsuya of Sashiko Stories. In his video, Zokin with Sashiko (Zokin as Cleaning Rug) & Apply it to Ordinary Days, he describes the stages (or progressive uses) of Japanese cleaning cloths.

  • Fukin - kitchen cloth (dish cloth or tea towel)
  • Daifuki - for wiping tables
  • Zokin - final form, used for cleaning the floor, washing the car, or scrubbing a sink

I love this philosophy. It's so true to the "use it up, wear it out" concept of that little ditty so many of us frugal people love.

Use it up
Wear it out
Make it do
Or do without

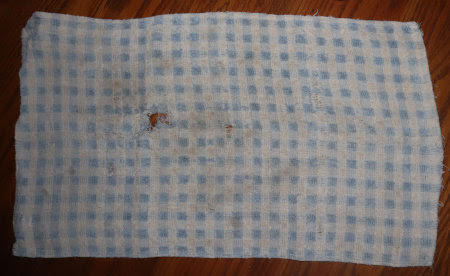
Old dishtowels are perfect for making zokin, and I had several old terry cloth dishtowels that were too worn for their original purpose.


I got these before we bought our homestead. We lived in an apartment and one kitchen wall had blue and white checkered wall paper. I bought these dish towels to match. When the first one became holey and frayed, I cut it into cleaning rags. I'm pleased to keep old clothing and towels out of the landfill that way, but my rag bin is almost overflowing. That's when I learned about zokin and thought it was a great idea. 

Finished size is arbitrary and I decided I could make two zokin from one dishtowel. I cut each one in half lengthwise, pressed down the cut edge, and folded the strip into thirds. 

The layers are stitched together with sashiko. You may recall from my Japanese Mending post, that sashiko is simply running stitch. It's often colorful and decorative, but for these, mine is simply functional.


Finished zokin

Besides old towels, I've seen these made out of old t-shirts and sweats. It's a great way to re-purpose end-of-life garments. My only recommendation would be to use natural fabrics, because polyesters and acrylics don't absorb water well. That, and when the zokin are beyond use, natural materials (in this case cotton), can be composted to feed the soil. That final act completes the cycle.

November 9, 2022

My New Sewing Toolbox

We've been working on our winter project list, and one of my line items is mending. I have a huge pile of it, but have been frustrated because my sewing tools are never in one spot. Part of the problem is that my studio became a storage area when we started working on the house. The same was true of the extra bedroom, and every time we start working on another part of the house, everything gets moved and shuffled about. So nothing has a home, and I can never find anything. Some of my sewing tools are in baskets, some are the sewing machine cabinet, some are in the mending box, and some are ??? It seems I'm always hunting for something before I can get started. 

Time to get organized! When I found this cute wooden box for $3 at a resale shop, I couldn't resist buying it.


It's the perfect size to keep everything I need for sewing. 


Several of the items in the box are special to me.

These little wood boxes were gifts from my granddaughters.


One is perfect for safety pins, the other is perfect for my tape measure.

These came from my great-grandparents

The thimble is 10k gold and belonged to my great-grandmother. She was a quilter. The steel container that I use as a needle case was my great-grandfather's. The embossed words say. "Colgate & Co. Shaving Stick New York U.S.A."

Buttons are handy to have so I made a button lid for a half-pint canning jar.


Besides scissors, thread, and a pin cushion, other useful items ...

Needle threaders, scissors sharpener, seam ripper, and darning egg.


Everything fits nicely in the box and there's still enough room for small projects I'm working on. And it's decorative enough that I'll be happy to keep it out and not be tempted to stuff it away somewhere where it's out of sight. I think this is a good step toward a productive winter!

January 12, 2021

Mending Gloves

I'm still darning and patching my way through a pile of socks, but I took some time out to mend my work gloves. They badly needed repair!


My winter chore gloves are actually two pairs. The outer gloves are lined cotton work gloves, and the inner gloves are a fleecy fabric glove. If I wear only one or the other, my hands are cold. But when I wear them together, they keep my hands warm. However . . .


I let them get too worn out! But I hated to throw them away, so I thought, well, why not see what I can do to fix them?


I decided to patch the hole in the lining and darn the outer shell holes with embroidery thread. For the patch, I used one of the too-far-gone socks that I cut into rags


I didn't worry about finishing the edges or making it pretty. 


I just did the job, making sure the unfinished edges were sewn down. To darn the other holes, I used two strands of embroidery thread and a paint stirrer as a darning board.


The paint stirrer worked quite well, giving me a firm surface for weaving the threads to make the darn.


It was a lot to do, and it's not perfect, but the variegated blues of the embroidery thread made it fun and the darns sort of match the inner gloves. Plus, I didn't have to throw them away and spend money on new ones. Best of all, my hands are warm again!

If I'd used dark brown embroidery thread, the darning would be almost invisible. But the latest trend is "visible mending," which creates beautiful decorative elements from holes, stains, and tears; very fun. More on that in upcoming posts. For now, I'll close with a link to a page on the Collingwood-Norris website, "Visible Mending: Gloves." Lots of creative ideas there. ❤                                      

January 9, 2021

Mending Socks

Does anyone keep a mending basket? A basket full of clothing items that need a ripped seam sewn, or a patch for a hole? Apparently, mending is the latest cool, sustainable thing to do. Keep old clothes out of the landfill! Of course, I agree. But because I remember a time when mending was looked down on as totally uncool, I feel a little smug that it's something I've always done. 

Winter is a fine time to keep a mending basket handy. Lately, mine has been filled with socks. Of course, hand knit socks must be mended. Too much much time, heart, and soul goes into making them!

The is one of my most frequently worn pairs.

To mend: sock yarn, darning egg, and tapestry needle.

This is just plain darning.

Actually, weaving a patch where the hole used to be.

Done. Inside view.

How it looks on the outside.

The socks I really seem to go through, however, are everyday cotton socks. And because I buy a large pack, they all seem to wear out at the same time. I've never been a fan of the buy&throw-away cycle, so since I was doing socks anyway, I decided to mend some of those cotton socks too. 

Plain darn with matching carpet thread.

Small holes are easier to darn. I used carpet thread in the above photo because I had it. Embroidery thread is a popular option because it comes in all colors (easy to match) and is inexpensive. Sometimes though, the holes in the heels are too large to darn, like the socks in the photo below.

Cutting cotton socks into rags.

These I usually cut into rags, so at least they are still useful. The other day, however, I wondered if it would be possible to patch the holes in the heels. Most of the socks with the heels gone still have good toes.

Sock toe to be used as a patch.

Why wouldn't these make good patches? So, I started cutting off the toes, cutting them in half, and then using them for heel patches.

Patched heel on sock.

I put the sock on my darning egg and pinned the patch in place. A running stitch holds it in place and a whip stitch further secures the edges. A blanket stitch in a colorful embroidery thread might be fun too. I also stitched around the holes to help secure the patch. 

How well will it work? Time will tell! But they're comfortable and I feel really good about getting more wear out of my old socks. 

Do you do much mending? 

January 17, 2019

What I Bought With My Christmas Money

For Christmas, I received an unexpected and rather generous gift of cash. I pondered what to do with it for a bit and then started a search on Craigslist. For a number of years now, I've wanted to replace my old sewing machine. But I didn't want another electric one, I wanted a treadle machine.

In my back-to-the-land days, I used to use a treadle sewing machine. We didn't have electricity although we didn't refer to it as being off-grid. Solar panels as we know them now were still being developed, so when it came to electricity we simply lived without. That's how living off the land was done back then. So I have some treadle sewing experience under my belt, even though I wasn't going to fool myself into thinking I still have the same dexterity as I did back then! But maybe it will be like riding a bike. (One can hope.)

There were a number of treadle sewing machines on Craigslist with prices ranging from $350 to $600. That was more than I had to spend, so I kept scrolling through the listings until I found one for a White Rotary Treadle sewing machine for $100. The listing was a month old so I didn't expect it to still be available. But I shot off an email inquiry anyway and then started researching this particular machine. From browsing sewing forums and the websites of treadle enthusiasts, I concluded that White had made a sewing machine of excellent quality.

I received no reply so I tried again. Finally, the response came back, "already sold." I wasn't surprised;  I just put on my patience hat and kept looking. I checked Craigslist frequently, but also took a look at a modern treadle machine - the Janome 712T. It was also more than my Christmas funds, but it was tempting since it can do zig-zag and buttonholes; stitches that most antique treadle machines can't. The main obstacle, however, was that it doesn't come with a treadle stand. Treadle cabinets to fit the Janome are available elsewhere for somewhere around $1000. I found an old treadle stand on Craigslist for $65 (most of them seem to be turned into tables), but discussion on sewing forums indicated that not all old treadle cabinets will accommodate the Janome. So the Janome was out.

After several weeks of waiting, a new ad appeared on Craiglist. It was the same machine I first liked, a White Family Rotary It was priced at $150. I shot off an email and waited. A reply soon came back that it was available, and yes, I could make an appointment to see it. Here's the happy ending to my tale...


What was interesting was that the seller told me I wasn't the first one to contact them; there were three others first. They chose me because my email was the most polite!


The treadle belt is okay for now, but if I need to replace it these are readily available.

The contents of the drawers came with it.


The first one contained an assortment of thread, buttons, needles (both hand and for the machine), tape measures, thimbles, old wire screwdriver, and a set of steel knitting needles in the long wooden tube.


Bobbins are in the upper right-hand drawer, along with some 3-In-One Oil purchased by the seller. She used it some but said she decided treadle sewing wasn't her style. The case contains all the attachments.


Once I learn how to use them I'll be able to gather, shirr, hem, sew lace, make tucks, quilt, ruffle, bind, underbraid, and chainstitch. That's more than I expected!

One drawer was empty, but the last one contained the original certificate of warranty.


The certificate is dated August 20, 1913. Between that and the patent date (April 18, 1911) I have an idea of when the machine was made. The original manual was in that drawer too.


It's well worn and the paper is frayed and fragile, so I took it apart and placed the pages in plastic page holders. I'll start a notebook and collect all the information I can find on this machine and treadle sewing.

The seller gave it a good dusting and polished the cabinet but admitted she hadn't used it in a while. I decided I should do some research and give it a good going-over to make sure everything is properly cleaned, oiled, and in good repair. With the help of several YouTube videos, I'll be able to do all that and more! I've definitely got my winter weather project cut out for me.

Continued over at Leigh's Fiber Journal.