Showing posts with label waste not want not. Show all posts

April 24, 2025

The Last Bowl of Soup

Soup season has come to an end. Soup is our favorite winter lunch, so all summer long I stick leftovers into a recycled peanut butter jar as "soup fixins." I defrost a jar every couple of days, add the previous days leftover soup and a pint jar of bone broth. Sometimes I'll toss in new leftovers. In the bowl pictured above, I tossed in a handful of freshly chopped kale from the garden. And there's lunch. But eventually, the weather starts to warm up and we have our last bowl of soup for the season. 

This year was the first time I think I managed an ongoing soup from the first bowl to the last. There's usually some left in the pot and this gets put back in the fridge until the next day, when it's added to for a "new" soup. 

Sometimes Dan asks what's in it, but I honestly can't be sure. The big bites are identifiable, but when I collect those summer leftovers, I scrape every last bit of tasty goodness into the soup jar. If the pot or pan is sticky with gravy or sauce, I glaze the pan and pour the liquid into the jar so that there are no air gaps. When I finish up a jar or bottle of sauce, ketchup, or tomato juice, I'll swish it with a little bit of water and add that to the jar too. I've even been known to add dumplings, stale tortilla chips, cheese, even leftover meat pie, crust and all. Everything but dessert goes into those jars. Nothing gets wasted! When it gets chilly out again in fall, I'll have at least a couple dozen jars of frozen soup fixins' for our winter lunches.

With the milder weather the chickens and ducks have started laying again, so our warm weather lunches revolve around eggs and salads. It's another way food helps mark our seasons. 

What about you? Do you have seasonal food favorites?

The Last Bowl of Soup © April 2025

April 17, 2023

Invisible Mending

Mending is one of those historical skills that has made a come-back. While it was primarily utilitarian at one time, it's taken on new life and prestige as an art and craft in it's own right. Because of that, it's worth defining some terms:

  • Plain mending - utilitarian patching, darning, and repair
  • Visible mending - decorative, such as boro, sashiko, embroidery, fancy patchwork
  • Invisible mending - re-weaving or re-knitting cloth to look like the original fabric

Because mending is a desirable self-sufficiency skill, I've blogged about some of my plain mending (such as mending socks) and some of my visible mending (such as my barn jacket). Recently, I decided to try my hand at invisible mending. 

To learn on, I chose my favorite denim work skirt. I discovered the beginnings of a small hole when I hung it out to dry on the clothesline. 


The repair required finding threads that matched the colors of the fabric. Even though the blue threads are a dark blue close up, I chose a medium blue thread because it blended better with the overall impression of color.


I caught it early enough that I only had to re-weave the blue threads. 


I'm not patient enough to do fine, close work, ordinarily. But this was small enough that it didn't take long, although one of those crafter's magnifying lenses would have been helpful. A blunter needle would have been helpful, as well. The sharps needle kept catching the white threads.

I also want to note that I didn't try to replicate the twill weave; I just did the best I could at picking up threads to weave through. The goal is so that the hole isn't noticeable at a couple of feet away. Do you think I succeeded?


A fancier weave or multiple colors would certainly make it more challenging. Assuming one is up to that challenge!

All in all, I think this is a useful technique to learn. The end result of plain mending chore or play clothes probably has low expectations for most of us. But learning how to properly mend career, dress, or town clothes is both a budget and a landfill saver. What's not to like about that?

March 20, 2023

Making a Zokin (Or Two Or Four)

March is the month when we start to spend more time outside. The earth is awakening, the weather is milder, and it's lovely to be out of the house. But there are still plenty of cold and rainy days. Days that are good for indoor projects, like sewing zokin.

Zokin is Japanese for "cleaning cloth." It is made from old, torn, or stained cloth, and has become a somewhat universal term for this style of cleaning cloth. But it has an interesting cultural background, and the best explanation comes from Atsushi Futatsuya of Sashiko Stories. In his video, Zokin with Sashiko (Zokin as Cleaning Rug) & Apply it to Ordinary Days, he describes the stages (or progressive uses) of Japanese cleaning cloths.

  • Fukin - kitchen cloth (dish cloth or tea towel)
  • Daifuki - for wiping tables
  • Zokin - final form, used for cleaning the floor, washing the car, or scrubbing a sink

I love this philosophy. It's so true to the "use it up, wear it out" concept of that little ditty so many of us frugal people love.

Use it up
Wear it out
Make it do
Or do without

Old dishtowels are perfect for making zokin, and I had several old terry cloth dishtowels that were too worn for their original purpose.


I got these before we bought our homestead. We lived in an apartment and one kitchen wall had blue and white checkered wall paper. I bought these dish towels to match. When the first one became holey and frayed, I cut it into cleaning rags. I'm pleased to keep old clothing and towels out of the landfill that way, but my rag bin is almost overflowing. That's when I learned about zokin and thought it was a great idea. 

Finished size is arbitrary and I decided I could make two zokin from one dishtowel. I cut each one in half lengthwise, pressed down the cut edge, and folded the strip into thirds. 

The layers are stitched together with sashiko. You may recall from my Japanese Mending post, that sashiko is simply running stitch. It's often colorful and decorative, but for these, mine is simply functional.


Finished zokin

Besides old towels, I've seen these made out of old t-shirts and sweats. It's a great way to re-purpose end-of-life garments. My only recommendation would be to use natural fabrics, because polyesters and acrylics don't absorb water well. That, and when the zokin are beyond use, natural materials (in this case cotton), can be composted to feed the soil. That final act completes the cycle.

January 18, 2023

Winter Mending Project: Barn Jacket

In my last post ("Japanese Mending,") I promised to show you my visible mending project - my old barn jacket. There's a story to go along with this project, which means this post will be wordy. But for those who prefer to scroll and scan, there are lots of pictures too, which will probably stand on their own.

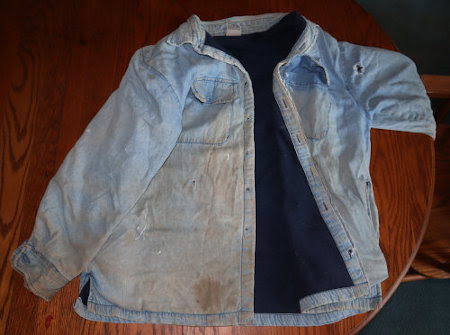
About the jacket. At one time, this denim jacket was my favorite fall and spring work jacket, and I wore it for years. It has a warm fleecy lining and the outer fabric is denim, which I love because it wears well and isn't prone to getting straw and hay stick in it (a huge plus when one works with barn animals!). Gradually, it got torn here and there, and the cuffs began to fray.

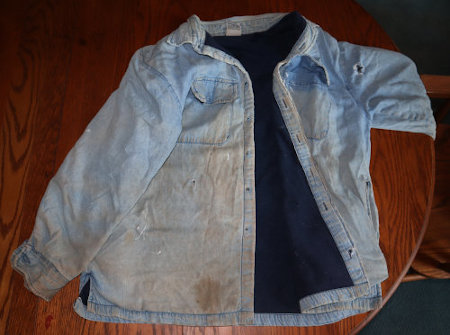
Lots of small holes on the jacket front and sleeves.

But it wasn't until it got a big tear in back that I stopped wearing it. 

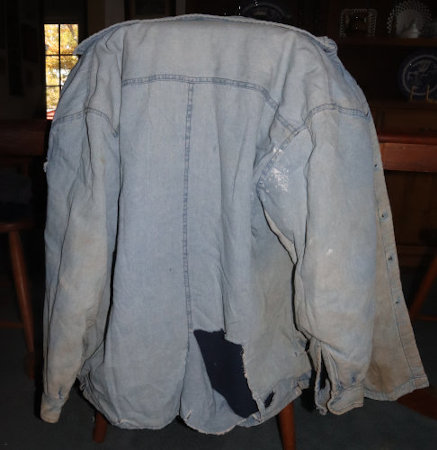
Big rip in the back.

By that time, the denim was badly torn, worn, and stained in too many places anyway. The jacket wasn't even fit to donate to the thrift shop, and I decided to discard it. I went so far as to cut off and save all the buttons, but I just couldn't bring myself to throw it away. Instead, I buried it in my mending box.

I pulled it out a few years ago when I needed a mending project for a Permies SKIP merit badge. SKIP is a free online program at permies.com, for learning homesteading and permaculture skills. That link will tell you all about it and what's offered, so here, I'll just add that it's an excellent resource for learning, documenting, and sharing a wide range of skills. In this case, I was working on the first textiles badge and needed to sew on a patch. The jacket was perfect.

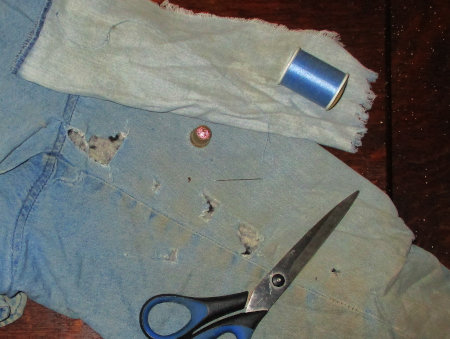
A series of tears on the underside a sleeve.

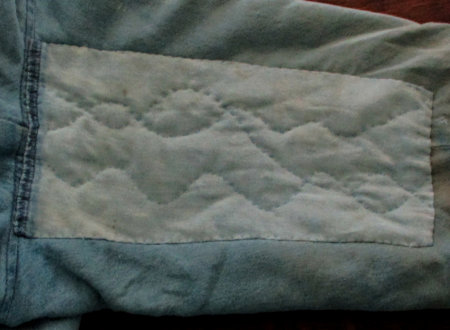
Even then, I got a bit creative in stitching down the large patch.

As I worked on it, I remembered how much I liked this jacket. But there was still a lot that needed mending, so I stuffed it back into the mending box and forgot about it for several more years. Until I was stuck inside due to inhospitable winter weather and came across several interesting YouTube videos about visible mending (which you can read about in my previous post). I pulled the jacket out again and gave it another look. It would be a good canvas for learning and experimenting!

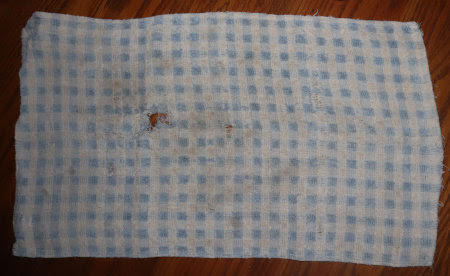
The next time I was at the thrift store, I found some patching fabric that I liked. Actually, it was a pillow sham that I got for $1. I took it apart and gave it a good pressing. Perfect. 

Then I made a start. The biggest tear was first, although it wasn't too bad when I spread out the jacket and laid the pieces back in place. 


The lining was in good shape, so I sewed the torn parts onto the lining with sewing thread and drew out my top stitching lines with a fabric marker.


From boro, I learned that it's okay to have patches and stitching overlap, like the patch above, which I added to support the pocket.

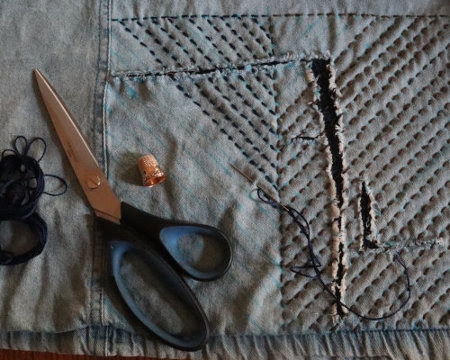
From sashiko, I find the concept of working only in running stitch intriguing. I like the mental challenge of figuring out my stitching path with the fewest cuts and knots in the thread.


Once the creative ideas started flowing, I added some embroidery to my first sleeve patch (and patched a few more holes). 


Jacket right front with two patched tears.

I stopped thinking about simply covering holes and tears, and began to think more about the overall affect on the jacket.

Below is a patched and embroidered hole on the other sleeve.

In the first picture you can see the hole in the left sleeve.

One problem that developed was because the outer jacket fabric and the lining have different fiber contents. That means they shrank at different rates! It wasn't terribly noticeable before, but the patches and embroidery cause the denim to pooch out in some places.  


On the one hand, this is just an experimental project on a barn jacket, so, so what? But it was a challenge and I wanted to rise to it. As Bill Mollison, the Father of Permaculture says, the solution is in the problem. I thought about this and settled on a sashiko design that I thought would work.

I smoothed out the outer fabric as evenly as I could and pinned it to the lining. Then I added lines with my fabric marker.


With variegated embroidery thread, I'm working a pattern that will distribute the denim more evenly over the back of the jacket without puckering.

A problem becomes a design element! The result will be a quilted look that stabilize the fabrics. 

Another problem is that, apparently, I don't have full ownership of the jacket. 

Meowy staked her claim

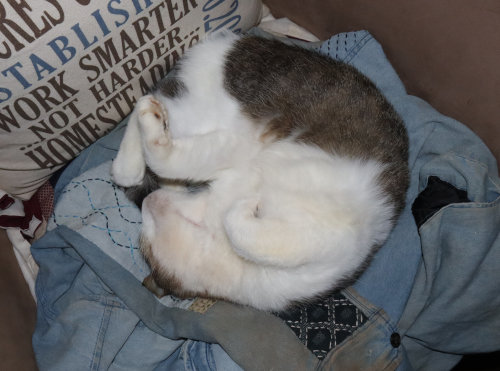
and stubbornly refuses to give it up.

What's a human to do?

Between mending my jacket and some knitting, my cold and rainy days are interesting and productive. Maybe I'll be able to wear the jacket again this spring. 

Your turn. Anyone else care to share to share their winter projects?

November 16, 2022

Greenhouse Progress: Not Much

Photo taken November 4, 2022.

There are a couple of reasons for the slow-down on greenhouse progress. One is the weather (rain), and the other is that Dan's sawmill needed repair. And while he was at it, he decided to re-level it. Between growing tree roots and the ground shifting as it expands and contracts with varying degrees of dryness and moisture, the mill wasn't level anymore. So that took some time. Fortunately, there's no deadline for this project.

I mentioned in my greenhouse planning post, that we had saved all the old wood windows we took out when we upgraded them. Those will become the greenhouse walls. What we didn't think about at the time, was the old jalousie windows we saved when Dan remodeled the back porch. He replaced two of them, and of course, we kept them. 

Jalousie crank windows. Photo from September 2013.

My idea was that they could be incorporated into the greenhouse roof, because roof vents would be very helpful. Dan nixed that idea, however, so we decided we'll use them on either end of the greenhouse walls. We plan to install a solar attic fan to vent the greenhouse during hot weather, and the jalousie windows would be great for helping to facilitate air flow. 

With the sawmill up and running again, Dan is back to working on posts and rafters for the roof. Weather permitting, of course. Hopefully, I'll have construction progress to show you soon.

Photo taken November 14, 2022.

July 25, 2021

Soup Stock from Veggie Scraps

This was a recent rainy day project. I got the idea from one of the SKIP badges on Permies.com. It interested me because I've never thought to do something like this before. Usually, my kitchen scraps are fed to the goats or are put in the chickens' compost bin. To make soup stock, I took a 2-gallon freezer bag and tossed in stalks, ends, and peelings of various vegetables. I kept it in the freezer until the bag was full, then I made a nice vegetable soup stock.

Various vegetable scraps including onion skins.
All went into the freezer for this batch of stock.

No recipe is actually required. Just cover the scraps with water, simmer them down, then strain and season as desired.

After simmering for awhile. it smelled wonderful.

I pressure canned it according to the directions for vegetable stock in the Ball Blue Book: 30 minutes for pints and 35 minutes for quarts at the appropriate pounds of pressure for your altitude. Salt is optional. I know many folks prefer to add the salt when they open the jar. I add it when I can it. Why? Because the past year and a half have caused me to rethink much of what I do and ask if there is a more logical way to do it. It just seems prudent to add the salt now, while I have an abundance of salt. Hopefully, salt will remain cheap and plentiful as things change, but nowadays, who knows?

Canned scrap veggie stock. The rich color is from the onion skins.

My yield was six quarts and nine pints. The pints are the perfect amount for making rice or gravy, or adding to my defrosted soup fixins'. The quarts are handy for larger quantities of soup.

I don't know if I'll continue to make veggie stock, mostly because there isn't much room in my freezer to store the scraps. But it's a nice addition to the pantry and handy to know how to do.

January 12, 2021

Mending Gloves

I'm still darning and patching my way through a pile of socks, but I took some time out to mend my work gloves. They badly needed repair!


My winter chore gloves are actually two pairs. The outer gloves are lined cotton work gloves, and the inner gloves are a fleecy fabric glove. If I wear only one or the other, my hands are cold. But when I wear them together, they keep my hands warm. However . . .


I let them get too worn out! But I hated to throw them away, so I thought, well, why not see what I can do to fix them?


I decided to patch the hole in the lining and darn the outer shell holes with embroidery thread. For the patch, I used one of the too-far-gone socks that I cut into rags


I didn't worry about finishing the edges or making it pretty. 


I just did the job, making sure the unfinished edges were sewn down. To darn the other holes, I used two strands of embroidery thread and a paint stirrer as a darning board.


The paint stirrer worked quite well, giving me a firm surface for weaving the threads to make the darn.


It was a lot to do, and it's not perfect, but the variegated blues of the embroidery thread made it fun and the darns sort of match the inner gloves. Plus, I didn't have to throw them away and spend money on new ones. Best of all, my hands are warm again!

If I'd used dark brown embroidery thread, the darning would be almost invisible. But the latest trend is "visible mending," which creates beautiful decorative elements from holes, stains, and tears; very fun. More on that in upcoming posts. For now, I'll close with a link to a page on the Collingwood-Norris website, "Visible Mending: Gloves." Lots of creative ideas there. ❤                                      

January 9, 2021

Mending Socks

Does anyone keep a mending basket? A basket full of clothing items that need a ripped seam sewn, or a patch for a hole? Apparently, mending is the latest cool, sustainable thing to do. Keep old clothes out of the landfill! Of course, I agree. But because I remember a time when mending was looked down on as totally uncool, I feel a little smug that it's something I've always done. 

Winter is a fine time to keep a mending basket handy. Lately, mine has been filled with socks. Of course, hand knit socks must be mended. Too much much time, heart, and soul goes into making them!

The is one of my most frequently worn pairs.

To mend: sock yarn, darning egg, and tapestry needle.

This is just plain darning.

Actually, weaving a patch where the hole used to be.

Done. Inside view.

How it looks on the outside.

The socks I really seem to go through, however, are everyday cotton socks. And because I buy a large pack, they all seem to wear out at the same time. I've never been a fan of the buy&throw-away cycle, so since I was doing socks anyway, I decided to mend some of those cotton socks too. 

Plain darn with matching carpet thread.

Small holes are easier to darn. I used carpet thread in the above photo because I had it. Embroidery thread is a popular option because it comes in all colors (easy to match) and is inexpensive. Sometimes though, the holes in the heels are too large to darn, like the socks in the photo below.

Cutting cotton socks into rags.

These I usually cut into rags, so at least they are still useful. The other day, however, I wondered if it would be possible to patch the holes in the heels. Most of the socks with the heels gone still have good toes.

Sock toe to be used as a patch.

Why wouldn't these make good patches? So, I started cutting off the toes, cutting them in half, and then using them for heel patches.

Patched heel on sock.

I put the sock on my darning egg and pinned the patch in place. A running stitch holds it in place and a whip stitch further secures the edges. A blanket stitch in a colorful embroidery thread might be fun too. I also stitched around the holes to help secure the patch. 

How well will it work? Time will tell! But they're comfortable and I feel really good about getting more wear out of my old socks. 

Do you do much mending?