December 19, 2021

Winning a War (Finally)

With four cats around, our mouse population is kept pretty much under control. I think only once or twice we've seen a mouse in the house (which didn't last long). Even so, every winter we've had mice move into the walls in one particular corner of the house. We can hear them. The cats can hear them. But they stay in the wall so we never see them. 

The problem with mice in the walls is that they gnaw on things. Thinks like electrical wiring. Not good, and not a risk we want to take, so every year Dan has diligently tried to mouse-proof the house. He's blocked off cracks and filled holes, but when the cold weather months arrive, they still get into their hidey spot in the wall. 

We're pretty sure that they've been getting in somewhere around the HVAC. 
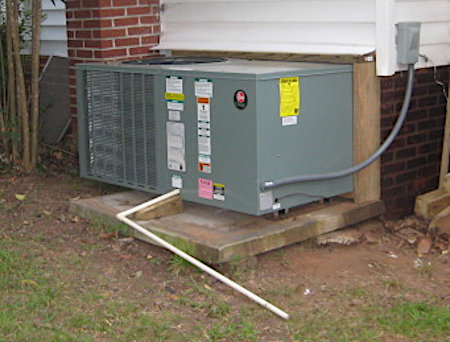
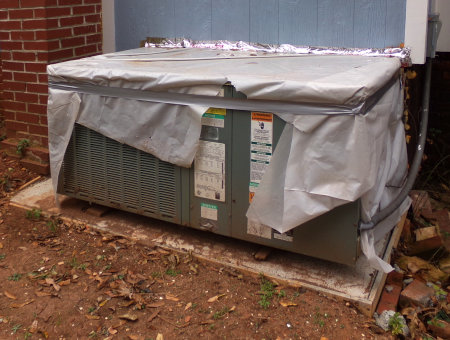
Our HVAC when it was newly installed.

When it was installed, the new unit was set on the old oil heater's concrete pad. It overhung it by several inches, but Dan figured that framing it where it butted up to the house would seal off the crawl space. After years of trying to second guess mousy holes and entrances, Dan finally pulled it out to see what he could do to keep mice out for good.
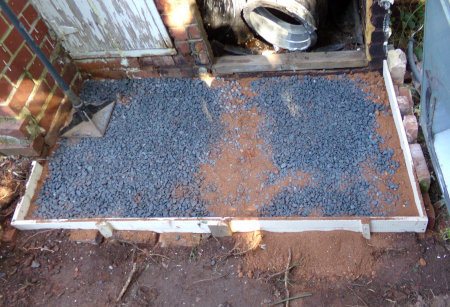
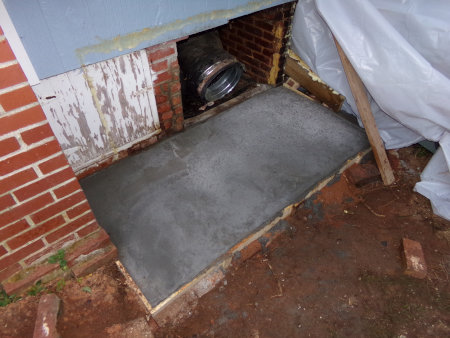
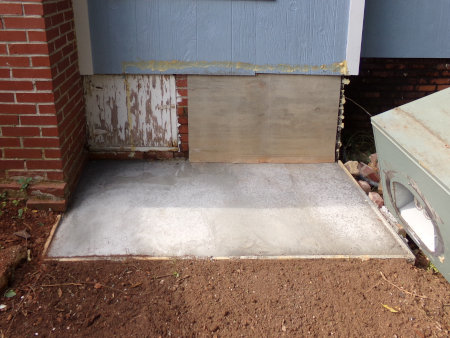
What Dan discovered is that the unit has holes in its framework that are perfect mouse entries. That's how they were getting in. The old concrete pad was removed and Dan poured a new one to properly accommodate the unit.


The other thing he  Dan's solution to completely wall off the HVAC opening in the foundation.

That might be shocking to some, but long-time readers may recall that we gave up using the HVAC years ago. We now live with wood heat in winter and modest natural methods of keeping the house cool in summer. It's been that way for the past six years, and we've acclimated. The bottom line is that winter is cold and summer is hot and that's just the way it is! If needs must, it can always be hooked back up. Anyway. . .

Three months later, still no mice! It worked! What a relief. 

December 15, 2021

Lacto-Fermented Cranberry Pineapple

Last year, I started experimenting with lacto-fermented fruit. One that I made contained apples, cranberries, and pecans, and it was delicious. I blogged about that one. The other contained pineapple, cranberry, and apple, but I didn't blog about that one. Unfortunately, that means that I can't find the recipe! I do believe I bookmarked it, but that was on a now dead computer and so is lost. I found a similar recipe after a lot of internet searching, and ended up combining the two. This time I'm going to document it! Following is my adaptation.

Lacto-Fermented Cranberry Pineapple

  • 12 oz bag of cranberries, chopped
  • 4 small apples, chopped
  • 1 fresh pineapple, peeled, cored, and chopped
  • 1/2 cup sugar, honey, or maple syrup
  • 2 tsp salt
  • 1/2 cup whey
  • filtered water or juice (apple or pineapple) to cover contents of jar

Mix all but the water or juice and place in a half-gallon jar. Pound the fruit down and add water until contents are covered. Put a lid on the jar and let sit in a room temperature place for 2-3 days. Unscrew the lid occasionally, to release the build-up of carbon dioxide. Refrigerate or store in a cold cellar after that. It will gradually become more tart over time.

Fermenting pineapple, cranberries, and apples on the left.
Pineapple core and peel being made into vinegar on right.

One question I have been asked about fermenting fruit is, won't it turn to wine? My answer is no, and here's why. When wine is made, yeast (commercial or natural air-borne) and extra sugar are added. It's the yeast that converts the sugars to alcohol. For example, for my elderberry wine, I add equal weights of sugar and fruit, which gives the wine a 5% alcohol content.

With lacto-fermentation of fruit, no yeast and very little sugar (if any) is added. Plus, the fermenting jar is kept closed (except occasional "burping" to release the CO2), so that will keep most air-borne yeasts out. The process is a primarily a natural bacterial ferment. It's possible that some stray air-borne yeast could enter the ferment, but fortunately (or unfortunately) you won't get any more tipsy on it than from eating a ripe banana.

Lastly, a bit of promotion for something useful. I was able to source organic pineapple and cranberries through Misfits Market, an online ordering and delivery service. I finally joined and have been pleased to economically supplement our diet with organic produce I can't (or don't) grow in our home garden. Highly recommended. In fact, if you haven't joined Misfits yet, use my referral code COOKWME-SD6SOLPHRAB and we'll both get $10 off an order. There are no subscription fees and you can cancel any time.

December 11, 2021

My New Camera

 Thank you to everyone who commented on my Recommendations Wanted: What Is Your Dream Camera? blog post. Here's what I decided!

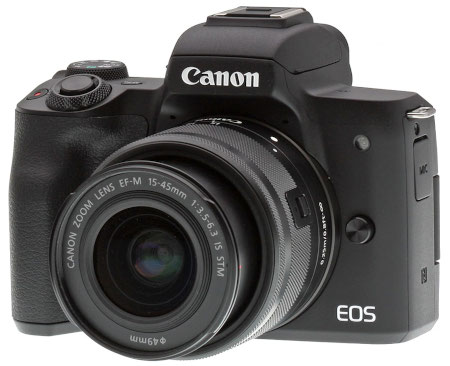
Canon EOS M50

There were too many things I liked about the mirrorless camera to not go with one. The Canon M50 received consistently positive reviews from consumers, camera websites, and serious photographers. The negatives were either inconsequential to me or not confirmed by other reviewers. In fact, it was interesting to me how many professional and serious photographers own and regularly use an M50 for personal use. YouTube comparison reviews for this class of camera usually used the M50 for their standard of comparison. Another plus is that it shoots in both JPG and RAW formats. RAW is the format used by professional photographers for the best quality photos. It's something I'm interested in exploring in the future.

Because it's such a popular digital camera, pricing for it is very competitive. Another plus! I was able to get the camera plus a used Canon mirrorless telephoto lens and two extra batteries and stay within my budget. I'll be looking into a macro lens in the future.

The camera does have an auto mode, which I'll use to learn all the buttons, menus, and icons. I found an excellent YouTube tutorial by Michael The Maven for my specific camera, which takes you through all those things. To practice, I'm going to do an activity I found called "Make 30 Photos."  I'll put these on my photography blog. You can follow that link to see how it's going. 

Once I'm comfortable with my M50, I plan to take a free online photography course to learn the manual mode - A Year With My Camera. I also found some free short classes over at Udemy (where I took Bill Mollison's permaculture design course). That might be a way to sample various teachers in case I want to take a paid course (which are very affordable at Udemy, even for me!) Then, there's always YouTube, of course.

So, there's my winter learning project. One that I'm really looking forward to!

My New Camera © December 2021