Showing posts with label water. Show all posts

March 24, 2022

Interesting Things I've Learned With a Shovel

Once upon a time, I thought of shovels as simply tools for moving things like dirt, compost, or mulch. While it's true that they are, I've also come to understand that they are invaluable learning tool as well. It's my first tool for soil analysis; a carefully removed shovel depth of soil reveals its physical structure: type, texture, color, and presence of organisms and organic matter. Then there was poking around in the dirt where I put my first forest garden. That was almost like an archaeological dig.

This particular episode in my ongoing learning adventures started when I planted two quince seedlings in the goats' browse area. I'd ordered four seedlings, of which two went above the annuals garden. Then I started learning about swales and wondered if I could help those little trees by digging a small trench-like swale between them. What I learned changed everything.

Digging the trench led to an interesting discovery,
which led to transplanting the little quince trees again.

While digging the trench, I observed water seeping through the clay subsoil and filling the trench. Odd, I thought. Even odder was that water sat in the trench for weeks afterward. Unlike our garden swale, which soaks up the water in about two days, the water here was very slow to soak into the ground. 

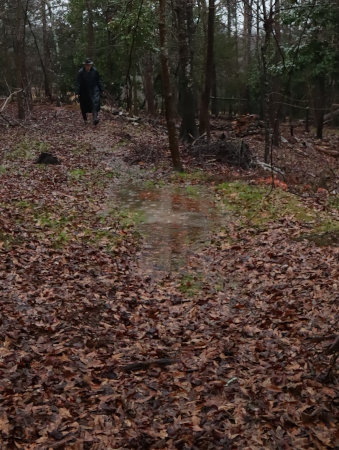
The next good rain we got, Dan and I walked the land to observe what the water was doing in this area. Our property is a series of ridges, possibly man-made in the 1930s when swale making was one of the government projects to give people work. The remnants of these are less obvious on our treed land, but easy to see on our next door neighbors' places.

Ridge and old swale above where the quince trees were planted.

Two ridges below where they were planted.

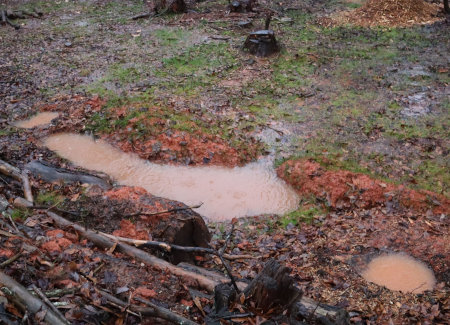
We discovered a series of puddles both uphill and downhill from where I planted the quince trees. However, there wasn't observable overland runoff. Coincidence? Or is something else going on?

After it dried out a bit, I dig another small trench below the first one.

If you can spot her, Meowy is squatted down near my 1st trench.

I dug about this deep and then something interesting started to happen.

Water started to seep through the clay and fill my little trench.

It filled quickly enough to make ripples in the water!

The water fill pretty much stopped when it reached this level.

I dug another trench a few feet over, and it too
started to fill, though not as quickly nor as much.

The next time it rained, I was curious to see what was happening.

This shot was taken looking down on my trenches.

The two lower test trenches had filled with water too (top of the photo).

The trench on the left not only filled, but overflowed.

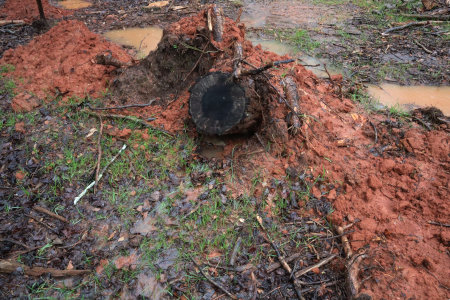
Where did the overflow go? Both around and under the old pine stump.

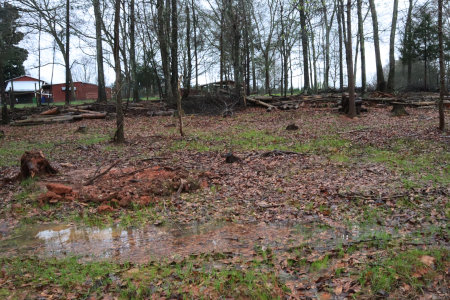
From the fence I could look below the next ridge, and this is what I saw.

The hole was made by an uprooted pine tree and
is in line with the flow of water I'm following.

I've been observing the trenches daily after it rains. My observations are that the two lower trenches drain before the top trench does. And while my garden swale holds water for about two days, the top trench holds water for several weeks.

Conclusions: 
  • There is a lot of water moving underground here, even when it's not raining.
  • Soil conditions are right to retain water here for a longer time than elsewhere.
The unanswered question is where does it originate? From rain, of course, but there's more water collecting in my trenches than is visible to the eye. 

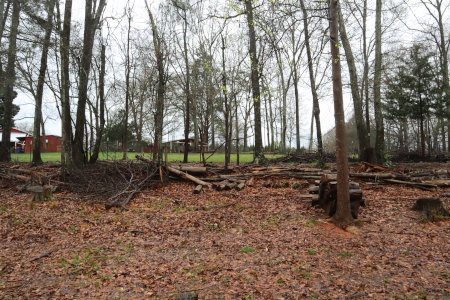
Looking uphill. That's the old swale in the foreground.

Continuing uphill. The green is one of our goat
paddocks. My forest garden is uphill from that.

Over the years, Dan and I have talked about putting in a pond, although we never thought about putting one here. Yet thanks to a shovel, we've made some interesting observations about our land and how it responds to rainfall. Will we ever actually dig a pond? I have no idea. When I took my online permaculture design course, Bill Mollison and Geoff Lawton had really interesting things to say about what happens after the land is re-hydrated by swales and ponds. They also discussed how productive aquaculture can be. So, a future pond for us? It's definitely something to consider.

December 2, 2020

Chicken Waterer Upgrade

I haven't blogged much about our chicks lately. So here are a few photos so you can see that they no longer look like chicks!

They look like Barred Rocks, but they're not.

They're Dominques.

With the girls in the background.

We've kind of gone along with our chickens for years, but recently have been discussing their water. We've tried buckets, pans, and the inverted "fountain type" waterers, but the problem is always the same - the water doesn't stay clean. So we decided to try waterer nipples. They're installed in a water container, like a 5-gallon bucket, so the chickens can help themselves and the water stays clean. Here's what one looks like.


The options were to buy the complete bucket with nipples already installed (expensive), or buy a package of nipples only and install them ourselves (inexpensive). Dan had the perfect container for it, the old 5-gallon water jug he used to take with him when he drove over the road.


We were both a little concerned about how to show the chickens where their water now was. But there was no need to worry! One of the little cockerels ran right up to it and started pecking. They figured it out pretty quickly. 

We bought them from Amazon, here. A couple of them were defective, and you can see in the above photo that the one leaks. But it was a 20-pack and they were cheap enough that we haven't worried about it. 

Now, not only does the chickens' water remain clean, but it's cut down on chicken chore time. We used to have to fuss with the waterer several times a day, but now Dan only has to fill it about once a week. This is so much better! I only wonder why it took us so long to switch!

July 24, 2018

Goat Barn and Garden: Killing Two Birds With One Stone

In my "Goat Barns: Delays and Discoveries" blog post, I showed you how Dan dealt with a massive amount of rain runoff that was finding it's way into the soon-to-be-completed goat barn. Subsequent rainfall proved its effectiveness, but Dan wasn't satisfied with this:

Drainage pipe in front of the goat barn to resolve rainwater runoff problems.

This is the drain pipe in back of the barn. It's protected by an overhang which will serve as the goats' loafing area. However, Dan wasn't sure the pipe was buried deep enough, considering that goats and us will be constantly walking over it. Probably wouldn't be a problem, but neither were we looking for a future "why didn't I ...?" moment.

So he dug it up and buried it deeper. Satisfied with that, he wanted to build up the ground on top of the pipe and gently slope it away from the barn. But with what? Folks used to give away fill dirt for free, but apparently not anymore. We really didn't want to buy dirt, so we brainstormed: Gravel? Sand? Concrete? We really didn't want to buy those either.

"How about clay?" I suggested, because our subsoil is southern red clay.
"But from where?" he asked.We'd have to dig at least 6 inches to get it.
"I've got just the place," I said, because I've been wanted to build more hugelkultur swales in the garden.

So far I've dug three swales in the garden. One at the top of the garden, and two that became beds. Plantings in those two beds have really done well during our dry spells and require less watering. My goal is to convert the entire garden to permanent raised hugelkultur swale beds.

Our brown sandy loam topsoil doesn't hold water, but our red clay subsoil does. With our garden is on a gentle slope, rain runs right through the topsoil, hits the clay, and drains out down the hill. By digging swales into the clay and filling them with organic matter, I can capture and retain some of that rainwater.

Why hugelkultur swales work for me.
Read more at, "Double Digging for Rainwater Collection."

When I dig the swales I save the topsoil to mix with compost, but I don't need all that clay. When Dan needed filler for the drainage pipe I thought the clay would be a good option. I had just the spot picked out.

Double digging to create a hugelkultur swale.
Brown topsoil is about a shovel's spade deep, so I dug another
shovel depth into the clay to collect and hold rain runoff.


That's the earthworks part, the next step is the hugelkultur part. The bottom of the swale, the part dug in the clay, is filled with anything that will hold moisture and decompose slowly: logs, large branches, wood chips, corn cobs and stalks, and wood scraps from barn building.


We mill our own lumber so it isn't treated, and I feel comfortable adding it to the soil. The pile had been sitting there so long that the wood scraps on the bottom looked like this -

Mycorrhizal fungi on home-milled lumber scraps.
Mycorrhizal Fungi

Mycorrhizal fungi had already grown on the wood scraps and were making new soil. I hope it transplants well in my bed!

I used soil to fill in the cracks and crevices until the clay layer of the bed was filled.

Creating a hugelkultur bed to retain rain runoff.
The tufts of green alongside the bed are wiregrass aka Bermuda.

The top layer is topsoil mixed with compost and mulched with leaves.

Hugelkultur swale bed complete and mulched with leaves.
Those are sweet potatoes in the bed on the right, melons on the left.

The next step will be to build a border around the bed. Over time we'll build the soil up with more mulch and compost. 

And Dan's project? The clay was perfect for the task.

Rehoming the clay to reshape the slope under the goat barn overhang.
When it's damp, our red clay is easy to form and shape.

Packed red clay under the goat barn overhang.
Packed down it will dry hard and solve several problems.

The clay worked perfectly, and I have to say it's a good feeling to use our own resources. Best of all, we got two important jobs done.
 

July 6, 2018

Goat Barn: Delays and Discoveries

I had hoped to have photos of the completed hay loft door and barn quilt by now, but we had so much rain during June and this first week of july that Dan didn't want to take down the tarp that's covering the hay loft door opening. That would risk rain blowing in our our hay and we don't want that! Delays are always disappointing, but in this case, the rain was a blessing because we discovered this...

Front door

We had drainage problems. Not only in front of the barn, but in the back too.

Rain runoff also drained in under one of the back walls.

The runoff was coming in under the back wall facing us below.


If we hadn't had so much rain we wouldn't have known. I would have moved the goats in and their straw bedding would have hidden it. Not good.

Part of the problem is the roof on that side.


It has been collecting and dumping a tremendous amount of water on the ground. Putting up gutters is on the to-do list, but we hadn't gotten that far when all the rain came. Even so, Dan wanted to direct runoff away from the barn. So he started in the back and began digging trenches.


Next, gravel and perforated pipe were laid in the trench with filter cloth covering the pipe.


Filter cloth is used to prevent the perforations in the pipe from getting clogged with dirt.

Sheets of filter cloth are also available, but our Lowes only had sleeves.

The pipe extends under the fence, in front of the double door, and out toward the fig trees.


The last thing he did was to level off a spot for a rainwater collection tank and fill that and the trenches with stone.

After we put up gutters they will drain into a future rainwater tank.

The very next day we got another inch of rain and so could see how well this arrangement worked. No more water finding it's way into the barn.

Next the front. Some of the runoff was coming from the barn roof, but most of it comes off the roof on the house. The downspouts empty onto the driveway, which slopes gently down toward the barn. All that roof runoff made huge puddles in front of the barn and drained into its front door. So Dan dug a trench in front too.


Beyond the barn the ditch angles away from it and down the hill.


Dan's handiwork was tested the next day, when we got another inch and a quarter of rain. No more water in the barn! That was a relief.

We're pretty sure the problem is solved now, but gutters will go up next.

July 1, 2018

Mulch Days

While I was on blog break last month, I was busy mulching the garden. Our summers can be  hot and dry, so it's imperative to preserve as much moisture in the soil as possible. We had quite a few rainy evenings toward the end of June, so with the soil moist, it was the perfect time to mulch.

Most years I seem to run out of mulch before I run out of garden. This summer, I made a commitment to myself to get the entire garden mulched. That has meant using whatever mulch materials I can get my hands on. Here's my rundown on mulching materials for the hot, muggy, no-tellin'-when-it's-gonna-rain South. I've listed a few things I avoid at the end of the post.

Dried Leaves

Dried leaves mulching corn.

Dried leaves are my old standby, mostly because we have a lot of them! They do make a good mulch, but they aren't perfect.

Pros:
  • plentiful (if you have deciduous trees)
  • a good way to recycle them
  • decompose quickly (build soil quickly)
  • not as ugly as a few other things
Cons:
  • have to be raked and hauled (time consuming)
  • usually full of acorns, pecans, etc (which sprout and grow)
  • also usually full of sticks
  • can harbor fire (and other biting) ants
  • usually needs a 2nd layer later in the season
  • doesn't deter wiregrass

Summary: Dried leaves have been my primary mulch for a long time. They are the traditional earth mulch and build beautiful soil in the forests! Because we have lots of trees, they are plentiful here and using the leaves as mulch is certainly better than stuffing them in plastic bags to be thrown away.

To simplify the two-part process of raking/hauling and mulching, we've taken to doing the raking in the fall and winter and storing them in our future laundry water recycling bed.

Convenient for leaf storage.

Paper Feed or Seed Bags

Paper feed bags mulching aisles between rows of okra.

I showed you how I was using these to mulch aisles in my "What's Growing in the Garden" post last month. Like everything else, they have their good points and bad.

Pros:
  • excellent way to recycle them
  • if plentiful, can cover an area quickly
  • last the entire summer 
  • smothers grasses 
  • help conserve other mulches like wood chips if not plentiful
Cons:
  • can blow away in a strong wind (have to be weighted)
  • needs a covering layer of fine mulch
  • not good for mulching small areas, such as between plants
  • can be hard to find. Many feedbags are either plastic or plastic lined
  • far from aesthetic!

Summary: I like these for mulching aisles. They go down first and then the plants are mulched with dried leaves or wood chips. The top layer of mulch helps hold them down and hide them.

Wood Chips

Wood chips mulching beans with feed bags in the aisles. They
are deepest around the plants, with a light layer over the bags.


If you've watched the Back To Eden video, then you may think wood chips are the perfect mulch. Maybe that's true in some parts of the country, but in other parts it has both good points and bad.

Pros:
  • can be readily available for free
  • slow to decompose
  • attractive
Cons:
  • if you can't find them for free, they are expensive to buy
  • slow to decompose
  • harbor fire ants and black widow spiders
  • doesn't deter wiregrass

Summary: Wait a minute. Did I put "slow to decompose" under both pros and cons? Yes I did. I like that they last an entire gardening season (or longer), but if the soil must be worked at the end of the season they are in the way. I usually rake them into the aisles until I need to use them for mulch again. Wiregrass growing in wood chips is particularly annoying, and if it isn't removed it will continue to grow until it covers and consumes the wood chips. At the end of the season I rake them into a pile so I can pull the wiregrass. This is why I like first putting down a layer of feed bags or ...

Cardboard

Cardboard between rows of tomatoes

Pros:
  • readily available (usually)
  • slow to decompose
  • can quickly cover a large area
  • smothers grasses 
  • earthworm friendly (used in compost worm beds) 
  • help conserve other mulches like wood chips if not plentiful 
Cons
  • have to remove tape, labels, and staples
  • can't fit them around individual plants
  • can blow away in a strong wind, must be weighted
  • not aesthetic 
  • needs a top layer of mulch to cover
  • flaps can create slits for weeds to grow through

Summary: I really like cardboard for covering walkways or large areas, because cardboard smothers well and helps me conserve my other mulching materials. Large corrugated cardboard boxes works best. I don't use cardboard with glossy color pictures on the box. Most stores are willing to give it away, but sometimes they have contracts with a company that collects and hauls off their boxes.

Straw

Wheat straw mulching tomatoes.

I don't often use straw, because I don't have a free source for it. But I had some leftover after we used it as bedding when hauling goats. So it made its way into the garden as mulch.

Pros:
  • easy to handle and work with
  • quick to mulch with
  • not usually free, but can be cheap
Cons:
  • can contain seeds which introduce more weeds
  • doesn't deter wiregrass
  • price has been going up and can be expensive to buy from a garden center.

Summary: I first used straw for mulch when I had rabbits. In winter I'd stuff their hutches with straw, which would fall out the wire cage bottom along with their manure. What I learned, however, is that all the grain seed is rarely removed. I inadvertently introduced oat grass all over my garden and had a heck of a time getting rid of that!

Newspaper

I admit I haven't used newspaper in a long time, because I don't have a free source for it. Most of our newspaper is saved for fire starting.

Pros
  • decomposes quickly
  • good way to recycle it
  • can be readily available for free
Cons
  • must be sorted to remove glossy ads
  • requires a lot to get a good thick layer 
  • needs less fine mulch materials for a covering layer

Summary: Newspaper works best in a thick layer. A couple of sheets decompose quickly in moisture which means it doesn't keep weeds down for long.

Living Mulch

This photo of clover as living mulch was taken last year.

AKA ground cover, I call it living mulch if it's growing in garden beds and aisles.

Pros:
  • builds the soil
  • aesthetic 
  • can be used as green manure after harvest
Cons:
  • have to buy seed every year
  • not always dense enough suppress weeds
  • has to be timed properly so that ground cover and crop grow together and weed seeds don't get a head start and dominate 
  • seasonal, i.e. grows either during warm or cool weather
  • hard to maintain in perennial beds. For example, my chicory bed is mulched with violets, but I've had blackberry and honeysuckle vines coming up there.

Summary: I love the idea of living mulch but have had mixed success. If it grows densely, like in the above photo of my melon bed last year, then it works well. If the seed doesn't germinate well, then I only get a sparse covering which isn't much help as mulch. Timing is important too, and that's something I'm still learning. If the seed isn't planted at the right time it can either interfere with crop seed growth, or can be overtaken by weeds first. I think it's best use is with field crops where the area is too large to mulch, but I'm still negotiating a learning curve with that.

My biggest mulch mistake...

... was using landscape cloth. It was expensive to buy and time-consuming to put down. Then, even with a good thick layer of wood chips the wiregrass grew right on up through it. And if that wasn't bad enough, the wiregrass secured the cloth to the ground! It was impossible to remove. Dan finally put the tiller to it to chop it up, but four years later I'm still picking up bits of the stuff. You can read all about that fiasco in this post, but needless to say I do not recommend landscape cloth!

Plastic is another one I don't recommend. I know commercial organic growers use it, but it IMO it has more counts against than pluses to outweigh them.
  • It's a petroleum product
  • It doesn't decompose, it deteriorates
  • Must be discarded when replaced (not good repurposing material)
  • It doesn't breathe so when it heats up, I can only imagine that it kills every soil organism beneath it. 
  • Rain can't penetrate it so
    • can't renew soil moisture
    • where does a gullywasher go when the ground can't absorb it???

So that's the rundown on my experience with mulch. Now it's your turn. What's your favorite way to mulch? Any lessons learned? Any tips for the rest of us?

Mulch Days © July 2018 by Leigh