September 28, 2012

Them Ain't Weeds, Them's Forage

The view of our grain field these days, looks like this...

Photo taken from the path between the garden and the house

In the background, you may be able to make out the field corn, drying on the stalk. It will be ready to harvest soon. In front of that are the cowpeas. These too are beginning to die back, though they are still producing like crazy. On the front right, is where we planted our winter wheat last autumn.

Photo of our wheat field last January

We harvested about half of the wheat we planted. What you see in that top photo, was the section left unharvested. So much of it had lodged (flattened), and was overgrown with weeds, that it was near impossible to scythe. I said, 'let's just leave it and see what happens. Maybe the straw will create a natural mulch and the wheat berries will reseed the area in a new growth of wheat'. Now it looks like this...

Same field, now overgrown with weeds and no wheat in sight

One of the things we're concerned with, is whether or not our five acres is manageable. I'm gradually coming to realize however, that our idea of manageability carries with it a certain mindset about the way things ought to be. Our concept of well managed includes looking like we've got things under control. A near half acre full of weeds, like this one, looks out of control. That isn't part of the definition.

Better view of the corn and cowpeas

Last year after we harvested the corn, we turned the goats and chickens into the field. They feasted! On the corn plants and especially on the "weeds." I had honestly never seen our Nubians look so fat. And healthy. There's a truth here, that often seems to be overlooked, that goats are naturally foragers. Because of that they are often recommended for brush control. Goats thrive on "browse," i.e. weeds, and shrubs, and bark, and leaves; all the things that don't belong in a well managed pasture or grain field. But beyond using scrub goats to eliminate brush, management techniques for modern goat keeping revolve around pasture, hay, and "concentrates" or grain. The problem is, these aren't the things they thrive on. In fact, it seems that folks on the goat forums are constantly discussing health issues related to diet and mineral deficiencies.

In Homestead Master Plan, 2012 Revision, I mentioned what we were thinking about, in terms of rotating field crops, animals, and pasture/ forage areas. That came about because of this very field. It had been neglected for so many years before we bought the place, that sapling trees and perennial vines were well established. It has been a battle to try and grow anything here because of that. Since we don't have heavy duty plowing and cultivating equipment, it makes more sense to partner with animals to do the job for us. It's a win-win, because goats are healthier on weeds, the chickens help with the seeds, and the pigs (coming this spring) will root out and feast on the roots as well as the weeds. Indeed, they will fertilize and till the soil for planting.

All of this is important, because if we are going to raise all our own animal feeds, then it makes more sense to utilize an animal's natural diet, rather than try to replicate a homemade version of a commercial feed system. Our weeds are a ready resource for that natural diet, even in their hay. This is why our  goats deem the pretty, pure grass, boughten hay merely okay, but fight over the weedy hay we harvest from our own pasture.

Dan practicing the technique.
Dan scything the pasture, May of 2010

Weeds will grow. They will take over a garden, a yard, a pasture, and field crops. What we've been needing, is not a way to conquer them as weeds, but a new way of looking at it. They aren't unsightly unwanteds, they are valuable, nutritious forage. There are a few I have to be on the lookout for and eradicate, those poisonous to goats, but all the rest are a valuable resource. And right under our very noses.


September 25, 2012

My 1st Repeatable Cheese

I didn't make any hard cheeses this summer. One reason is because we don't have a lot of surplus milk. Almost all of it has gone for yogurt and mozzarella. That doesn't mean we've been without cheese. I made 20 hard cheeses last summer and we're just over halfway through all that.

Some of the goat milk cheeses I made last year

Why so slow? Well, these were my first attempts at cheese making and to be honest, the first nine weren't all that great. Sad, but not a complete disappointment, because I knew I would have to develop the knack for making cheese, much like I did when I learned to make bread or bake with sourdough. I know to give myself some room to learn and make mistakes. Even so, I've figured out several reasons why these first cheeses could not be categorized as successes. One, I made the first eight with hand skimmed milk. The cream really makes a difference in flavor and texture. I didn't realize this until I had dutifully eaten my way through those cheeses (Dan didn't help me but the chickens did), Then I got to the first cheese made with whole milk. What a difference.

The second reason is the amount of salt. I was skimpy on the salt at first. Recipes give quite a range for how much to add, and I wasn't sure where to start. So I started on the conservative side. Although cheese is said to be a high sodium food, it doesn't really taste salty the same way that potato chips do. But the salt is there and makes a huge difference in taste. Once we got to the cheeses that had more salt, the taste improved as well.

Now, cheese number 10 was promising. I blogged about that one ("I Think She's Got It!"). It gave me hope that the next few would be even better. Still, we were slow to finish it. Then I cut into cheese number 11.

Cheese #11

Sharp (it was aged almost a year after all), but really good. Good enough that it was quickly eaten, and good enough to want to try to make again.

Fortunately I kept a cheese diary and made good notes. I recorded ingredients, times, amounts, and temperatures. I followed the same basic recipe for all my cheeses last summer, using the hard cheese directions from The Little House Cookbook. I have Ricki Carroll's Home Cheese Making, but I want to try to develop recipes without using purchased mesophilic and thermophilic cultures. I wanted to see if I could make a good cheese from what I have available: whey or buttermilk, for example.

Like almost all my cheeses, this one was made with a gallon and a half of whole raw goat milk, and 2 cups of whey from the previous cheese as the culture. There are several differences however. For cheese #11, I added a tablespoon of whole milk goat yogurt to the whey. I also made a note that I forgot to cook the curds until "squeaky," i.e. they literally squeak on your teeth when you bite them. This is a standard cheese making step, so it isn't something I would have thought to omit as an experiment. I also brined it, like I do my mozzarella. That was in addition to a teaspoon and a half of salt added to the curds before putting it in the press.

The question is, can I duplicate it? Well, I'm certainly going to try. I have all the times, temperatures, and steps in my notebook. Trouble is, hard cheeses have to age so it will take awhile to find out if the repeat is a success (slow living at it's finest). Still, I'll stick with this recipe for awhile, and make several by it, to see how these turn out. If I can duplicate it, we'll have our first homestead cheese worthy of a name. I'm not necessarily looking to have a huge repertoire of cheeses, just a few that we really like.

I have plenty of cream in the freezer for butter, so I'm going to save up whole milk to try this recipe again. Wish me good providence!

[UPDATE: Oct. 2012 - I did indeed try this cheese again. For the recipe and a photo tutorial, click here: Cheese #11 - The Recipe.]


September 20, 2012

Pea Pickin'

Cowpea pickin' that is. This summer I planted cowpeas (aka Southern peas) in one third of our half acre grain field.

Ozark Razorback cowpeas in a 5 gallon bucket
5 gallon bucket not quite full of cowpeas

About a month ago, 5 rows almost filled a 5-gallon bucket like you see above. Several days ago, it only took 3 rows to do the same. I've got a total 18 rows and all the plants are loaded with pods in various stages not to mention load of blooms.

The variety is Ozark Razorback. It is a small cowpea that I plan to use in feed mixes for the goats and chickens. We haven't tried them yet, but we can eat them too. I got a seed packet from Baker Creek Heirloom Seeds and planted it last year as a seed crop. I saved all that seed for a field planting this year.

Ozark Razorback cowpeas

Cowpeas are said to be about 23% crude protein. Not as high as soy, but certainly easier to process and without the phytohormones. The protein content is important to me because one of my goals is to raise all our own animal feeds. This is still in the experiment and learn stage, and this is the first time I've grown more than a garden bed of cowpeas.

In regards to protein, I have noticed a huge discrepancy in what the charts say, and what the feed bag labels say. I've been feeding my goats a mix of wheat, oats, black oil sunflower seeds, and alfalfa pellets, barley when I can get it (which is rare). I buy these in 50 pound sacks and mix them myself. All the charts say wheat and oats are around 12% crude protein (CP). My feed bags say minimum CP is around 8%. That's a pretty big difference. Are the feed companies merely covering their bases by giving a minimum guarantee? Or is that a fairly accurate assessment of the protein these grains actually contain? I do know that the nutrient content of our foods has been decreasing over the years, because of the way modern conventional farming handles the soil.

Many cooperative extension services offer feed and forage testing. Mine does, so using the Pearson Square, I  calculated a mix of feed store wheat and oats, and those homegrown cowpeas. My target was 16% crude protein, the recommended CP for dairy goats. That came to roughly equal portions of each. I mixed a small sample and sent it off.

calculated feed mix using Pearsons Square
I used the free online Pearson Square calculator, here
Open image in its own window to enlarge

As an aside, I confess I've questioned why the recommended crude protein for goats is higher than what they can naturally forage. Then I read in Pat Coleby's Natural Goat Care, that too much protein causes health problems. She recommends 14%. It's something I need to research further in the future.

My results were emailed to me about a week later. They indicated a CP level of 14.2%

feed analysis for crude protein
Right click and open in it's own window to enlarge

It's not what I aimed for but I am not displeased with this; I think it says something good about my cowpeas, even though our soil is nitrogen deficient. While this is not the recommended 16% for does in milk, it's closer for a home mix than I had before.

The results don't explain to me what the second column means, 16.7% at 100 percent dry-matter. Nor do I know the exact CP content of the individual ingredients. That will be something I'll have to have tested eventually. The results do tell me that the cowpeas can help provide what is needed. The test was inexpensive ($6) and will be an excellent tool for not only making sure I'm feeding what my animals need, but also making sure my soil fertility is good.

Fortunately, these peas are fairly easy to pick, because the pods shoot up on stalks above the leaves.

cowpea pods on stalks

They will keep producing until frost kills them. The few plants nearest the corn, managed to climb a few corn stalks.


That made them even easier to pick. I originally thought these were half-runners, but they did spread more than I remembered in the garden. Next year I'll try planting them in with the corn.

Two questions remain. Firstly, how much will I need to grow to have a year's worth? I'll have to wait and see how long this year's crop lasts to answer that. The second question is how to best shell them all.

Only the beginning....

Last year I did it by hand, this year I have too many. I've looked into shellers and can either opt for a small hand, "Mr. Pea" sheller for around $40, or a larger electric model. The smallest of these runs just under $300 ($400 if purchased from the manufacturer). I also found a homemade pea sheller at Mother Earth News. One pod at a time though. Seems easier just to do it the regular by-hand way.

I ordered a little "Mr. Pea" sheller, which can be hooked up to a small hand mixer as well as operated by hand. That might be worth a try first. Like all equipment, the question is, is it worth it in the long run. I don't mind hand shelling dried beans or peas for supper. Shelling hundreds of pounds to feed our animals? On the other hand, how much do I want to spend for a tool I'll only use once a year? Right now my pocketbook dictates what I get. After this year I'll have a better idea of whether or not it's the best choice. [UPDATE: The sheller works great. See my post "Cowpea Sheller" for more details.]

Related Posts:
Food Self-Sufficiency & Animals
More Thoughts On Growing Animal Feeds

Pea Pickin' © Sept. 2012 by Leigh 

September 17, 2012

Goats' Milk Butter For Two

Remember this photo from "Ziggy Milk, Ziggy Butter, Ziggy Mozz"?

homemade goat butter on homemade pumpkin muffin
Goat butter on freshly baked pumpkin muffin

Farmer Barb (Life Rock Farm) and Brenda (A Separate Path), were interested in how I make my butter, so in this post I'll show you my method. I'll also share everything I've learned about the process, both through research and experience.

First, a little about raw goats' milk.

You may have read that cream cannot be obtained from goats milk because it is naturally homogenized. Is that true? In my experience, no, this is not true. Cream does indeed rise on goats' milk and can be skimmed. Why then, do folks (even goat owners) sometimes say it's naturally homogenized? There may be several reasons.

The fat globules in goats' milk are smaller than those in cows' milk. This is one of the reasons why goats' milk is more easily digested than cows' milk. (This has nothing to do with lactose intolerance, which is the inability to digest lactose, a milk sugar). Being smaller, the fat globules are slower to rise, but also, those in goats' milk apparently do not cling together as readily as the fat globules in cows milk. I find it has to sit in the fridge for several days to really get enough to skim. Those who use their goats milk within 24 hours, likely won't see a cream line, which may contribute to the idea of natural homogenization.

Regarding freshness, depending on cleanliness and how quickly it's cooled, raw milk will stay fresh for longer than you'd think, like a couple of weeks. This brings up another point about raw milk, it doesn't actually spoil, it sours. When pasteurized milk goes bad, it putrefies. Anyone who has sniffed a jug of old store bought milk knows what I mean. Raw milk on the other hand, will smell sour.

Many an old time recipe calls for sour milk and saleratus (baking soda) to leaven baked goods. The reaction of an acid (sour milk), combined with a base (baking soda), creates carbon dioxide bubbles, which cause the batter to rise. On the one occasion I had milk that soured, I saved it for baking. Soured, it keeps for months and makes absolutely heavenly chocolate cake. It can also be fed to chickens and pigs.

Another reason for the idea of natural homogenization, may be the breed of the goat. Some breeds produce more butterfat than others. Individuals may vary, but in general, Nigerian Dwarfs and Kinders produce the highest amounts of butterfat, 6 - 7% plus. Nubians come in next, with 4 - 5%, followed by LaManchas with 4+%. Most other breeds produce less than 4%. Butterfat is what gives richness to the milk, plus rises to the top as cream. Lower butterfat will mean less, and perhaps negligible cream.

Making Butter

I have small goats, small amounts, and small needs. At this time in the season, I'm getting about a quart of milk per day. This is strained into wide mouth canning jars. I find the wider mouthed jars easier to skim the cream. After the milk sits in the fridge for about 3 to 5 days, I use a slotted spoon to skim off the cream. It is thick and rich.

Hand skimming cream from raw goats milk. We get plenty of
cream for whipped cream and butter, for just the two of us.

I skim all my milk except what I'm saving to make hard cheese. Last year I learned that skim milk cheese in nowhere near as tasty as whole milk cheese. Mozzarella, on the other hand, is fine with my skimmed milk. Hand skimming doesn't get every drop, but that's okay. I get enough for what I need, and it leaves some for richer milk, yogurt, and mozzarella. If I wanted all the cream or had more milk to deal with, I'd likely consider a cream separator. These can be purchased in either electric or manual models, but cost hundreds of dollars. That doesn't make sense for us at this time.

I put the cream into wide mouth pint jars and store in the freezer.

Pint jars of cream are stored in the freezer

I keep adding until the jar is full. When I need to make butter, I take one of the jars from the freezer and let it thaw on the countertop. It needs to be about room temperature to make butter most efficiently. Colder, and it takes longer. We like ours from sweet cream, but some people prefer it cultured. More info on that, here.

To churn, I pour the cream into a quart jar with a tight lid. This gives plenty of room for the cream to slosh around. I just shake the jar by hand. With only a pint of cream, it doesn't take too long, the batch you see below took 6 minutes.

Butter in a wide mouth quart canning jar.

At one time I had a gallon size butter churn. Because I hadn't used it for years, it was given away during one of my many moves <sigh>. It would actually be too big for the amounts I make now, but I still wish I had it anyway. An alternative would be in a blender.

Washing the butter and working out the buttermilk

The next step is washing the butter. Because the cream was room temperature, the butter is soft and I find working it in cold water easiest. During summer months our city tap water is not very cold, so I put a pitcher of water in the fridge to use for this step. By pressing or kneading the butter with a scraper, all the buttermilk is worked out and it will keep for quite awhile. How long I couldn't say for sure because we use ours up in several weeks. Butter can be frozen, also clarified (ghee) to increase shelf life. I also saw a Butter Keeper that has me curious.

Once is rinsed and drained, I work in a little salt, and pack it into an small lidded crock given to me by my grandmother.


If I had butter molds, I would likely use those for table butter.

Goat butter is white, because goat milk contains no beta-carotene. It is absolutely delicious though, so I never give the color a thought.

There are quite a few links in the post, but here are a few more if you're interesting:

You can have a fingertip-ready copy of this information and a whole lot more in my eBook, How To Get Cream from Goats' Milk: make your own butter, whipped cream, ice cream, & more. Follow the link for a complete listing of chapters plus where to get your copy.
Goats' Milk Butter For Two © Sept. 2012 

September 14, 2012

Firewood Storage & Privacy Too

The fence is up and firewood is being stacked.
I'm pleased to say that we've made great progress on our privacy fence / firewood storage project. The fence is up and Dan is working on installing dividers for stacking the the firewood. Each section is the width of a fence panel (8 feet). We fill them as he gets them up, starting with the cured wood first. Looks like we'll have to add a second row in front of the one you see. Still to do is a roof of some sort to protect the wood from rain and snow. And of course there's still plenty of wood to cut and chop.

Here are a few shots to show the difference the fence made. Here's the public side from the street ...

Street view of our yard before the fence. When the brush isn't
there, you can see all the way to the chicken yard  & goat shed

After. I'm hoping it helps buffer our barnyard sounds

And the other side, looking toward the street from the yard....

Before.

Previously our neighbors had a view of our entire yard and beyond from their dining room window. I might not have thought anything of it, except he was often commenting on what we were doing. I'm sure it was meant as polite conversation, but it made me uncomfortable to know I was being watched. I do know what it's like to be interested in what the neighbors are doing. I know what it's like to want to report the neighborhood news, to comment, to analyze, to criticize, i.e. gossip, when really, it's none of my business. I'm not saying all this is the case, but there were other incidents. Remember the guy who stopped by to tell Dan his wife thought we were a couple of hippies? Anyway....

View toward the street with the fence.

Now I no longer have to worry about being spotted in my bathrobe or nightgown at first light, when I need to check on a ruckus in the hen house, or a doe due to deliver at any minute. But besides providing privacy and a place to store firewood, we now have a sense of a defined back yard. I like that.

Right now the fence stops at our driveway. Eventually we'd like to finish it to the house and add a gate. If we fence off the other side of the house, the entire yard would be fenced, perhaps for another dog. Or to keep wandering chickens from getting too close to the street. That won't be anytime soon however. In the meantime, I'll enjoy what we've got.


September 11, 2012

Garden Think: Things I Have to Change

I had plans to work in the garden the other day. Fall planting is underway as well as finishing the summer harvest. And of course there are always weeds to pull. As it was, I sat at my computer, watching another 7/10 inch of rain drizzle from the sky. So instead of working in the garden, I worked on the garden. Here's what I've been thinking I need to change next year, along with a few random garden photos.

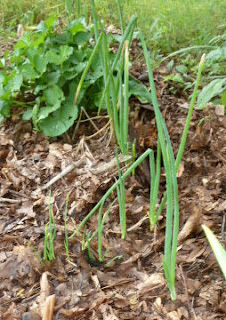
Egyptian Walking Onions with new sprouts
Egyptian Walking Onions are beginning
their fall growth. Note the little guys
from summer's bulblets.
1. Mulch more. Of course I say this every year because every year I either run short on mulch materials, or don't get it done before harvest commences. It's been that way for decades and you'd think I'd have learned my lesson by now. Still, some decisions have been made that should help. I haven't utilized cardboard much because Dan doesn't really like how it looks, i.e. kind of tacky. But it's results we need more than aesthetics, and he sees that it works, especially for the paths between the beds. In the beds themselves, heavy leaf mulch. I also find that with the companion group plantings, the soil is very well shaded so that very little else can grow there.

2. Never leave the ground bare. Too many times this year we've gotten soil turned, only to have planting delayed (often by rain). I need to either plant something or cover it. Immediately. Preferably plant something. Bare ground never stays that way because, as the saying goes, nature abhors a vacuum. If I don't plant something I want, I'll get something I don't want.

Golden giant amaranth seed heads
Golden Giant amaranth (or is it Giant Golden, I can never remember)
from saved seed. I feed whole heads to the chickens.

3. Simplify our diet. If I can do that, I can simplify what I grow. Every summer I've experimented some with different vegetables or varieties. It's great when something new does really well and we like it. If it takes too much fussing, we probably don't need it all that much. I now have a pretty good idea of what will grow well here, and that's what I need to concentrate on rather than trying to nurture things that don't grow well.

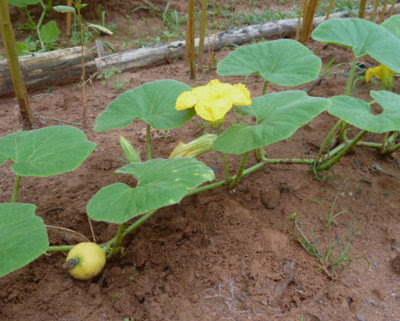
Orange Bulldog pumpkin growing under the amaranth
Under the amaranth I planted pumpkins. This cultivar is Orange Bulldog,
developed by the University of Georgia. I have a few more growing too!

4. Rely more on seasonal foods. Not that we don't already do this, but I'd like to freeze and can less, especially veggies, because I can harvest root crops all winter long. It will mean more fresh eating, less work in preserving, and more room in my freezer. Pluses, all.

Vardaman sweet potatoes in bloom
Sweet potatoes are one of the things that
grow well here. These are Vardamans in
bloom. I found they are great keepers.
5. Biennial rotations of varieties. Squashes, for example, or melons. One year I'll plant cantaloupes, the next year water melons. We can only eat so much melon and this will make it so much easier than trying to prevent cross pollination. That will simplify seed saving.

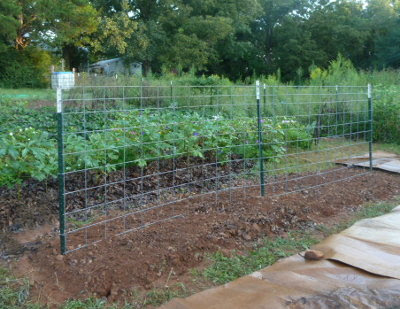
6. Can the tomato cages. Every year I seem to have problems with things that need support like pole beans, peas, and tomatoes. Either they get too tall, or too heavy, or too something. I recently saw a photo on the internet, which inspired me to consider how to use cattle panels as trellises. They are taller and sturdier than conventional tomato cages, and movable. Dan put three t-posts into a bed, and we tied a cattle panel to it....

cattle panel as a garden trellis
Cattle panel trellis installed in newly planted fall English peas & turnips

The t-posts will be permanent in the beds, and next year we'll outfit more beds the same way. When I plant something that will need a trellis, I can tie a cattle panel to the t-posts and not have to worry about my tomato cages falling over or my bean poles leaning.

Clemson Spineless Okra beginning to bloom
I planted okra late. Still, if 1st frost holds off,
I should get enough to can gumbo. The variety
is Clemson Spineless from saved seed.
7. Grow more, save more seed. I used to think I should only plant what we needed, but without being able to predict germination, insect and disease damage, etc. extra sowing is a necessity. Some years there's an abundance, some years barely enough for a meal or two. I've learned to not worry and go for an abundance because with animals, there is no waste. In fact, the more I grow, the more there is for them. I also found myself collecting tons of seeds. Why save a half gallon of lettuce seed when we can never eat that much. Of course, if something does poorly one year, extra seed is a necessity. In a good year, seed is plentiful. Extra seed however, can be sown in those empty beds (see #2), and pasture areas à la Sepp Holzer; for us, for our animals, and to build our soil.

8. Indoor seed starting. Actually, because of our long growing season, I've done okay direct sowing almost everything. True, tomatoes are late, but I don't know actually need the earliest possible tomatoes. Or melons. Or whatever. It's more important to have at least something to harvest and eat. On the other hand, if something doesn't make it (like this year's sweet peppers and eggplants) I don't know until it's getting a bit late in the season. Oh well. Simpler eating, right? Still, with my companion group beds, I need everything to reach mulchable height about the same time. Slow germinators need to be started early for that. This is something I need to work on.

antique marigolds propping up Amish Paste tomatoes
Even though the tomato cages toppled from the weight of the tomatoes, my
antique marigolds came to the rescue. They propped up the tomato plants!

These are my thoughts so far. They're not so much gardening goals as they are self-sufficiency goals. With an overall goal of becoming as self-sufficient as possible, we're finding we have to focus on the majors and simplify the rest. If the only thing I had to do was the garden, I could get as exotic as I want. The garden is important, but it's only a part of what we do here. Since there isn't time to do everything, I think these changes in the garden will help.


September 8, 2012

Chicken Little's Close Call

The other day I was heading toward the chicken yard with the wheel barrow, when I heard the chickens set up a fuss. This isn't uncommon. They will carry on when they lay an egg, or if a hen wants a nest box occupied by another, if the neighbor sets off fireworks, if a motorcycle drives by, or if anything they think is suspicious, is going on around them. Cowboy, our rooster, either sets it off or joins in, and tends to be a bit of an alarmist. In fact Dan has taken to calling him "Peter Panic." But he is excellent at spotting hawks.

our Buff Orpington rooster is always on the alert for hawks
Cowboy and company (Buff Orpingtons)
It's because of hawks that we always go check it out when he sounds the alarm. Last summer we lost three chickens to hawks. From this we learned we are located along a hawk migration route. Spring and fall we see a lot. Because of that, Cowboy is always on the alert.

As I neared the hen house, I saw all the chickens clumped under the big cedar tree in their yard. Not a good sign; hawk for sure. I quickened my step. Sure enough, there on the ground was a hawk! Next to it, staggering around like she didn't know what hit her, was Chicken Little.

Not that screaming and yelling and charging a hawk does much good, but that's what I did. The hawk simply flew up to a branch in the pecan tree that shades the shed. It quickly became apparent that I was not going to let it have Chicken Little, so off it flew.

Chicken Little with treated wounds after a hawk attack
Chicken Little after her close call
Chicken Little (who is almost full grown) was dazed and stumbling around. I quickly caught her (still don't know if she's a she or a he, I think a she). Her head and beak were bloody. The wounds looked superficial, but I wasn't sure whether or not the beak was broken. Dan, whose read quite a bit about hawk behavior, says they usually attempt to break the neck at first strike. I quickly checked her wings and legs, and then took Chicken Little into the house. I bathed away the blood and applied triple antibiotic ointment. Nothing appeared to be broken, but I still didn't know about her beak. I'd have to wait and see about that.

I put her in the dog carrier with food and water for the night, and went back to the shed. The chickens were still under the cedar tree, fussing. There was the hawk, on the ground in the same spot. It flew off when it saw me coming.

The next day I let Chicken Little out of the carrier and tossed down some scratch. She could eat just fine, so the beak wasn't broken. My concern turned to the other chickens. Chickens are extremely ruthless to their own kind and with those fresh wounds and scabs on her head, I was afraid they would attack her themselves. Plus, being the littlest and youngest, Chicken Little is already at the bottom of the pecking order. She is the only one who hadn't experienced hawk attacks, and didn't know to take cover when Cowboy sounded the alarm.

All that day she was rather subdued and quiet, taking frequent naps. I kept her in the goat shed, shutting the gate to keep the other chickens out. The goats couldn't get in either, but with nice weather they weren't any worse off for it.

Yesterday she ventured out again.

Buff Orpington chicken and Nubian goat
Chicken Little and Surprise

I couldn't keep her separate forever, so I just observed after letting the rest of the flock out to free range.

Letting the chickens out to free range
Chicken Little in the foreground. The rest of the flock about their business.

She already knows to stay out of their way, and there were no worse squabbles than usual.

We do talk about a chicken tractor with a mesh top to protect from hawks. We see other problems with that, so the jury is still out. Animal housing is at the top of our discussion list these days though, so we'll be making some decisions soon.

Chicken Little's Close Call © Sept. 2012 

September 5, 2012

Ziggy Milk, Ziggy Butter, Ziggy Mozz

Ziggy, one of my Nigerian Dwarf does
Ziggy

Ziggy milk. Icy cold with peanut butter chip chocolate bar cookies

homemade goat butter on homemade pumpkin muffin
Ziggy butter on freshly baked pumpkin muffin.
For more information on goat butter including a how-to, click here.

Ziggy yogurt with home canned figs

goat milk yogurt cheese & homemade blueberry jam on toast
Ziggy yogurt cheese & homestead blueberry jam on toast

Ziggy Mozzarella

Homemade pizza with homemade mozzarella
Ziggy YUM!

In all fairness, Ziggy shouldn't get all the credit. She gives most of the milk, but Edy & Nessie contribute too.

2 Nigerian Dwarf does
Edy & Nessie

Now all I need is an ice cream maker ;)

Related Post:
Homestead Whipped Cream (From Goats!)


September 2, 2012

Homestead Master Plan, 2012 Revision

Although we continually seem to be analyzing what we're doing and evaluating what we've done, once a year we try to put it all down on our master plan. We drew up our first one in 2009, the year we bought the place. Every year we get to know the place a little better, and what we want to do with it a little better. I actually didn't think we had many changes to make, but after talking about things, we did make a few. Things in red on the sketch below are what's on the drawing board.

Revised homestead master plan for 2012
Copies of all our master plans are available in my book, 5 Acres & A
Dream The Book: The Challenges of Establishing a Self-Sufficient
Homestead
. For more information, click here.

The biggest change is in where we've been growing our grain. (Compare to last year's master plan, here.) This year, it's labeled "pigs". While it seemed a logical place for grain at the time, the ground was neglected for so many years that it seems impossible to overcome the morning glories, blackberries, kudzu, and other unwanteds established there. Goats do a good job of brush clearing, but after reading Sepp Holzer and Joel Salatin, the best solution for getting to the root of the problem seems to be pigs.

This would not be a permanent area for pigs, but will be where we'll put them this spring. If that goes well and we want to continue with them, rotating their location with temporary fencing makes more sense. Ever since reading an article about Australian pasture cropping in the July issue of Acres USA, I've been wondering why we couldn't modify the concept with pigs; fence off a pig area in one of the pastures every year, and follow with a grain & legume crop right there in the pasture (keeping the fence up of course;). After harvest, the goats and chickens feast on the remains and we can reseed as needed for pasture.

Our previously designated pig area, will be fenced for a doe browse. We will enlarge it by extending existing fences to meet along the property line. This will make a triangle shaped area, as you can see on the plan. This area is of particular concern because it is loaded with invading kudzu and poison ivy, all creeping our way. The goats will keep all that at bay.

A barn (or maybe barns, we haven't decided yet), is always under discussion and we really haven't settled on "the" spot. A central location makes the most sense, with fences and gating to give all animals access to various pasture and browse areas. Having a pie shaped piece of property makes that a little more challenging. Our current outbuildings (one for animal housing and one for workshop/tool storage) are becoming increasingly dilapidated with use, and eventually we're going to have to replace them both. Our carport is also in deplorable condition, so that neither of us will be surprised if we wake up one morning and find it tumbled down!

Current thinking is to tear down the "coal barn," and rebuild in the same footprint. This would become a real workshop for Dan on one side, and a milking parlor over the existing concrete slab. We could run a water line to it so I'd have running water there. (Add a small point-of-use water heater and it would be absolutely deluxe). We could also add a carport onto the front. The old carport could become an outdoor room, with an outdoor oven, barbecue grill, smoker, picnic table, etc.

Loafing shelter and hay storage would be a separate building. I'm thinking movable fencing could make pens as needed (kidding, kids, etc). Poultry housing would go here too, though not the guineas. From what I've read about guineas, home is home is home. They don't take to being moved around so I figure we might as well start them where we want them, near the buck barn because the woods are full of ticks.

Fencing is an ongoing project. We've pretty much finished the privacy fence / wood storage, and eventually hope to add a gate across the driveway and finish it to the house. We'd also fence the other side of the yard so that if we ever get a dog again (sigh), he'll have run of the back yard.

The other fencing concern is the red line you see on the left side of the property. Currently it's wire mesh and a row of crepe myrtles. The rental house though, sees lots of folks come and go. While everyone always seems nice enough, young children especially are attracted to the goats. They want to see the goats, pet the goats, feed the goats, throw things at the goats, hit the goats, hang on the fence, pull on the fence, climb the fence. You get the picture. Since the incident last spring with the neighbor's dog, we've been thinking "out of sight, out of mind" is the best solution. A privacy fence along here however, would be neither cheap (long stretch) nor easy to install (tons of tree roots). It's on the plan however, even if it's just one panel at a time.

We've left the pond on the plan too, though that isn't even on the radar. Still, it's good to have these things in mind as future plans are made. Honey bees too. Also eventually digging out the old swimming pool and building a greenhouse over the top. The pool itself could be the foundation for the greenhouse and a good spot for a root cellar in the greenhouse "basement."

One thing in the planning stage that I couldn't fit on the sketch, is the greywater areas we've been discussing.

sketch of ideas for utilizing greywater
Sketch of ideas for greywater.

With the hall bathroom scheduled as our next indoor project, we've been trying to finalize a plan. All the plumbing is at the back of the house. Part of it we'd like to drain and filter with a greywater wetland. This would be used to irrigate the field on the other side of the fence. Next to the house, laundry water would drain into a raised bed greywater garden. This side of the house is where the bedrooms are and faces southwest. I'd like to frame the two bedroom window with pergola type trellises, and plant deciduous vines there to shade the windows from the hot summer sun. These would be watered with the laundry greywater.

This is a long term plan and will likely change again next year. What it does for us though, is gives us a framework for decision making. It keeps us from spontaneously building something that would be in the way a few years down the road. If you're interested in seeing the original master plan and our progression of ideas, check out the following links:

Copies of my homestead plans can also be found in 5 Acres & A Dream The Book.