Showing posts with label homemaking. Show all posts

November 15, 2023

A Return To Homemaking

I feel a need to preface this post by defining my terms. That is, after all, what Mortimer J. Adler says a good author does (How To Read a Book: The Classic Guide to Intelligent Reading). To that end, I have several terms that I'd like to clarify as to how I personally use them, to establish context for my post title.

House: a structure built for people to live in, i.e., a human dwelling.

Home: one's personal house; where one lives, keeps their possessions, and maintains their lifestyle.

Household: the collection of items belonging to a house and the persons dwelling there.

Housework: the work of maintaining a home. Includes a collection of chores such as dusting, vacuuming, washing dishes, making beds, doing laundry, etc.

Housekeeping: the skill of overseeing and managing a household.

Homemaking: the art of creating and maintaining an ambiance, i.e. environment and atmosphere within the home that is conducive to the comfort and mental/emotional well being of the people who live there.

All of these are relevant to our life here as homesteaders, but I confess that there hasn't been much actual homemaking going on for quite awhile. Why is that? Well, we bought this place in 2009 as a fixer-upper. We made that choice for two reasons. The first was to have a lower mortgage payment. The second was make it suitable for our chosen lifestyle. And because we chose to do all the repairs, updates, and remodeling ourselves, our house has seemed more like a construction zone than a home these past years, with various rooms taking turns being storage units for whatever other room we are working on.

On the one hand, we've had the benefit of doing things exactly the way we want them. But it's taken a long time because we had so many outdoor projects as well: fence making, outbuilding construction, tree planting, garden establishing, critter keeping, etc. The problem with this is that one gets used to living conditions as they are, as though stacks of packed-up boxes in the dining room are actually a thing. 

This began to change, however, when I wanted to carve out a little space for my sewing machine and creative projects. I was willing to just shove boxes aside to do it, but Dan said "let's finish the room." (That adventure started here.) It was one of the last two rooms to do, and he wanted to take another step forward to finishing the house. So the smaller one finally became my studio/sewing room

The other day I finally got the last of the storage boxes out of the dining room. As I cleared off the hutch, table, chairs, and corners and began to dust and clean, I thought about the table runner on my loom and recalled another one that I made years ago, when I first started weaving. What's the point of pursuing creative arts, I thought, if it isn't reflected in my home? Maybe it's finally time to switch my brain from storage mode to homemaking mode.

When we bought the place, this was the only dining area in the house. It only became a "formal" dining room when we remodeled the kitchen and carved out a little space for a dining nook. Truth be told, I use the dining table a lot; previously for projects before I got my sewing and crafting table, now, for a place to cure produce or to dry and sort garden seeds for saving. So it rarely looks like that photo.

The table runner will forever be memorial in my mind because it was one of the very first projects I produced on my loom. I think someone gave me the yarn, a fuzzy singles (one-ply) hemp yarn that was  nearly impossible to work with because it stuck together and tangled so. Somehow I managed to win and for a beginning weaver's project, I think it turned out really well. And it's perfect for autumn decorating. 

It's amazing how this impacts the atmosphere of the entire house. And it's nice to think that when someone comes to the front door, it offers a backdrop of tidiness and care. At least I'd like to think so. Keeping it tidy is another story! It's amazing how much dust accumulates in a 100-year-old house with wood heat. But it's fun to think of myself as a homemaker again. It's been worth the wait.

March 1, 2016

"How To Bake Without Baking Powder"

I'm am pleased to finally announce that this is out


It is my most ambitious book in The Little Series of Homestead How-Tos so far, especially because I included a recipe section with 54 non-baking powder recipes. It's available in either paperback or eBook in epub, mobi (Kindle), pdf, rtf, lrf, pdb, txt, and html formats. You can find where it's available at my book website. 

This is not a reprint of my "Baking With Wood Ash?" blog series. I reference that series, but the information here is so much more than that.

Chapters:
  • What is Baking Powder? 
  • Baking Soda (The Alkali) 
  • Cream of Tartar (The Acid) 
  • Common Kitchen Substitutes for Cream of Tartar 
  • How To Make Sour Milk 
  • Buttermilk: Cultured Versus Traditional 
  • How To Make Cultured Buttermilk 
  • Cocoa Powder: Natural Versus Dutch 
  • Not So Common Kitchen Substitutes for Cream of Tartar 
  • How To Make Sourdough Starter 
  • Are There Substitutes for Baking Soda? 
  • Baker's Ammonia (Hartshorn) 
  • Pre-Baking Soda Leaveners: Potash, Pearlash, & Saleratus 
  • Ash Water 
  • Other Historical Leaveners 
  • What About Eggs?
  • The Little Things Matter

Also includes:
  • Chart of Baking Powder Substitutes 
  • The pH of Various Foods
  • 54 modern and historical recipes 
  • Glossary 
  • Resources

I have to admit that I keep a copy handy myself. I refer to the charts and recipes frequently! 


January 10, 2016

Book Review: The Back To Basics Living Bundle

Back To Basics Living Bundle

Honestly? I don't even know where to begin. This collection of over 65 eBooks, eCourses, and subscriptions is so loaded with information that it's going to be hard to pick out just a few things to tell you about. Let's just say it is an amazingly well-rounded collection of everything related to homesteading, preparedness, and DIY. I was delighted to get my hands on an advance copy.

What I can tell you is that it covers every aspect of homesteading and then some. Categories include cooking from scratch, DIY, frugal living, green living, homeschooling, homesteading, natural remedies, preparedness, and simple living.

Topics cover things like seasonal meal planning, seasonal cooking, freezer meals, the how-to of fermenting fruits and vegetables, a dehydrating eCourse, DIY facial and body scrubs, zero waste cooking, natural cleaning, homeschool planners, kids' chore charts, several cookbooks, rabbits, goats, chickens, bees, gardening, pickling, soil building, herbal remedies for colds, flu, skin problems, natural mothering, homemade beauty products, preparedness checklists, a prepper crash course, decluttering, home organization, homesteading without a homestead, even how to make money from your homestead. And more. My own contribution includes a 4-book mini-bundle from my The Little Series of Homestead How-Tos: "How To Preserve Eggs," "How To Mix Feed Rations with the Pearson Square," "How-To Home Soil Tests," and "How To Garden for Goats." Click here to see a complete list of what's included in the bundle with links to more information about each. You're probably already familiar with many of the authors.

Here are some of the tidbits I found while perusing the various eBooks: how to make scrapple, how to get the gaminess out of wild game, how to clean chicken feet, how to make herb infused honey, 25 ways to clean with cream of tartar, why eating everything on your plate won't solve world hunger, how to make an edc kit, what to do with the pencil shavings I've been throwing away, and a discussion of frugal versus thrifty (I'd honestly never thought about that).

And then there are the vendor offers. I've got my eye on the $30 off one case of Tattler wide mouth lids!

The only bad news is that this is not a permanent collection. It will only be available for seven days: January 18 - 24. Click here for details, information about purchase options, or to sign up to receive more information.

Also! A freebie! The free Back To Basics 15 Day Challenge is an email course designed to share some of the how-tos of working toward a simpler, back-to-basics lifestyle. If you would like to sign up for that click here.

Okay, enough hoopla. I really do think this is an excellent resource. If your budget is as meager as mine is, at least sign up for that free 15 Day Basics Challenge. Or, if you'd like a super-discounted copy of the bundle plus earn a little $$ by offering it on your own blog or website, sign up to become an affiliate, here.

January 7, 2016

Baking With Wood Ash? (Part 1)

Now that Critter Tales is behind me, I'm turning my hand to working on more volumes for my The Little Series of Homestead How-Tos eBook series. Yes, I know that sounds like it contradicts my New Year goal of going hard-copy for information I don't want to lose. From a writers' perspective, however, eBooks (like my blog) give me a chance to get something published, get feedback, and edit them later. My eventual goal (Good Lord willing and the creeks don't rise) is to compile the series into a paperback. The one I'm working on at present is "How To Bake Without Baking Powder."

When we think of baking without commercial baking powder, recipes for homemade baking powder come to mind. So do old-fashioned recipes calling for saleratus and sour milk or buttermilk. All of these work on the same chemical principle: an acid + a base = carbon dioxide bubbles which cause a batter to rise. While doing my research, I ran across an interesting statement in a Wikipedia article.

"In times past, when chemically manufactured baking soda was not available, "ash water" was used instead. Ashes from hardwood trees contain carbonates and bicarbonate salts, which can be extracted with water. This approach became obsolete with the availability of purified baking soda."

How could I not resist following up on that?

I know ashes in one's food probably sounds gross, but consider that wood ashes have been used historically in cooking worldwide: in Mexico for nixtamalization of corn for masa, in the Philippines as Lihia, in Nigerian cuisine as Kaun or Akaun (Cooking Potash), in traditional Scandinavian foods like lutefisk (lye fish), for making olives in the Mediterranean, in old European recipes for Greek and Polish cookies, as Pottasche for browning German pretzels and lye rolls, in gingerbread, in Chinese Century eggs and noodles. Native Americans also used wood ash to make hominy. Cooking with ash is considered a trendy gourmet technique, and think of ash-coated cheeses. Or how about this paleo recipe for steak cooked on a coal bed?

All of that might not convince you, but the prepper in me is always running in the background asking, "How would I do that if I couldn't buy or barter for it?" In this case, "How would I bake quickbreads if I couldn't get baking soda? Could I somehow use hardwood ashes if I had to?"

There were no references for that tidbit at Wikipedia, so I had to do a little digging on my own.  In his blog post  "Where does soda bread come from?," Joe Pastry mentions that Native Americans used ashes to "lighten" their grain cakes. Susan Slack ("Pearl Ash – A forerunner to Baking Soda") further states that the Hopi made a thin batter of blue corn meal, wood ash, and water to make piki, their staple bread.

In terms of actual recipes, the earliest references I could find did not call for wood ash proper, but rather for potash. Potash is a product which is refined from hardwood ash. It was in use in American cookery in the 1700s. Example proportions are found in an old "American Potash Cakes" recipe in The Domestic Encyclopedia, Or, A Dictionary Of Facts And Useful Knowledge, Chiefly Applicable To Rural & Domestic Economy: With An Appendix, ... And The Veterinary And Culinary Arts... (published in 1802): a half-teaspoon potash dissolved in a half-teacupful of water to 1 pound flour (about 4 cups) and a quarter pound of butter (1/2 cup).

In Martha Washington's Booke of Cookery and Booke of Sweetmeats, transcriber Karen Hess states, "that American women were routinely using this chemical (made at home of wood ash) in their baking," (page 201). She is referring to pearl ash (or pearlash), but gives no clue as to how it was made at home.

Pearlash (potassium carbonate) is a purified form of potash. It is sometimes found in recipes of the American Civil War era and before. The modern leavener of the time, however, was saleratus (Latin for aerated salt). Chemists had discovered that by exposing potassium carbonate (pearlash) to carbon dioxide gas, they could make potassium bicarbonate. It was twice as potent as pearlash, with one teaspoon of saleratus being equivalent to 1-1/4 teaspoons of baking soda.

In the mid-1800s a purer form came onto the market - sodium bicarbonate. Originally developed in Europe, the first American manufacturers of sodium bicarbonate also called it saleratus. Later it became known as baking soda.

Okay, so the history is interesting, but how can I, as a DIYer, use that information? By experimenting! More on that soon. (Click here to read Part 2.)

Now available: How To Bake Without Baking Powder: modern and historical alternatives for light and tasty baked goods. Includes 54 non-baking powder recipes. Click here for more information and where to buy.

June 2, 2015

Non-electric Housekeeping

I've been wanting one of these for a long time.

Carpet sweeper

While I probably don't care for housework any better than the next person, I do like a clean house (theoretically, at least). One of my least favorite housekeeping tools is the vacuum cleaner. They are heavy, noisy, awkward, always dusty dirty, always with the cord in the way, and why is it that anytime I use a wand attachment all the dust blows out the back??? I admit that it is a good tool for some things, but for a lick and a promise, they are too much work to deal with.


This little carpet sweeper, on the other hand, is lightweight, easy to transport, and quiet, plus it uses no electricity (although a number of them are now battery powered, to which I say - why?). It does a decent job on our wood floors, but especially for my little area rugs. I like these little rugs because they add color, warmth, softness, and help protect the finish on the wood floor in high traffic areas. This is the perfect tool for them.

How about you? Any gripes about modern "convenience" tools? Any other ideas for non-electric housekeeping?

Non-electric Housekeeping © June 2015 

August 2, 2012

Kitchen Tools They Ought To Still Make

I was perusing kitchen books at the library and found one about historic kitchen tools. I couldn't resist checking it out and thought some of these items never should have been discontinued. They are certainly things I would purchase and use.

Here's one I would love to have for example......

Utility Measure, c. 1890

This is a utility measure and has a built in funnel for pouring bulk liquids into smaller, more manageable bottles. Priceless for those of us who don't have three hands: one to hold the pitcher, one to hold the bottle, and one to hold the funnel. This one was manufactured by the Matthai-Ingram Company and came in four sizes: 1/2 or 1 pint, 1 quart, and a gallon.

Measuring spoon, 1940

This measuring spoon would be a useful tool, and in fact recall having seen and used one somewhere in my past. It is made of stainless steel and wood, and was manufactured by the Edward Katzinger Company.

My first thought was how convenient it would be. I wouldn't have to fish around to find the right size spoon.

Then I thought I'd probably never be able to find it, like my other measuring spoons.

Then I thought, but this one is bigger (measures about 12.5 inches in length) so it would be easier to keep track of.

Then I thought how often I'd have to stop and wash it because it would be dirty from the previous ingredient.

Then I thought I'd just have two, one for wet ingredients, and one for dry.

I'd like one of these too...

Soap saver, circa 1890

A soap saver. Leftover bits of bar soap were put in it to swish around in dishwater to make it soapy. What a great idea. Of course nowadays, most soaps are liquids and aren't soaps at all, but detergents, which are petroleum based products. I use as few of these a possible, and boy would a soap saver be handy.This one was manufactured by the Matthai-Ingram Company. The stamp indicates that the patent was granted September 14, 1875.

This one would be handy...

Utensil scraper 

I've seen similar tools in restaurants for scraping the cooktop, so perhaps I could find one.

I like the idea of this too....

Cream whip & egg beater, c. 1890

The "Lightning" Cream Whip & Egg Beater. It was also manufactured by the Matthai-Ingram Company, and looks like it would be a wonderful tool to have. Quick and simple! The sales ad says it was easy to clean too, always a bonus.

Now this one...

Mayonaise mixer, c. 1920

.... is called a mayonaise mixer [sic - that's how they spelled it]. I don't know what it was made of, but you can see it's a clamp on model and looks pretty sturdy. I actually have something similar ...


Tovolo Mixer for egg whites
& whipping cream

Mine is made of plastic and advertised for whipping cream and egg whites. I got it after I had so much trouble making the meringue for my Christmas lemon meringue pie. I've only tried it once, to whip cream. Unfortunately I think it had too much milk in it (hand skimmed with a spoon), so it didn't do well. It does get difficult to turn the crank when as the liquid thickens and is not very easy to clean either.

And how about this one. Anyone with dairy goats or a cow would probably like one of these...

Milk strainer pail, circa 1870s

This is a milk strainer pail. The spout and handles make it look so convenient to pour the milk. I'm assuming it was poured into the strainer, rather than having the strainer built in(?) Made of tin, it was manufactured by F. A. Walker

I'm sure a lot of this can still be found in various stores that sell used or vintage items or antiques. My part of the country however, is not a good place to buy things like this. That's because the Southern Appalachians rely heavily on tourism as part of their economy. Prices for these types of things are premium, aimed smack dab at those tourists. For example, the gallon crocks Dan brought me back from Ohio a few years ago, sold for $12.50 a piece. I'd be lucky to find them around here for $30 each. I've seen them priced as high as $65.

With the resurgence of true homekeeping perhaps someone will once again start to manufacture these things. I'm sure a lot of us would find them welcome and useful.


February 29, 2012

Wood Cookstove Cooking: What I'm Learning


While I'll not consider myself a master yet, I've gotten quite a bit of practice on my wood cookstove since we got it installed in January. I'm definitely more comfortable with it and am starting to learn how to get good results.

This is a very versatile piece of equipment. It cooks and it warms. Some days I've kept it going nearly all day, for the warmth. Other days, milder days or days I work outside a lot, I start a fire for each meal I prepare.

Learning damper control was important, both for starting fires and adjusting heat. This is different for each cookstove. Mine is a Heartland Sweetheart, and I admit I didn't like the bell style dampers at first.

My stove has 3 bell dampers

I've gotten used to them though, and the stove has fairly good control, though not nearly as sensitive as our Woodstock wood heat stove.

Stovetop Cooking

Pancakes on the griddle

The surface actually heats up pretty quickly, though a slow start is better for the cast iron itself. Even starting from a scratch fire, I can get cooking fairly quickly by removing plates and placing a pan directly over the fire. The firebox is fairly deep, so sooty pan bottoms are not a huge problem, unless I build a large, pot licking fire. An old Girl Scout tip for that, apply liquid dishwashing liquid to pan bottoms before using, so soot washes off easily.

There are two other ways to control cooking temperature. One is by placement of the pot or pan on the cooktop. The entire cast iron top can be used. After the stove is warmed up, even the surface farthest away from the firebox will keep soup simmering.

Temperature is also controlled by the dampers, which control air flow. Open dampers mean more air and a hotter, faster fire. Closed or partially closed dampers restrict air and slow the burn rate down. This means the wood lasts longer, but the temperature is lower. The oven damper can adjust stove top temperature as well as oven temperature.

Oven damper control, here, almost all the way open

When it's open, the heat is routed directly up the chimney. When it's closed, the heat circulates under the cooktop and around the oven. So I can somewhat adjust the temperature by adjusting the oven damper. If I want to turn "up" the heat, I close it. If I want to turn it "down," I open the damper to allow the heat to escape. The stove obviously retains more heat when the dampers are closed.

If the stove is used to heat the kitchen all day, getting a meal prepared is quite quick. Everything is pre-warmed and ready to go. I keep a cast iron pan or two on the cooktop. They stay quite warm this way, and are ready to use when I'm ready to cook. It's also quicker to heat the oven.

I have successfully used my stainless steel pots as well as my cast iron. With the SS however, food wants to stick to the bottom of the pan more quickly than with the cast iron, so I need to keep a closer eye on whatever I'm cooking.

The stove can also be used like a slow cooker. If I'm going to be keeping the stove warm all day, I can start a soup or stew in the morning, keep it off to the side and tend to it from time to time to judge its progress. I've used the oven the same way, "slow cooking" baked sweet potatoes.

Baking

Hot, golden brown biscuits as they come out of the oven

Getting the oven heated to a good baking temperature takes awhile if starting with a cold stove. In that case it's a plan ahead project. If the stove is already warm, then the oven heats to baking temperature in no more time than it takes to preheat my electric oven.

The thermometer in the door only registers the temperature of the door. I use a small oven thermometer inside the oven to check it's actual temperature.

Baking requires a good coal bed and larger pieces of wood for a sustained, even temperature. This is actually not as fussy as I first feared. 12 to 14 inch long pieces of hardwood at least 3 inches in diameter are good for this purpose.

At first I lamented that my Air-Bake baking sheets didn't fit in my new oven. I love them because they help prevent burned cookie bottoms. With a wood cookstove however, the heat source is on the side, not the top and bottom of the oven. Burning cookie bottoms (or tops) is not a concern with this oven.

I'm learning to worry less about precision oven temp, by adjusting cooking time. This doesn't work as well with baked goods, but does with vegetables, meats, and casseroles. I reckon it could be called a more intuitive type of cooking, which would likely drive some folks crazy. It's a different style of cooking I suppose, but one that I actually find easier.

Pizza? Well, since my beloved pizza stone also doesn't fit in the wood cookstove oven, I still bake that in my electric oven every Friday night!

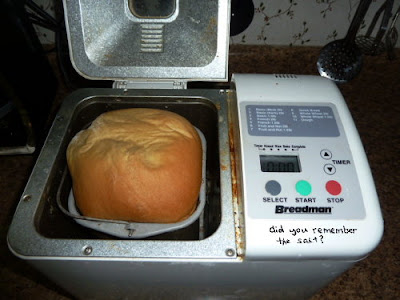
I've also not tried to bake loaves of bread in my wood cookstove oven yet (too used to the bread machine!) I am understanding however, the concept of once a week baking ("bake on Saturday" as Ma Ingalls used to say). Especially in summer, why heat up the kitchen more than necessary? Bake everything once a week and get it over with.

Heating

On milder days, I let the fire go out between meals. Also I don't worry about it if I'm working outside for most of the day. It's just easier that way because even though it has a good size firebox, I don't want to be running in and out all day just to tend the fire.

The fire can be banked however (fill firebox with large pieces of wood, turn down dampers, and cover with ashes to slow the burn). A good coal bed and pre-warmed stove make it quicker to get the next meal going. I've not tried to bank a fire all night yet.

The stove does a marvelous job of keeping the back of the house warm, including our tiny bathroom off the kitchen. The ceiling fan helps push warm air out of the kitchen (we have high ceilings). The oven and warming oven doors can be left open to add even more heat to the room.

I stick my slippers or house shoes underneath anytime I have to go outside. The floor under the stove doesn't get exceptionally warm however, so these aren't as toasty to put on again, as one would imagine.

Hot Water

Hot water with the turn of the faucet (up to 5 gallons worth)

The water reservoir holds about 5 gallons of water. It is slow to heat however, so to have hot water requires that the stove be going most of the day. Still, it's wonderful to fill the dish pan without using the hot water heater! This is not potable water however, and cannot be used for cooking or tea.

When the water in the reservoir is hot, the stove retains heat longer.

-------------

When the days get warmer, I'll switch my cooking to my summer kitchen, a.k.a. the back porch. Eventually I'd like to get a solar oven for summer cooking and baking. Even farther down the road would be an outdoor kitchen. The hows and whens of that are still future tense. I'm gradually learning not to get too anxious about accomplishing anything like that. It's what the slow life is all about after all. :)

November 26, 2011

Thrift Store Finds For The Kitchen

Every time I have a few extra dollars in my pocket, I find myself perusing thrift shops. My mind, of course, is on our kitchen remodeling project, with a view to the little things that will impact the overall result. Admittedly, some of these are borderline frivolous, but most lean toward the function side of their purchase. Here are my latest finds:

9, gallon glass jars, $1 each

stainless steel cream pitcher w/ hinged lid, $1.50

cast iron saucepan, $5

wallpaper, 2 unopened rolls, $1 each

Yes, I did get the expensive wallpaper that I fell in love with (Kitchen Remodel: The Perfect Wallpaper). I found it deeply discounted online, though the shipping and handling knocked it out of the bargain box. I plan to give the dining nook a chair rail look, using the green on the lower portion of the wall, separated from the expensive stuff with a cheap, but coordinating border I found at a big box store.

wire & wicker baskets, $3 & $4, respectively

canisters, $5 the set

one, perfect for my kitchen but could only find one, dinner plate, $1.50

Of the plate, I have to say that I couldn't resist because I will be needing new kitchen dishes. My 30 year old set of Corelle is down from a service for eight, to two dinner plates and three cereal bowls. The Blue Willow is for good dining room use, so I need something for breakfast and lunch in the kitchen. The pattern on the back of this plate says is "China Pearl, Olive Garden", and I would love to have a set. Unfortunately, I couldn't find it online. Doubt it would be in my price range anyway. :) I did find the following however, at the dollar store.

4 dinner plates, 4 cereal bowls, & 4 mugs, $1 each

Not as pretty, but the theme and colors will match my new kitchen, don't you think?

Have you found any good bargains lately?

June 28, 2011

The Economics of Food Self-Sufficiency

One of our goals is to grow and raise our own food. Consequently, I write about gardening and food preservation quite a bit. From time to time I show you my pantry and give you a progress report on the status of my food stores. Currently, we're producing all our own vegetables, eggs, milk, cheese, and most of the fruit we consume. This year, we started growing some of our own grain: wheat and corn. In the future, we will focus on more types of grains and meat.


I still grocery shop, for things like coffee, cereals, meat, black olives, tuna fish, baking soda, chocolate, sweeteners, a few stock-up items. You'd think because of all we grow I'd be saving a lot, but actually, my food budget remains the same. Why? Because instead of buying people food, I now buy grains and pellets for the chickens and goats too. Add to that other supplies necessary for their well being, more seeds in the spring, and the rising cost of food (both human and animal), and I have to admit that my budgeted food spending hasn't changed a cent since we started working toward food self-sufficiency.

A question often arises amongst homesteaders regarding raising one's own food - is it worth it? Is it cost effective to grow and preserve all one's fruits and vegetables, and to raise one's own eggs, meat, or milk? Realistically, wouldn't it be cheaper to buy them?


I think the answer to that depends on several things. The temptation is to compare our actual cost with the price tags at the grocery store. Yet what is on grocery store shelves is commercially produced. The quality of food suffers because the ways and means of industrialized agriculture focus on quantity and profit, not quality and nutrition, nor on the well-being of their animals. Are my eggs, produced by free ranged chickens who eat bugs, worms, seeds, grains, fruits and vegetables, equal in quality and value to factory eggs, produced by chickens who are fed formulated pellets and never see light of day? Or, can I really compare my pure raw goat milk to ultra-pasteurized, rBGH grocery store milk? Then there are the added values of manure for the compost, increases in flock and herd, meat and/or sales from culling, plus the endless hours of delightful entertainment watching animal antics. Shouldn't these be factored into the value of producing one's own food?

More importantly is one's world view, one's mindset, because this ultimately determines how we set our priorities in life. I discussed this in detail in this post, "Mindset: Key to Successful Homesteading?". For our purposes here, we need to consider how mindset determines our motivation toward how we feed ourselves. Am I seeking to raise my own food to gain a financial benefit or a return on an investment? Or because I want to eat real food, to know where it comes from. Maybe I'm motivated by environmental concerns. Or it's simply for the love of doing it. Perhaps I do it because of concerns for the way our world food supply is being managed, and for the sense of purpose, security, and freedom food self-sufficiency affords.

In terms of food self-sufficiency, I honestly think money is a poor standard of value. If I look at my garden harvest and only see what it's worth in terms of money, I must realize that its value is unstable and changes as conditions fluctuate. Yet, I always need to eat. That doesn't change. It doesn't change if produce is worth 25 cents a pound, or if it's worth $5 a pound. I still need to eat.


For the homesteader, the questions about raising one's own food should be personal and ethical, not financial and economical. The questions we need to ask ourselves are: How do I want to nourish my body, my family? What kind of food do I want to eat? How do I want it grown? How do I want it produced? Do I want to contribute to the environmental problems created by modern agribusiness practices, or help heal them? What are my self-sufficiency goals and how does raising my own food help meet them? Whether or not the cost of raising one's own food is worth it, will depend upon one's answers.

For my husband and me, our ultimate goal is to decrease our need for money and our dependency on the consumer system. Raising our own food is an important step in meeting that goal. We are working toward raising all or most of our own animal feed, beginning by planting the wheat, the corn, and black oil sunflower seeds. We will look into other crops as well. We will research pasture improvement and what kinds of hay mixes will grow well in our part of the country. What we can grow will eventually determine the number of animals we can keep; we must strive for a need based balance. It will be a step by step process, but will enable our homestead to be more self-sustaining in the long run.

Is it worth it? There's obviously no one-size-fits-all answer, but it is something every homesteader needs to consider. For us, the answer is a resounding yes.

June 15, 2011

Contemplations on Making Cheese

I reckon that anyone with their own source of milk, begins to have more than enough rather quickly. When all those jars of milk begin to fill the fridge....

3 half-gallon jars of raw goats milk

..... it doesn't take long to begin thinking about trying to make cheese. Actually I had anticipated this quite awhile ago, and in preparation, bought Ricki Carroll's Home Cheese Making: Recipes for 75 Homemade Cheeses. I also bought some liquid vegetable rennet from the co-op. I felt quite prepared.

We mostly consume our milk as yogurt. From that I also make quite a bit of yogurt cheese. Hard cheeses though, are only something I watched someone do at home once, a very long time ago. One day, when I had a lot of extra milk and plenty of yogurt, I decided to give hard cheese a try. I picked Ricki's 30 Minute Mozzarella, because something one can make in 30 minutes has to be easy. Right?

My first mistake was starting at 4:30 in the afternoon. Then my rennet didn't set up as quickly as it was supposed to. When it finally did, I muddled my way through until I got to the part about microwaving the curd. I don't have a microwave and to heat via the stove was supposed to require working with the cheese at a temp of 170 F and therefore rubber gloves. Well, I don't have any rubber gloves and besides that, it was already way past my bedtime. I rigged up a cheese press with plates and a cast iron pot, plopped the cheesecloth wrapped blob of curds into it, and went to bed. In the morning, I had this.....

My 1st attempt at hard cheese

Not exactly what I envisioned. However, it melted great in scrambled eggs, so all was not lost. Obviously I needed a better way to press it. For my next cheese, I decided to try something that didn't need a press, cottage cheese...

Raw goats' milk cottage cheese & home canned figs

That turned out fairly well, except that what one ends up with is a dry cottage cheese. The moist creamy kind we're used to from the grocery store requires the addition of cream. Lots of cream. More cream than I could manage for the amount of cottage cheese I ended up with.  On top of that we really don't eat much cottage cheese. So. The chickens loved it, what can I say?

I started to look at plans for making a cheese press, until Dan suggested that I could probably use my tincture press for the time being. With that, I looked through Ricki's book again, read through the directions for various cheeses, and realized these were not what I was after. This is recipe book for specific cheese recipes. They were developed in other parts of the world and many have been made for centuries according to local tradition. Those traditions combined with a local milk from animals eating a local diet, and a starter culture made from local bacteria, are what made those cheese what they are. For me to reproduce them, would require special starters and attendance to time, temperature, pH, etc. This is perfect for the hobbiest with an intense interest in cheesemaking. But I'm a homesteader. I don't want to be buying lots of special ingredients, nor do I have time to spend over the stove making sure the temperature increases exactly 2 degrees every 5 minutes. I just want a way to preserve the extra milk we get and another food for my pantry. I just want to make a homestead cheese.

At that point I set that book aside and reached for The Little House Cookbook by Barbara M. Walker. On pages 172 to 176 is a description of the basics of making cheese. I decided to start with that. For my starter, I remembered something I read in Ricki's book, that back in the day, cheesemakers saved whey from a previous batch to use as starter for the next cheese. I used the whey from my cottage cheese.

My tincture turned cheese press 

Everything went well, and I used my tincture press as my cheese press. It's a wine press actually, though we've never used it for that. Since it doesn't have a way to actually drain the whey, I rigged it up as you see above, allowing the cheese to drain. This is how we drain our tinctures too, and have found it works pretty well.

1st hard cheese. Could certainly use a proper cheese press

One thing I didn't have was a proper follower. The follower is a flat disk that fits perfectly into the cheese mold. It is the follower that comes into contact with the cheese as it is pressed, making it as flat on the top as it is on the bottom. My tincture press left a depression in the top of the cheese, so I had to trim this off and use the fresh "green" cheese in cooking.

Once the cheese had dried several days and formed a rind, I waxed it....

Waxed cheese

It is supposed to age in the fridge for several months, then we'll give it a try. First bites weren't impressive. It is boringly bland, so hopefully aging will help. I've actually made three of these cheeses now. For the second I used the whey from a yogurt cheese. For the third I used the whey from that. The third cheese actually had a mild but pleasant flavor, so I am hopeful aging will improve upon that. Perhaps each successive batch will get more flavorful.

To keep track of my experiments, I've started a cheese diary.

Click to enlarge

Since I don't stand over it, my times and temperatures vary with each cheese. To keep track of which cheese is which, I embed a bit of paper in the wax, with the cheese number and date made. For this cheese (#0003), I'll weigh it again after it's dried and record that weight. I'll also note the date I wax it and put it in the fridge.

It's too early yet to sample any of my cheeses! I've warned Dan that it will probably take awhile and a lot of milk before we start to get one's we really like. I doubt cheddar or gouda cheeses were perfected first go round.

As a closing bit of trivia, here is the whey drained off that cheese. Remember, I started with 3 half gallons of milk...

Cheese whey produced from 3 half-gallons milk

What do I do with the whey? Oh, I'm finding lots of things to do with it. More on that in another post.

March 26, 2011

I'm Curious About Your Kitchens

With a kitchen remodel right around the corner, you can well imagine that I'm pouring over kitchen books, magazines, and websites. Even though we have a basic floor plan, there are a million and one little things that need to be figured out. As I've looked at hundreds of kitchen photos, I've noticed things. Improbable things, such as how every one is so organized and clutter free. Of course, I imagine that behind the camera is a large table, loaded with everything they cleared out to make it look so neat! Other things strike me as curious and make me wonder. Wonder enough to find out how your kitchens are set up, and what you think about the current trends. Things like:

Windows. Hardly any of the kitchens in the books and magazines have window treatments. Whatever happened to kitchen curtains? Or even blinds or shades? Does anyone have bare kitchen windows like that? Doesn't that make you feel exposed? What if you want to run into the kitchen in your underwear? Especially at night when you can't see out to know if anybody might be around to see in. Please tell me about your kitchen windows.

Appliance Garages. I admit these look kind of neat and I like the idea of being able to push some commonly used appliances out of the way. But I think it would eventually get annoying to have to do that little door up and down every time I needed one. And come to think of it, why would I want to hide my small appliances anyway? It's not like they're the messiest thing in my kitchen. Does anyone have an appliance garage? How do you like it? Do you bother to push the appliances back in after you use them? Do you keep the door mostly up or mostly down?

Rugs. Now, I really like the look of a few throw rugs in the kitchen. Pretty on the eyes and easy on the feet. But personally I find they are way too hard to keep clean. How many of you have rugs in your kitchens? Do you really truly like them there? Aren't they always full of crumbs, dirt, sand, cat/dog hair, and pizza sauce spills? How do you keep them clean?

Peninsulas. Every peninsula is made with an overhang for stools. Does a peninsula have to accommodate seating? For one, we don't need it, and for two, nobody really likes sitting on stools to eat anyway. And so what if a peninsula can seat five. What kind of arrangement is that for a conversation? It seems like islands can get away with no seating, but it's expected with a peninsula. Does anyone have stools at your island or peninsula? How often do you use them? How often do you eat there? Do they ever get in the way?

Work Triangles. OK. Whats the deal with work triangles. Honestly, how many of you work in a triangle? When I cook it's: sink, fridge, cabinet, pantry, garden, outdoor faucet, sink, countertop, sink, cabinet, stove, shelves, countertop, stove, sink, pantry, dining area, cabinet, fridge, dining area, sink, fridge, countertop, shelves, stove, sink. Where's the triangle in that? Yet every book and article on kitchen design tells us we have to have one.

I did find an article online, and learned that work triangles were devised in the 1950s to test kitchen layouts in government financed housing. The ideal distance was deemed 4 to 7 feet between sink, refrigerator, and stove. The rationale was that this either saves steps, or keeps the cook from constantly having to walk around appliances. Even so this doesn't seem logical because it takes more than a sink, fridge, and stove to prepare a meal. I've noticed that modern kitchen triangles go anywhere from straight lines for one wall kitchens, to triangles with bumped out legs to accommodate huge islands and peninsulas. I've also read enough kitchen forums to know that lots of folks (myself included) think that 48 inches is too far for some set-ups. (Can you say "water from freshly rinsed vegetables dripping all over the floor"?) It's curious that kitchen designers would hang on to this concept. Needless to say, I'm not worrying about triangles in my kitchen.

Please tell me, how does your work triangle work for you? What's your ideal distance between work areas? Are you conscious of your "work flow" and able to organize every step around the most efficient footwork? If you are, I need to know your secret.

Kitchens as Entertainment Centers. Maybe this is a sign of the times, but rarely do I see kitchens treated as a workshops. The rare exceptions are the personal home kitchens of professional chefs. More commonly, book descriptions point out amenities for guests and multiple cooks, and open concept architecture which enables the cook to remain part of the action elsewhere in the house. In addition, they are big on things like a fully stocked cappuccino center and little sinks designed solely for washing celery. Decorator details seem to be the focus. We even found one that touted "the lived in look." Um, hello, we need to make the kitchen look like we actually use it?

My question for you all is, how many of you entertain in your kitchen? I mean, how often do you work up a guest list for making an evening out of a group cook in? Personally, I find it's more trouble to find things for guests to do in the kitchen than to do it myself. Just don't leave before the dishes are done.

The resale factor. OK, moving is a reality and we're considered the mobile society after all. Still, why do I have to design my kitchen based on what somebody else may want in the future? Why can't I make it the way I want? I mean, how many of you absolutely fall in love with those one size fits all, cookie cutter kitchens in homes you're looking to buy? I read that the number one room people want to remodel in their homes is their kitchen. Maybe kitchens designers should take a hint. Or, maybe they already did and generic kitchen design is the way to guarantee job security. Keeping future buyers in mind may be good advice for those whose house is simply an investment, but what about those of us who actually plan to live in our homes? What do you think?

Books, magazines, and websites are fun to look at and great for ideas, but not for whole kitchens. I say this because most of them seem to be geared toward career minded folks rather than homemakers and homesteaders. That's where you all come in. Please tell me, what do you love about your kitchen? What would you change? If you could design your dream kitchen, what would be important to you? The floor is yours.

January 7, 2010

Accidental Sourdough

I told Sharon (In Stitches), that two things I wanted to do this winter was soapmaking and sourdough bread. I used to make a lot of soap, but somehow stopped a number of years ago. I've tried my hand at sourdough bread too, but that was nowhere near as successful as my soap. The one or two loaves I made were heavy as a rock and as hard as one too. I figured it was about time to try it again soon.

I hadn't planned on trying a sourdough starter yet, but I did manage to make one accidentally. It happened because of what I've been reading about the benefits of soaking whole grains (a couple of good articles on that here and here.) For yeast bread making, one thing I've been trying has been to mix whole wheat flour with water and some whey, and letting it sit overnight. The next morning I prepare my yeast along with the other ingredients, mix, knead, and bake away.

Well, one morning I couldn't get to it. In fact the whole thing sat overnight a second time and by the time I got to it the following morning, it had risen just as though it contained yeast! I was amazed and figured that I had accidentally made a sourdough starter.

My sourdough starterI started feeding it, and it kept on growing. After about a week I decided to try to bake a loaf of bread. I couldn't find a recipe I liked, so I made one up.

My sourdough bread!It worked! Not perfectly, but my bread rose and was not only edible but tasty. After my failure years ago, it was exciting to have my first success.

I by no means feel that I've got a handle on this sourdough thing. This first loaf had a muffin-like consistency rather than like yeast bread. Still, it's a start, and I hope to improve my loaves with some experimentation. I've also been experimenting with sourdough pancakes and muffins. I've even added it to cake in place of buttermilk. What I need is a sourdough cookbook or at least to start collecting recipes. Yesterday Sharon sent me her recipe for Sourdough Applesauce Cake. I can't wait to try it! Bread of course, is my main concern. Hopefully in the near future I can show you some real successes!


Accidental Sourdough photos & text copyright January 2010