 |
| Photo from August 2009 |
November 10, 2023
I Finally Had to Replace My Excalibur
July 24, 2023
Dan's Power Scythe
Once upon a time we had a sickle mower.
 |
| our old sickle mower |
It was a great alternative to the scythe, as it could cover more ground, more quickly. Not that we're always in a tearing hurry to get things done, but sometimes expediency is helpful. Unfortunately, this Troy Bilt was discontinued years ago, and replacement parts are impossible to find. Eventually, it stopped running and Dan couldn't fix it. So that was that.
Since then, Dan's done all of the hay cutting, wheat harvesting, and tall pasture grass mowing with his scythe. But we've discussed options. Such as a new walk-behind sickle mower (selling for something like $6000), a sickle bar for the tractor (large and also expensive). or better yet, a sickle attachment for our old John Deere garden tractor. It will take attachments, except the small bars are now longer manufactured, and we have searched in vain for a used one.
What about "inventing" something of our own? We discussed that for years. The best idea we could come up with was to somehow rig a hedge trimmer for sickle work. Here's Dan's first experiment.
 |
| Dan's power scythe, the prototype |
He attached a hedge trimmer to the snath (handle) of his old American scythe (he prefers to use his European scythe) Here's it's first test run.
As you can see, it worked well. It even cuts through clump grass easily! (Something the scythe doesn't do well). Even so, it needed improvements. For one thing the wooden snath made it even heavier than it already is, and the controls couldn't be accessed except by bending over (not always convenient.)
Here's version 2.

|
| Lighter aluminum frame |
 |
| Hand control for the throttle |
 |
| Wiring for the throttle. |
Here's version 2's test run.
That went well, so the next test was to put it to work, cutting a small patch of hay. It worked really well. He's able to catch the cut grass on the trimmer's blade guard and then lay it down in nice, neat rows.
 |
| Can you see the rows? (Probably not enough contrast.) |
September 6, 2022
Power Blender
Something that's been on my wish list for decades is a Vitamix Blender. They are very expensive, however, and all things considered, never seem to make it to the top of my financial priority list. Last week, I was researching ketchup recipes and ran across a video that caught my attention because the gal cooked all her ingredients together and then blended it—including the tomato peels and seeds!—with her Vitamix. The result was a beautifully thick ketchup with less cooking time. Considering all the hours and days I've spent cranking my Roma Juicer to make tomato sauce, I had to give Vitamix another peek.
Well, they're still expensive, but when I found a refurbished one for around $300 on Amazon, I was tempted. So, I put it on my mental back burner while I went to work on pears. By the time I took my next break, I decided to do a search on Vitamix type blenders. I spent hours reading and analyzing reviews and comparisons. Here's what I ended up with.
 |
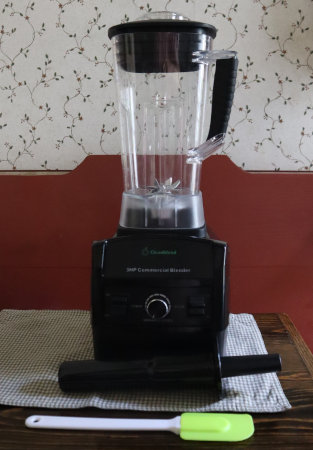
| Cleanblend Commercial Blender |
 |
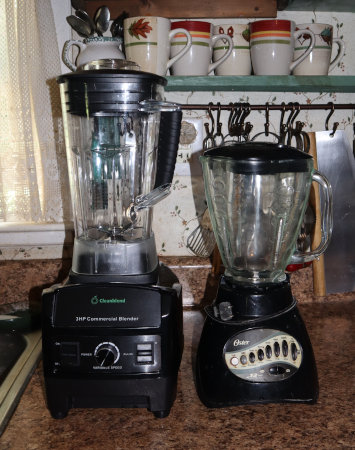
| Side by side with my old Oster blender. |
At a glance, it looks exactly like the a Vitamix, except for the labeling.
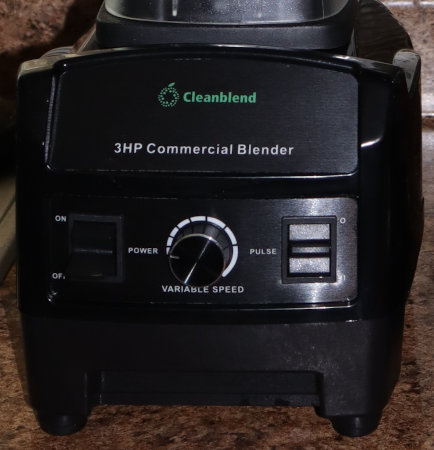
To compare, both are big and heavy, both have variable speeds (unless you get a Vitamix with preset speeds), both have a pulse function, both have 64-ounce BPA-free Tritan containers, both have stainless steel blades, both come with a tamper, both are self-cleaning, and both preform the same functions: blend, chop, grind, emulsify, and will make nut butters, ice cream, and hot soup. To contrast, the Cleanblend boasts 1800 watts of power (3 horsepower), while the Vitamix lists 1440 watts (2 horsepower).
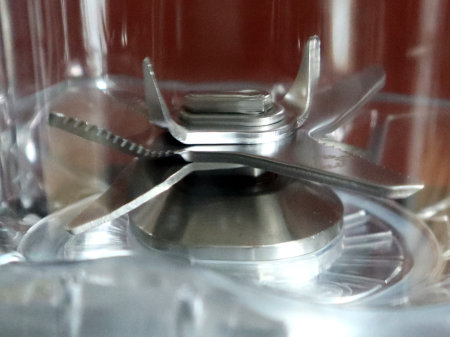
Also, the blending blades are different.
 |
| Vitamix blades |
 |
| (side view) |
Another difference is the warranty. Vitamix now offers a free 7-year warranty (formerly it was 10 years), while Cleanblend offers a 5-year free warranty. Both companies offer an extension to 10 years for $75. So, even adding the 10-year warranty to the Cleanblend, it still comes in cheaper than a Vitamix.
Prices? I got my Cleanblend (currently on sale at Amazon) with free shipping for about $200 including tax. Vitamix blenders start at $350 and range up to $800, depending on the model and accessories. Taxes, if applicable, will be on top of that. Vitamix does have more models and accessories to offer. But I think the clincher, for me, was the smoothie tests done at eater.com. They compared smoothies made with seven high performance blenders, and the Cleanblend really did the best job. You can see the photos at this link.
June 5, 2019
Stewardship, Sustainability, and Woodchips
"Stewardship evokes a sense of responsibility ... It implies the supervision or management of something entrusted to one's care. It implies not only responsibility but also accountability. We believe that one day, we will be accountable for how we lived our lives and for what we did with the things in our possession."
pages 23 to 24
One of the things we feel responsible for is the renewable resources on our property; in this case trees. I recently blogged about how we manage our trees ("Spring Chores: Trees"). In that post I mentioned that twigs and small branches from downed trees are chipped. Thanks to having our own source of chips, we've been able to address several problems we've had with a "work smarter not harder" solution.
Initially, I used our wood chips as mulch in the garden but found that they work better as long-term mulch for perennials. For annuals, they must be raked away when it's time to plant again, because they are slow to decompose. That's not necessarily a problem, but it made me wonder if there wasn't a work-smarter way to mulch. This past year we've worked out a routine that is that and more.
That routine starts with a chipping day. I started to use fresh wood chips in the goat corral, because when it rains a lot, the corral gets very muddy. Add manure and urine and it becomes a mucky mess. The chips really help with that, plus keep the dust down during a dry spell.
 |
| The goats' hang-out area. |
Eventually, the chips accumulate manure and absorb urine, so they must be removed. When that happens, it's time to make fresh wood chips. Chipping day begins with shoveling out the old urine soaked chips and manure, and then dumping them into the compost bins.
 |
| The chickens love chipping day. |
I've found that woodchips make a very nice compost. They supply carbon for the compost, and the manure and urine supply nitrogen. We regularly add kitchen, canning, and garden scraps too. What the chickens don't eat adds to the compost.
While I'm doing that, Dan fires up the chipper.
 |
| WoodMaxx WM8M PTO-powered wood chipper. |
Our chipper was a good investment because we have so many trees. Definitely not cheap but indispensably worth it. Our first year here we bought one of those little YardMachine chippers-shredders off Craigslist. It proved to be worthless for our need: slow, limited to twigs and leaves, and sprayed the chips all over the place. (Dan later converted it to a wheat thresher.) So every year we would rent a large industrial chipper for several hundreds of dollars per day to deal with our numerous brush piles. Obviously, that wasn't cheap either!
The fresh chips are spread out in the cleaned-out goat corral.
 |
| New wood chips |
For garden mulch, I now use composted wood chips. After the chickens have done their magic on the old chips in the compost bin, it's gorgeous.
 |
| Wood chip compost |
The chips aren't completely decomposed, but I like it that way because I've observed that mycorrhizal fungi love wood chips on or in the soil.
 |
| Mycorrhizal fungi growing on wood chips. |
Mycorrhizae are the subterranean nutrient delivery system of the plant world. They form symbiotic relationships with plant roots, exchanging liquid carbon from the plants for nutrients harvested from other areas. The nutrients are transported to the plant because the mycorrhizae extend the root system with filaments known as hyphae. Through the hyphae, the fungi network with one another to extend their resource harvesting to areas covering acres and miles.
 |
| Composted wood chips mulching pumpkin seedlings. |
Partially composted wood chips not only work better than uncomposted wood chips, they also work better than compost made from dirty straw and wasted hay from the goat barn. That's because the old straw and hay are loaded with seeds (even though technically they shouldn't be.) Too many of those seeds survive the heat of composting and invariably start growing in my garden - as more weeds. (Ditto using old straw or hay as mulch). Counterproductive! This wood chip composting and mulching system is definitely work-smarter-not-harder gardening.
What do I do with the old straw and wasted hay I clean out of the barn? Now, I put all that directly out on the pasture where it can build pasture soil there. (Read about my modified Fukuoka method of soil building here.) Let the straw and hay seeds sprout where the goats can benefit!
Obviously, our system isn't feasible for everyone, because everyone's practical specifics aren't the same as ours. But my takeaway point isn't so much what we're doing and how, but that we've worked out a system that works for us. We analyzed our problems in the light of our goals and available resources, and then experimented until we worked out satisfactory solutions.
Problems:
- alternately muddy or dusty goat yard
- compost loaded with weed seeds
- poor soil needing improvement
- never enough mulch
Goals:
- stewardship
- sustainability
Resources:
- tree "waste" (overabundant twigs and branches) turned into
- wood chips
- chickens (for composting)
- goats (for manure)
- humans (for the work of making and moving the woodchips)
No waste, just multiple uses of a renewable resource in a sustainable cycle. What could be better than that?
July 1, 2017
Wheat Processing
You'd think that after doing something for a number of years we'd have it all figured out. Not so and processing wheat is one of those things. It's a traditional skill for which many of us have some knowledge, but for which finding the equipment and developing the skills are a challenge.
Wheat processing is a two-part job. The first part is threshing, i.e. removing the wheat grains (berries) from the wheat heads. The second part is winnowing, which is separating the chaff (plant waste) from the grains.
The modern industrial-scale way to harvest and process wheat is with a combine harvester. It does it all-in-one (video of one in action here.) That's obviously beyond our scope, so we've looked at the more traditional methods, such as threshing wheat with a flail. The photo below shows two men with flails.
 |
| Photo by DEXTRA [No restrictions], via Wikimedia Commons |
Here's a good video of flailing in action.
George Washington designed a 16-sided threshing barn. We had the opportunity to see this on a field trip to Mount Vernon a number of years ago. Here's the threshing floor.
 |
| By Galen Parks Smith (Own work) [CC BY-SA 3.0 (http://creativecommons.org/licenses/by-sa/3.0) or GFDL (http://www.gnu.org/copyleft/fdl.html)], via Wikimedia Commons |
The freshly cut wheat was placed on the floor to be treaded by a team of horses. The grains and chaff fell through to be collected below for winnowing.
Flailing was one of the first methods we tried, with a flail Dan made. The major plus with this method is that the heads don't have to be separated from the stalks (straw). The major negative is that it is very laborious and time consuming. Working with a team (as seen here) would definitely be faster and more fun, but it would require four very coordinated people.
Besides flailing, we've tried a number of other methods over the years as well. The links will all take you to videos to see these in action.
- By foot (kinda like stomping grapes)
- Chain and bucket
- Blender (slow due to small amounts)
Some methods we haven't tried:
- Grain threshing with a lawn mower.
- With a converted clothes dryer, AKA "Urban Threshing Machine." Very nifty as it threshes and winnows.
- And if you think the price might be worth it, there's also a foot-powered thresher available (scroll to the bottom of the page for a video). $900 plus shipping keeps it out of reach for us.
There are a ton more ideas, just check out YouTube!
What we decided to try this year, was to use the chipper that Dan turned into a feed processor for me. Click here for photos about how he did that.
Whole heads are tossed into the hopper . . .
 |
| Best results were obtained by throwing in a handful at a time. |
and end up in the barrel...
This works very well, and you can probably see the advantage of not including too much of the stalk. That would mean more debris and chaff to clean out.
The seed heads are now flat and empty, so the next step is to separate them (and any straw) from the small berries and chaff. I did this with my compost sifter / sunflower seed separator...
 |
| This is with 1/2" hardware cloth, but 1/4" would be better. |
That left wheat and lightweight chaff...
The next step is winnowing. In lieu of a brisk breeze, I used an electric box fan.
 |
| Berries and chaff are poured from one container to another in front of the fan on high speed. |
This is repeated until all the chaff is blown away,
and only the wheat berries remain.
Then it can be ground into flour
 |
| Did this the quick way with my WonderMill rather than my hand mill. |
and baked into bread!
 |
| Bread from our own homegrown wheat: sliced, toasted, & topped with homestead raspberry jelly. |
Besides making a sifter with a finer hardware cloth, there is one more improvement we'll make next year - to add a cradle to Dan's scythe. The advantage of the cradle is that it causes the cut wheat to fall neatly head to head, making it easier to cut the heads from the straw. There is an excellent video here, which shows how to make a grain cradle, adjust it, and use it.
The only other thing to add is that the bread has the most delicious flavor! The wheat seed wasn't anything special, just seed wheat from the feed store. Maybe it's the freshness, or maybe just the fact that we grew it ourselves, but it's the best bread I think I've ever made.
May 20, 2016
Homemade Beams for the Goat Barn
Dan bought the mini-mill attachment for his chain saw back when we were working on the kitchen. He wanted to make his own posts and beam for a load bearing wall so we got it.
One thing we didn't do at the time, however, was to get the proper chain for it. Some folks say the regular across-the-grain cross-cut chain can simply be filed at a different angle to rip boards with the grain. That proved not to be as easy as promised. This time he bought a proper ripping chain for the job. The difference is in the angle of the cutting teeth. A regular chain is filed at a 35-degree angle, a ripping chain is filed to 10 degrees. This makes a huge difference in the ease of cutting, not to mention wear-and-tear on the saw.
 |
| Wedges in the cut keep the saw from binding. |
One problem is that Dan only has a 20-inch saw, while the logs are wider than 20 inches. That has meant two cuts per side, flipping the log to get both cuts.
The guide that came with the mini-mill isn't long enough for our logs, so Dan has to stop and move the pieces to finish the cut.
 |
| First two done. |
He says the ripping chain makes all the difference in the world, but also that it would be easier to do these on the sawmill like the posts. If only it were longer. Hmmmm...


