Showing posts with label woods. Show all posts

April 14, 2022

Silvopasture

Pasture improvement is something we are always striving toward. Ideally, it should be a self-sustaining perennial system, but in reality, this is not an easy goal to reach. In observing how our pastures grow, I noticed early on that when trees create light shade from a high canopy, our pasture forage does better than parts of the pasture that are in full sun. Lightly shaded parts of the pasture survive summer's hot dry spells, continuing to provide forage for the goats. Because of that, silvopasture makes a lot of sense.

Silvopasture. Silva is Latin for forest and, of course, pasture is where livestock graze, so silvopasture is a system which integrates forest, forage, and livestock in a mutually beneficial way. Our wooded goat  browse areas are a ready-made location for establishing silvopasture.

Our 2020 Master Plan
Hmm. Needs updating.

Silvopasture has been on the master plan for a couple of years, but it took awhile to get to a point where we could actually do something. Mostly because of

this

this

and this.

They're all mature pine trees, most of which either uprooted and fell, or broke mid-trunk and fell. Some of them Dan took down because for awhile, it didn't seem safe in our woods, especially when it was windy. 

On the one hand, these have become a source for homegrown lumber and woodchips. On the other, they leave a lot of mess behind.

Our tractor and PTO chipper in the background.

Needless to say, clean up has been slow. However! We finally made enough progress so that last fall I could toss down some seed. Here's how it looks now.

Silvopasture beginnings.

It's somewhat spotty, but it's a beginning. I'll work to add plant diversity and fill in the bare spots.

Learning that some goals are slow to achieve has been one of the lessons we've learned from homesteading. It's easy to become impatient and even discouraged, when things don't happen quickly. So much of it is simply plodding one step at a time. If we do that, then eventually we make progress! Now we just have to keep at it because living systems require our ongoing participation. 

Do you have any long-term goals that you feel will never be reached? Are you hanging in there with them?

February 21, 2022

Brush Fence

Some of our property is fenced, some of it isn't. The garden and pastures are, but our woods aren't. But the woods is where I take the goats to browse, and while they mostly stick close to me, they don't recognize property lines and don't mind invading the neighbors to see what they've got growing. 

We've talked about fencing the woods, but it would be a big job. It just never makes it close to the top of the to-do list. One reason for that is because we've had a lot of pine trees fall since we bought the place.


We used to think it was because of disease or insect problems, but finally figured out that what we were observing was natural succession. The land was farmed 80 or so years ago, and the pines sprung up when the land went fallow. They grew fast, tall, and spindly, so that by the time we arrived, they were ready to give way to hardwood saplings. We're happy to see the hardwoods growing, but the fallen pines have made a real mess of the woods. 

We've made the best of the waste. Dan has milled a lot of thesm (see some of them here), but that still leaves a lot of branches. Some of the branches get chipped, and some of them become my brush fence.  

I cut them and pile them up along the property line.

Once the piles get high enough, the goats stay on their side.

Trees along the property line help hold them in place.

Every year or so they settle and need more branches piled on top.

Progress is slow, but I'm getting my walking trails back.

I work on it until the goats head back to the barn.

I doubt my brush fences would keep coyotes out, but they are very effective for keeping the goats on the homestead. And, they're free! Plus, it's good exercise and nice to see things getting tidied up. 

November 19, 2021

Learning How to Make Biochar

First, a bit of irony from something I wrote a year and a half ago.

"There are many good ideas for homesteaders out there, but they often require significant time and energy to maintain. Brewing compost tea or making biochar are two things I considered. They are excellent ideas, but would I be able to balance the time they required with everything else? Would I be able to provide all the components myself or must I continually buy something to maintain them? The answers to projects like this are subjective because there are many individualized factors to consider. We chose other soil building methods because they worked better for our homestead goals and routine."
"Re-evaluating Our Priorities," 5 Acres & A Dream The Sequel, pg 27.

The advice remains sound, but now I have to move biochar as an example into the never-say-never category! It was Dan, actually, who decided to undertake the project. We have a lot of waste wood, and the question is always what to do with it. How do we put it to good use?" The answer is to make biochar.

What is biochar and why would we want to learn to make it? Good questions!

What it is. Biochar (biocarbon) looks like natural charcoal (as opposed to commercially made briquettes), but it isn't. Charcoal contains wood resins, which make it combustible and give smoked food its flavor. Biochar is a step beyond charcoal. The resins have been baked out, leaving a stable, porous, carbon char. Its most common use is for soil building, where the pores become habitats for beneficial soil microorganisms and store water and nutrients.  

What it's used for. It has lots of uses.

  • In the garden (needs to be inoculated first - see below)
    • sequesters carbon
    • provides a habitat for beneficial soil microbes
    • retains soil moisture and nutrients (reducing runoff and erosion)
    • decreases soil acidity
    • removes soil contaminants such as hydrocarbons and heavy metals
    • increases microbial life
    • binds soil nutrients
    • improves physical structure of soil
    • provides long-term soil productivity
  • Water purification
    • rainwater tanks
    • greywater systems
    • aquaculture
  • In barns, kennels, cat litter, and composting toilets
    • odor control (absorbs ammonia)
    • absorbs moisture
    • reduces pH
  • Feed additive 
    • absorbs toxins in the digestive tract
    • improves digestion
    • improves feed efficiency 
    • reduces nutrient losses
    • reduces methane production
    • improves animals' overall health
  • Poultice additive to draw toxins out of a wound

How is it made? Biochar is made by heating biomass without oxygen. This is called pyrolysis and can be achieved in a number of ways. Some people make it by simply putting corncobs or woodchips in a lidded dutch oven on the stove and baking it. Others burn it in pits or in retort kilns. To make ours, Dan built a top-lit updraft kiln, also called a TLUD (tee-lud).

The TLUD is a type of gasifier and works just as the name says; it's lit at the top and draws air up from air holes in the bottom. It's not as complicated as it sounds! It's actually very simple. There are numerous variations on this, but this is how Dan made ours with two barrels with lids and some old ductwork.

Outer 55-gallon steel drum (burn barrel) with air holes
(primary air intake is at the bottom and secondary at the top.) 

Inner 30-gallon steel drum holds the biomass. Fire burns in the outer ring.  
(Note: This was our first try, and we've learned that smaller pieces work better.)

The wood inside the inner barrel will become our biochar. It is filled with "feedstock" (the biomass to be baked into biochar) and the lid put on the small barrel. Fuel wood is packed under and around the inner barrel, with kindling on top. The kindling is lit, and the chimney is placed on the top. 

A hole cut in the barrel lid accommodates the chimney.

The process goes through several stages.

Initially, smoke is emitted as the fire
burns out residual moisture in the wood.

The red glow indicates that the temp is
hot enough to begin burning wood gases.

Once the gases are burning well, there is no smoke.

The kiln is allowed to burn itself out, and once cool, the chimney is removed.

This is the biochar which is basically char with the wood resins burned away.

How do we know we've made biochar? 
  • Crushes easily
  • Has a fragile, almost tinkling sound
  • Has no smell or taste (it's sterile, so it's safe to eat)
  • When crushed with bare hands, the black residue washes off easily. With charcoal, residue is difficult to wash off because of the wood resins.

What other materials can be used to make biochar? 

  • corncobs
  • corn stalks
  • woodchips
  • twigs
  • bamboo
  • basically, any dried biomass; small pieces work best

How long does the process take? Once the TLUD is going, it needs no tending and will burn itself out in several hours. So the only time involved is in loading the barrels, starting the fire, and later unloading the biochar.

How do I inoculate it for the garden? Making biochar burns away all life and nutrients. So when first removed from the kiln, biochar is sterile and void. If added to garden soil at this stage, it will begin to absorb soil nutrients. Unfortunately, during this time it is competing with plants for those nutrients. Once charged with absorbed nutrients, it will begin feeding the soil, but the process takes at least 3 to 6 months. 

The best and quickest results are seen when biochar is inoculated (charged) first. There are a number of ways to do this:

  • Soak in liquid fertilizer. Fastest way, takes about a day.
    • compost tea
    • comfrey tea
    • nettle tea
    • manure tea
    • compost worm casting tea
  • Urine - place it in a bucket with drain holes and cover with pee. Takes 2-3 weeks
  • Mix 4 parts biochar, 1 part rock powder, 1 part worm castings, and ½ part flour or molasses. Cover. Takes at least 2 weeks.
  • Mix it into the compost pile (10-50%). Takes 2-3 weeks.
  • Deep litter. Mix it into the chicken litter in the coop, where it helps deodorize. It will be inoculated by the next time the coop is ready to be cleaned out.
  • Mix with equal parts fresh grass clippings. Cover and let sit until clippings are decomposed. Takes about 2 months.
  • Worm castings - equal parts with biochar. Sprinkle with flour, corn meal, or molasses. Cover. Takes about 2 weeks.

When I first looked at biochar years ago, I found only the complicated ways to inoculate it. As with all new endeavors on our homestead, it must be asked whether the benefit outweighs the time and expense. (See my post on "The Time to Benefit Ratio.") There are only so many hours in a day! Finding simpler ways to inoculate biochar changed that ratio. For us, simply adding it to the compost pile and deep litter significantly increased the benefit factor.

How do I apply it in the garden? Since ours is mixed in with the compost, I'll apply it as I do compost. I'll use it to cover seeds and top dressing. For new beds or transplants, I'll mix it into the soil. Some no-till people prefer to make slits in the soil with a shovel and sprinkle it in. It can also be tilled in or worked in by hand. Mixed with compost, it makes good potting soil.

Caveat. Various biochars are not equal, so results may vary. From what I've read, some benefit can be seen the first year of application, with continued improvement over the years.

Okay. That's all my notes about biochar! It isn't all there is to know, of course, and it's another fascinating subject to study. But it's a start and a good homestead solution for our woods and garden "waste." 

August 30, 2021

Tomatoes as Ground Cover (?)

I have a lot of volunteer cherry tomatoes this year. And most of them, I've just let grow. It's been nice to get the extra tomatoes and interesting to observe how they do in their different places. I have one bed that contained fall and winter veggies, but the cherry toms took over once everything was harvested.

A mounding mass of cherry tomato vines. 

The plants are indeterminate. I didn't stake any of these because I was curious how they would do growing on the ground. They've managed to produce quite nicely. They tend to sprawl out of the bed, so I lay the vines back over the plants to keep the aisles clear. They've done so well, that I began to wonder if I could use them as ground cover somewhere. I had just the place, too. 

Ridge on the right and the ground dips above the ridge.

The above photo was taken down in our woods, in the goat browse. Our land is a series of ridges descending toward the back of the property, and some of the ridges have a dip in the uphill side, kinda like a very shallow swale. Were they deliberately made that way? I have no idea. But when it rains, these dips catch and hold water fairly well. They aren't very deep and they are only roughly level, so with some improvement, I think they would make nice swales. 

For my tomato experiment, though, I was thinking about the ridges. Years ago, I placed logs and branches just below the ridges to help catch runoff and slow erosion. Much of that has settled over the years and needs more added, but I've also been wondering about planting something on the top of the ridges. Dan has taken out a number of dead or old trees, so the ridge here receives quite a bit of sun. The cherry tomatoes don't seem to mind partial shade, so this became the spot for my experiment.

Downside of a ridge with my dead wood barrier.

 I chose spots where the soil was bare and then scattered the seeds.

Tomato pulp from making tomato sauce.

The first time I tried this, I just left them scattered on the ground. When I came back a couple of days later, something had eaten them! Birds? Squirrels? Chipmunks? Opossums? Skunks? Could have been any of the above. This time I covered them with soil that I scraped up from the natural swales.

Maybe these dips can be dug out into proper swales.

There are a lot of tree roots there, but any improvement on the depth of the almost-swale would certainly help.

Tomato seeds covered with forest topsoil.

To protect the soil from washing in heavy rain, I mulched it with leaves.

Will it work? Time will tell. Likely, it won't grow until next year. I think it would be neat to see the ridge covered with sprawling tomato plants. They would provide ground cover plus food for wildlife and us too. Best of all, the goats don't eat tomato plants, so this may work very well. 

November 7, 2016

A Walk in the Woods

Down the hill from the Little Barn is a gate into a fenced area in the woods. We call this the doe browse. 


At the bottom of the doe browse is a place to put another gate.


Beyond that is our two-plus unfenced wooded acres. I used to have a walking trail down there, but in the past few years we've lost a lot of pine trees from pine bark beetle, so the area is thick with fallen pine trees and new undergrowth. Dan and I have been talking about trying to utilize it. It contains a lot of potential lumber and a lot of good browse for the goats.


"Come on, girls, let's go take a walk in the woods!"


With our pastures all dried up, this is prime foraging for the goats.


Goats are excellent for kudzu control


Trusty watch cat


When they've had their fill they head back on their own. I can come too if I want.

In the past few days the leaves have really started to turn. It's been so dry that I wondered if we'd get much color. We are, although the leaves drop quickly. We've had breaking-in fires in both our stoves, but our temperatures remain warm with no rain in sight. I'm enjoying the beautiful weather while I can.

February 12, 2016

A Homestead Goal Deterred

One of our goals for this year is to work on fencing our back woods. We already bought part of the fencing for it.

Woven wire goat fencing, something I've not been able
to find locally before. The rolls are 330 feet and heavy!

The other day I went down to see about getting a start on clearing the property line. It's very overgrown with bushes, brambles, kudzu, and fallen trees. Winter is the best time for clearing because the vegetation is dormant so I can find the surveyor's boundary pins and clear a path for the fence. When I got down to the bottom of the doe browse, however, I found a newly downed pine tree, just on the other side of where the gate will go.


It's a miracle it didn't fall on the fence corner!

The corner post sticking up in the center of the above photo is on the property line and from where the new fencing will extend. That is more than my nippers and little bow saw can manage, so I headed back to the house.

For our homestead ecosystem, this is ecological succession in action: mature, fast-growing pines giving way to the undergrowth of slow-growing hardwoods which need sunlight to mature. For us, it means a little extra work on this project.

January 15, 2015

Learning the Land by Observing the Weather

January started off with two and a half inches of rain over two days. We'd had a beautifully mild December with a little under four inches of rain, so the ground was pretty saturated by the time that January rain hit. As it finally began to let up I noticed the puddles seemed larger than usual. I was curious as to where the water was collecting, so I set off to take a look.

Our land is a series of ridges.


The house sits on the highest elevation which is on the base of our triangle shaped property. This is good because it means the house has excellent drainage. It also means that our collected rainwater can be gravity fed where ever we need it, another plus. Going toward the back of the property means going downhill through the woods. Last year we 
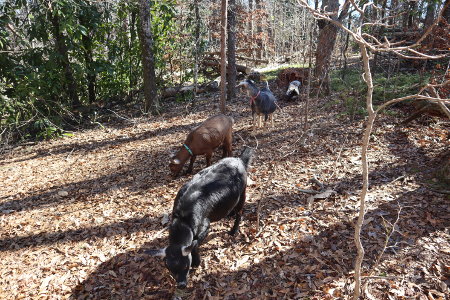
fenced an area of the woods to let our goats do some clearing there. It was loaded with poison ivy, kudzu, saw briars, and blackberry brambles. One year later, the goats have done a good enough job so that we can better see the lay of the land.

Randy getting ready to jump over a ridge long puddle of rainwater.

The same puddle continues along the ridge on the other side of the fence .

The next ridge had collected more water in a wider dip in the terrain, but ...

The water drains from the ridge by running down the path on which
  you can see Waldo and Polly (our pigs) scampering down the hill. 

The water continues to drain down the hill toward the back of the property, where it seems to disappear into some sort of indentation in the ground. I got to thinking that the ridges are almost natural swales. What I need to do is to stop the water from running down the hill.

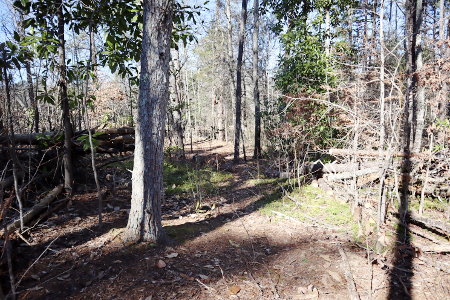
The ridges are clearly defined with a short, steep drop.

Not a terribly good showing of the ridge. Randy is on the top of it.

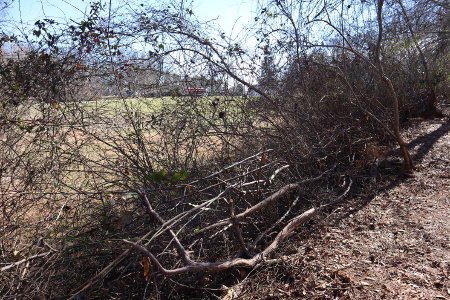
I've also been thinking that the downside of the ridges would be a good place to start placing all our tree debris, in hugelkulture fashion. We had to do some clearing for the fence, but most of the debris has been fallen pine trees. These are mature, end-of-life trees that have done their job in forest succession. The pines were the fast growing, light loving pioneer species which gave shade tolerant hardwoods an opportunity to establish themselves. Now more hardwoods are establishing themselves, but the pines are tall and spindly, like light starved tomato seedlings. Because of that their trunks are weak, and it's amazing to watch them bend and sway like tall grasses in strong winds. And a little bit scary. It seems that after every major storm we can find new pine trees falling over. We've tried to clean the area up a bit.

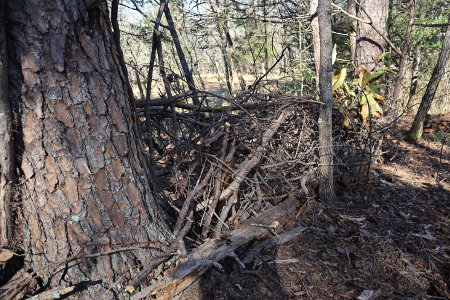
The wood piles are all pine from wind-downed trees

What to do with them has been a concern, but I think lining them up parallel to and below the ridges might be a good plan. Perhaps in the future we could even plant something there. After Dan read Sepp Holzer'z Permaculture he envisioned a orchard on our downward sloping property, if we could ever get it somewhat cleared. It seemed impossible then, but now it looks as though it might actually be a possibility someday.

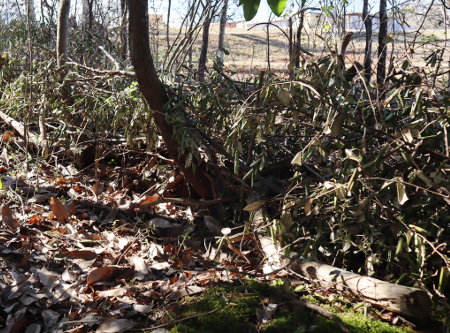
Two other natural swales are in the front pasture. A small one sits along the ridge where we are planning to plant a forest garden hedgerow.

Surprise & Lily. The fenced area contains our
blueberry bush and is downhill of the ridge.

The other collects at the top of this same pasture.

A puddle collects here anytime we get a good rain, but this was the largest
I've ever seen it. There is another ridge just to the left of the puddle.

I know from experience that these are not a year-round solution to water conservation. But if we can stop the runoff where it exists and build up the soil on the downside of the ridges, we can certainly help.