Showing posts with label pasture. Show all posts

May 19, 2023

Rethinking Pasture Rotation

About five years ago, I subdivided our goat pastures for grazing rotation. If you aren't familiar with the concept, I'm going to direct you to the research series I did at the time. It has lots of pictures and information:

The gist of it requires subdividing grazing areas into smaller paddocks, typically with electric fence.  Then it's a matter of monitoring how much the animals are allowed to eat, rotating them frequently, and resting the forage until it's regrown adequately.

Up front, I will say that it definitely works! But as with all ideas and methods, the concept is simpler than the reality. The purpose of this post is to record the challenges that our reality presented us, and how their sum total has resulted in taking a step back to regroup. 

Weather

Plants require moisture and warmth to grow. When  the temperatures are mild and we get good rainfall, we get good forage growth in the pasture. When our winters are too cold, or are summers too dry, we get very little growth. If we have an especially hot, droughty summer, much of the good forage dies out, leaving the weedy stuff to take over again.

Goats

Most of the successful systems are rotating meat animals. They are kept outdoors and simply moved from paddock to paddock. With dairy animals, like my goats, I have to be able to get them back to the barn at least twice a day. And when we have coyotes around, I have to be able to secure them in the barn at night. This means I have to add a corridor and gating system to my paddock plan. We were able to do this (photos here), so it's definitely doable. What I'm noting here, is that it adds a layer of complexity to pasture rotation.

Another consideration is that goats are more challenging to contain with electric fencing. While they can definitely be trained to respect it, some of them (bucks mostly) are willing to muster up the courage and run through the fence anyway. Apparently, the annoying zap is worth getting to the choice grazing goodies on the other side. 

The does can learn to do this too, especially if they ever discover that the fence is off. And once they learn this trick, it's difficult to retrain them.

Keeping the fences charged

Electric fence energizers can be powered in three ways: plug into grid electricity (AC), with a 12-volt battery (DC), or with a built-in solar panel and battery. We'd have to run a crazy amount of extension cords to simply plug it in, so we've tried solar charged and 12-volt batteries. Both have their drawbacks.

Solar energizers with the built-in solar panels:

  • Both the panel and battery are small, and so slow to recharge.
  • They require consistently good sun to be consistently charged. Cloudy days or even a little shade compromises the charge and therefore the jolt that reminds the goats to stay back.
  • Have an energizer lifespan of only a couple of years. So they will have to be discarded and replaced. This is not a selling point.
12-volt battery:

  • Requires battery monitoring, maintenance, and recharging.
  • You need a way to recharge them, plus extra batteries for when the one is recharging. 
  • Recharging can either be done with an AC powered or solar charger.
  • The batteries are heavy, so either strong muscles or a way to transport the battery is needed.
  • An AC-powered charger requires a source of electricity (typically the grid).
  • A solar panel and solar charge controller require sun.
  • Lifespan is 2 to 5 years

I know the current craze is for everything to be battery powered. But I have to say, that I have become a bit weary of having to feed and tend rechargeable batteries. We aren't off the grid, but we have a lot of stuff powered by rechargeable batteries, from 12-volt lead-acid and sealed batteries, to power tools, to AAs and AAAs for our clocks and flashlights. Besides being a chore to keep them all charged, the battery shelf life stinks. The little AAs and AAAs quickly quit holding a good charge, and the power tools. Sheesh. Forget replacement batteries for tools, because they have been replaced with a different model by the time you need to buy one. Plus, rechargeables aren't cheap. And while I agree with wanting to get away from fossil fuels, batteries require non-renewable resources to make. 

In addition, electric fences should be walked at least daily to remove grasses and branches that touch and short out the wires.

So, those are the challenges, and since we're down to only one 12-volt deep cycle battery for the fences, I want to rethink our options. These include replacing the 12-volt batteries ($$$!) or building more permanent fences (more $$$!). 

This is the stuff that's figured out by personal experience. Concepts, information, and theories are a good introduction to an idea, but as will all things, what works well for one person, may not work at all for another. There is no one-size-fits-all solution. It's a matter of understanding one's personal goals, routine, and regional challenges. It's a matter of deciding what one can live with. There is no perfect answer. Rather, which requirements best suit our personal circumstances? 

As you can see, I have more questions than answers! Well, I do have some answers, but this post is long enough. For the time being, I want to step back and think it through again. When we figure it out, I'll let you know. 

May 4, 2022

Swale Project: More Experiments

Digging swales is our big infrastructure project for 2022.

Proposed plan for approximate swale placement.

The first swale was for the kitchen and canning garden. We dug this one by hand. It was a lot of work, but not too bad with the two of us working on it.

Blog posts with more pictures here and here.

It still needs a bit of leveling, but it works well and captures a lot of rainwater.

Next, Dan hand dug a second small swale for the little production patch next to the driveway. No roots and soft soil, so it went pretty quickly.

After we get a good rain to see how
level it is, we'll fill with wood chips.

This spot is where we plant a plot of something, like corn or wheat, rather than a bed. But because it's located on a high point of our property, it dries out quickly once we hit our summer dry spell. Whatever  rainwater we can catch here will hydrate the soil more deeply than just rain. 

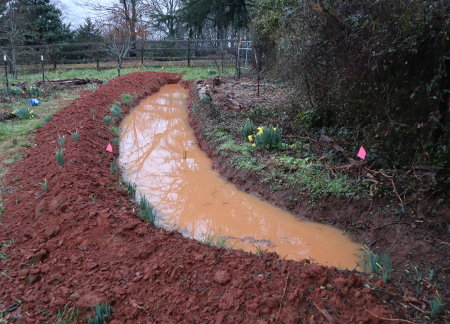
The more challenging swales are the ones for our pastures, because they are too big to dig by hand. But we've finally made a start! We started with the pasture closest to the garden, where we can use a spillway to direct garden swale overflow into the pasture swale.

After we moved that big mound of dirt, the next step was to find and flag a level line for the swale.

We used an inexpensive transit to find a level line for a swale.

Being level is key to a swale's effectiveness, because it ensures the water will be distributed evenly across the length of the swale.


Flags mark a level path for a future swale.

The how-to has been the big question. People often use large equipment such as a backhoe to make swales. But a lot of folk have been creative with what they have and have used turn plows or scraper blades. 

Dan decided to see what the scraper could do and made a start.

Then he ripped it and scraped it again.

Then the tractor called it quits and stopped running. At least we've made a start.

April 14, 2022

Silvopasture

Pasture improvement is something we are always striving toward. Ideally, it should be a self-sustaining perennial system, but in reality, this is not an easy goal to reach. In observing how our pastures grow, I noticed early on that when trees create light shade from a high canopy, our pasture forage does better than parts of the pasture that are in full sun. Lightly shaded parts of the pasture survive summer's hot dry spells, continuing to provide forage for the goats. Because of that, silvopasture makes a lot of sense.

Silvopasture. Silva is Latin for forest and, of course, pasture is where livestock graze, so silvopasture is a system which integrates forest, forage, and livestock in a mutually beneficial way. Our wooded goat  browse areas are a ready-made location for establishing silvopasture.

Our 2020 Master Plan
Hmm. Needs updating.

Silvopasture has been on the master plan for a couple of years, but it took awhile to get to a point where we could actually do something. Mostly because of

this

this

and this.

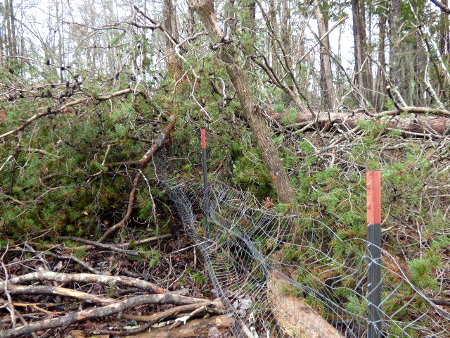
They're all mature pine trees, most of which either uprooted and fell, or broke mid-trunk and fell. Some of them Dan took down because for awhile, it didn't seem safe in our woods, especially when it was windy. 

On the one hand, these have become a source for homegrown lumber and woodchips. On the other, they leave a lot of mess behind.

Our tractor and PTO chipper in the background.

Needless to say, clean up has been slow. However! We finally made enough progress so that last fall I could toss down some seed. Here's how it looks now.

Silvopasture beginnings.

It's somewhat spotty, but it's a beginning. I'll work to add plant diversity and fill in the bare spots.

Learning that some goals are slow to achieve has been one of the lessons we've learned from homesteading. It's easy to become impatient and even discouraged, when things don't happen quickly. So much of it is simply plodding one step at a time. If we do that, then eventually we make progress! Now we just have to keep at it because living systems require our ongoing participation. 

Do you have any long-term goals that you feel will never be reached? Are you hanging in there with them?

April 5, 2022

Pasture Swale Prep: Moving That Pile of Dirt

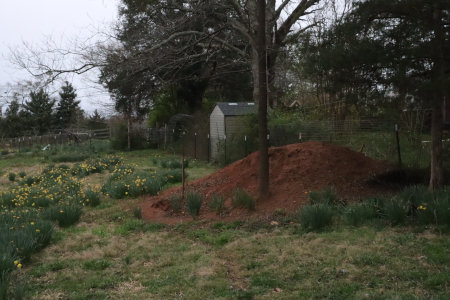
The biggest project on our spring project list is getting a start on our pasture swales. Our garden swale is functioning beautifully, so the next step is to extend our swale system to the pastures. We want to start the next swale near the one in the garden, to take advantage of its overflow. However, we had an obstacle; a big pile of fill dirt that Dan made when he dug out the old buried swimming pool. I finally have some progress to report.

Photo from "Our Agrarian Year: Spring Project List."

Disappearing the pile was done in stages. March was rainy, but in between rains it was warm enough to dry things out. Between the tractor and scrape blade and some hand digging, we redistributed the pile over several weeks.

Dan started by spreading out as much as the scrap blade could reach.

Then we had to knock the top of the pile down by hand.

More spreading until he got to the fence.

This last bit at the fenceline was moved by hand as well.

Then he secured the fence once again, to keep the goats from escaping.

Looking at it from the pool side, a view that has been
blocked by that huge pile of dirt for over two years!

The soil was fill dirt: a mixture of sand, clay, silt, rocks, and mica flakes. I don't expect much in terms of fertility, but spreading it out on the pasture was the fastest and easiest option. It's a relief to have it done.

Next, we'll measure and mark a level line to dig the swale. Then, I'll broadcast pasture forage seed over the soil and cover it with old barn bedding. The old straw and manure will be protect the seed and feed the soil. All weather permitting, of course!

March 16, 2022

Our Agrarian Year: Spring Project List

March (the old agrarian new year) marks the beginning of spring, which is planting season! Our project prioritizing motto is "food first." So, hopefully, we've gotten the maintenance and winter projects to a good stopping point, so we can set everything else aside to focus on planting. Even if we haven't, this seasonal project takes priority over everything else, save emergencies.

Seasonal

  • Planting
    • Annual food crops
    • Pasture forage
  • Cleaning out the barn (of which the winter's accumulation of deep litter is spread across newly planted areas in the pasture)
  • Prepare for April kidding
Infrastructure
  • Continue working on swales

We hoped to get further on the swale project during winter, but we have a couple of obstacles to deal with for which there are no easy solutions. 

Obstacle 1:

Big pile of dirt where the swale needs to go.

That pile came from the old swimming pool, which Dan dug out to see if we could do anything useful with it. That's where he put the dirt, and that's where it's stayed for over two years now. Our tractor doesn't have a front end loader, and trying to move it all by hand is a discouraging idea, so there it's sat. 

Obstacle 2 is related, i.e., lack of equipment to move the dirt and dig the swales. We dug the garden swale by hand, which was fine, but pasture swales will be much larger undertakings. We'll probably end up renting something; not a cheap option, but certainly cheaper than buying equipment.

Miscellaneous

These are things we need/want to do but which haven't made it to the top of the list yet. It's an ongoing list that is good to keep at hand, in case weather, time, necessity, or change of plans allows us to tackle them. This list never goes away, because as we cross things off, we add things too.
  • Finalize design and materials list for masonry heater (construction will be a summer project)
  • Do something useful with our remaining two solar panels
  • Finish the exterior of the house
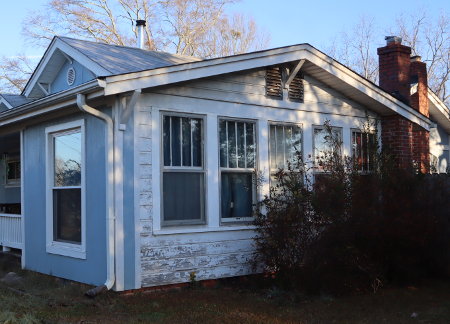
Of the house exterior, this is all that's left . . .

Last exterior wall in need of new siding and paint.

Not much, is it? So you'd think it would be done by now! The holdup here is that we've discussed adding on a small greenhouse here, but so far haven't been able to decide/design what we want to do. And that's why it's been on the project list for so many years! Maybe 2022 will be our year of success (???)

So, there it is. A very short list of the projects that will occupy most of our outdoor time this spring.

How about you? What are your plans for spring?

September 28, 2021

Random September Photos

Seems like we had a short summer this year: fairly cool through June, only a few days in the 90s, and lots of clouds and rain in August. I think I swapped summer with some of you all! Now, September. I don't remember nightly lows like these in September before. When I go out to do morning chores, I'm having to wear a jacket and sweat pants under my skirt! I wonder what October will bring??? While we wait, I'll close out September with a few photos.

Jonah and Magnus

Front porch trellis

Squash blossom in the pasture.

Sky. Tentative due date is Nov. 2.

Hopness flowers on one side of the hoop house

Morning glories on the other side

Meowy

Lone Jing

3 mature winter squash

Maturing winter squash

Raspberries

Asparagus spears (in September!)

Sam

Lettuce

The girls

Random September Photos © September 2021

August 7, 2021

Pattern in Permaculture Design

I've mentioned that I'm taking Bill Mollison's online Permaculture Design Course (PDC) at Udemy.com. But, I also had the opportunity to get Geoff Lawton's 2013 PDC on DVD for just the price of postage(!) So, Dan and I have been watching that one together, while I fit in the online course as spare time allows. I'm going to have to say here, that until these courses, I didn't understand what permaculture actually is. Most of what I knew about permaculture was various gardening and landscaping techniques, or a business with services to purchase. From Permies.com, I've started seeing permaculture as a lifestyle. But while there are many definitions to permaculture, it's always best to go to source material, in this case, Bill Mollison himself.

"Permaculture (permanent agriculture) is the conscious design and maintenance of agriculturally productive ecosystems which have the diversity, stability, and resilience of natural ecosystems. . . The philosophy behind permacultre is one of working with, rather than against, nature."
Bill Mollison, Permaculture: A Designer's Manual, page ix.

One of the key elements of conscience design, is pattern. Pattern exists everywhere in nature. Here are my notes from the PDC lectures:
  • Patterns are events of form.
  • We're surrounded by the natural patterns of the universe, from micro to macro.
  • Design that follows natural patterns is productive, design that doesn't, isn't.
  • There are very few pattern form types but infinite variations.
  • Partial list of pattern forms:
    • waves such as water waves and sand dune ripples
    • spirals - snail shells, whirlpools, sunflower seeds in the flower head
    • lobes - reefs, lichens
    • branches - rives and tributaries, tree branches or roots
    • nets - cracks in mud or skin, honeycombs
    • scatters - algae, lichen on rocks
    • cloud forms - clouds or tree crowns
    • tessellations - turtle shells
    • Fibonacci sequences - found in the number of sunflower seeds in a flower head or number of pine seeds in a pine cone.

So, some simple examples of using pattern in design would be an herb spiral, making swales that follow land contours, making an herb garden with branching pathways, or circular greywater mulch pits. I guess, contrast with this with how most farming and gardening is done - squares, rectangles, and rows of straight lines, none of which is found in nature!

One way of discovering pattern is with a topographical map. The contours can reveal a specific pattern of one's property.

Contour lines are in green and spaced every four feet.
Yellow X's mark the highest elevation on the property.

Our house and Dan's workshop are located at the highest elevation of our property. This will be important when we begin working on implementing permaculture water conservation. (More on that one of these days.) Interestingly, the tree lines follow the contours, and our existing fences follow the trees. What hasn't fit this pattern, however, has been my paddock system for rotating goat grazing. Here's the plan I came up with several years ago.


As I contemplate pattern, I've tried to re-envision this with what I'm learning about permaculture design. I started to play around a bit, to see what I could come up with. First, I superimposed the contour lines onto my drawing.

Not perfect, but close enough!

Then I drew in paddock fencelines that follow the contour lines.


Will we actually do this? For now, it's just an exercise in thinking. But what we're also considering is digging swales on contour. Capturing and retaining water is a primary permaculture goal, one that I really get. Most of our growing struggles point back to our long, hot, droughty spells most summers. Our current idea is that swales will follow the contour, we'll plant the swales with edible hedgerows, and grazing paddocks will follow these. 

All of this is in the contemplation stage at this point, with many details to work out. Like how to get/pay for the equipment to make the swales! However, one step at a time. First, we strive to understand the concept, then we explore ways to implement it. Hopefully, this is just the beginning. 

May 5, 2021

Planting Pasture the Fukuoka Way

One of our seasonal chores is planting pasture. I have a long list of blog posts about my attempts to establish sustainable pasture, and admit it's been a slow road. Like so many other things on our homestead, we had much to learn. 

Initially, we simply broadcast seed and hoped for the best. Birds ate quite a bit of it, which is expected and why seeding rates for broadcasting are so much higher than for seed drilling. Dan has wanted a seed drill for some time, but we haven't found one yet at a price we can pay. So I've experimented with other methods. 

One experiment that has worked pretty well is what I call my "modified Fukuoka method." This method covers the seed with dirty barn litter as mulch. It's worked well enough so that we've gradually made progress to the point where we no longer have huge patches of bare soil to plant. Now, planting is mostly seasonal spot seeding. 

Last month, I added another One-Straw Revolution inspired technique - seed pellets. This is similar to the seed bombs I showed you last fall. The difference is that they aren't formed into balls, but spread out to dry as pellets. The bombs were fun, but the pellets let me spread the seed more evenly, so I think I prefer this method for my purposes. (The "bombs" are great for lobbing into a hard to reach area.)

For spring planting, I made my pellets with two forage mixes and a pasture seed mix, plus whatever seed I had handy such as clover, turnips, echinacea, oregano, sunflowers, sugar beets, etc. 

Mr. Fukuoka simply mixed seed and clay to form his pellets.
I followed the idea for the seed bombs and added compost.

Mix by hand (adjusting ingredients) until the seed is covered.

Seed pellets. I think the technique is better suited to smaller seeds.

Drying in the sun. I stirred it occasionally for even drying.

To plant, I took a bucketful and looked for spots of bare soil.

I think the pellets disguise the seed pretty well!

Making the pellets is a pleasant afternoon job for shade. I think as long as they are thoroughly dried, they will keep. So a large quantity could be set by for the next season. 

I planted this batch a few days before rain was forecast. I'm curious as to whether the rain will wash the clay off, and how they'll grow. I'm hopeful that this will help fill in the bare spots in the pasture with increased plant diversity. It's fun to experiment like this!

October 7, 2020

Seed Bombs

I've been a fan of Masanobu Fukuoka ever since I read The One-Straw Revolution five years ago. I've blogged about modifying his grain planting method for seeding my pastures. Another of his ideas is coating seed with clay before planting. I've thought this would be an excellent way to hide the seed from birds. And goats! But I never quite understood how I'd do it. Then I watched this video on how to make seed balls and seed bombs. Last month, I finally made some for seeding several small bare soil areas in the pasture. So, here's my first attempt.

Mix of pasture seeds.

Because it's for winter pasture, my seed mix contained cool weather grasses, legumes, and forbs: crimson clover, arrowleaf clover, hairy vetch, purple top turnip, annual ryegrass, wheat, oats, winter peas, rape, radish, white clover, perennial rye, timothy, brome, echinacea, chicory, and oregano.

Here's what I needed to make them.

Seeds, compost, and clay.

The mixture calls for equal parts of each.
How do you like my southern red clay?

And enough water to dampen.

Mixing and testing if it can be shaped.

Formed and pressed into balls (bombs).

My yield was roughly 4 pounds worth.

These could be dried and saved for later or planted immediately. I went out and dropped them onto various bare spots as soon as I was done because the forecast was for rain.

Seed bomb on a bare bit of soil.

The clay protects the seeds and gives them soil to get started in. The compost feeds them. Here they are several weeks later.


Has anyone else tried this? It would be a great activity to do with kids! Like mud pies but better! Kids would have fun planting them too.

Seed Bombs © October 2020 by Leigh