Showing posts with label soil. Show all posts

July 25, 2024

Soil pH and Our Blueberries

It's hard to tell in the above photo, but we have blueberry bushes in front of the house. Dan transplanted them there several years ago, after he finished our first keyhole garden. It looks pretty when the butterfly weeds and 4 o'clocks are blooming. It looks messy when they aren't. 

July being blueberry month for us, we've been keeping an eye on those blueberry bushes. But we've been disappointed that the berries are small and hard. That something was wrong, was evident by the leaves.

But what? I got out my copy of The Organic Gardener's Handbook of Natural Insect and Disease Control (an excellent resource and highly recommended), and quickly discovered the cause.

The link will take you to its page on Amazon, where only
used copies are now available. It would be a shame if this is
out of print. It's an excellent book for identifying problems.

In the section of leaf symptoms for diseases, I found a picture and description that matched, with a diagnosis of iron deficiency or overly high pH. From page 377 . . .

Plants affected: acid loving plants including blueberries . . .

Prevention and Control: Symptoms of iron deficiency appear when the soil is not sufficiently acidic. Symptoms commonly occur on susceptible plants growing near buildings because lime that leaches out of the concrete foundations raises soil pH. In most cases, iron is present in the soil in adequate amounts, but plant roots cannot absorb it if the pH is not in the appropriate range for that plant. 

I wouldn't have thought of this because we have fairly acidic soil here. But these bushes are indeed fairly close to the foundation of the house, so it all fits. The quick fix is to spray the leaves with a chelated iron solution, which I don't have.  But I could water with with diluted whey, which I do have.  The long term solution is to increase acidity in the soil by adding peat moss or sulfur. Or mulching with evergreen needles, which we have handily. 

So, I couldn't save the fig trees, but hopefully, we'll see the blueberries recovery and have a better blueberry harvest next year. Hopefully, everything will be better next year!

March 24, 2022

Interesting Things I've Learned With a Shovel

Once upon a time, I thought of shovels as simply tools for moving things like dirt, compost, or mulch. While it's true that they are, I've also come to understand that they are invaluable learning tool as well. It's my first tool for soil analysis; a carefully removed shovel depth of soil reveals its physical structure: type, texture, color, and presence of organisms and organic matter. Then there was poking around in the dirt where I put my first forest garden. That was almost like an archaeological dig.

This particular episode in my ongoing learning adventures started when I planted two quince seedlings in the goats' browse area. I'd ordered four seedlings, of which two went above the annuals garden. Then I started learning about swales and wondered if I could help those little trees by digging a small trench-like swale between them. What I learned changed everything.

Digging the trench led to an interesting discovery,
which led to transplanting the little quince trees again.

While digging the trench, I observed water seeping through the clay subsoil and filling the trench. Odd, I thought. Even odder was that water sat in the trench for weeks afterward. Unlike our garden swale, which soaks up the water in about two days, the water here was very slow to soak into the ground. 

The next good rain we got, Dan and I walked the land to observe what the water was doing in this area. Our property is a series of ridges, possibly man-made in the 1930s when swale making was one of the government projects to give people work. The remnants of these are less obvious on our treed land, but easy to see on our next door neighbors' places.

Ridge and old swale above where the quince trees were planted.

Two ridges below where they were planted.

We discovered a series of puddles both uphill and downhill from where I planted the quince trees. However, there wasn't observable overland runoff. Coincidence? Or is something else going on?

After it dried out a bit, I dig another small trench below the first one.

If you can spot her, Meowy is squatted down near my 1st trench.

I dug about this deep and then something interesting started to happen.

Water started to seep through the clay and fill my little trench.

It filled quickly enough to make ripples in the water!

The water fill pretty much stopped when it reached this level.

I dug another trench a few feet over, and it too
started to fill, though not as quickly nor as much.

The next time it rained, I was curious to see what was happening.

This shot was taken looking down on my trenches.

The two lower test trenches had filled with water too (top of the photo).

The trench on the left not only filled, but overflowed.

Where did the overflow go? Both around and under the old pine stump.

From the fence I could look below the next ridge, and this is what I saw.

The hole was made by an uprooted pine tree and
is in line with the flow of water I'm following.

I've been observing the trenches daily after it rains. My observations are that the two lower trenches drain before the top trench does. And while my garden swale holds water for about two days, the top trench holds water for several weeks.

Conclusions: 
  • There is a lot of water moving underground here, even when it's not raining.
  • Soil conditions are right to retain water here for a longer time than elsewhere.
The unanswered question is where does it originate? From rain, of course, but there's more water collecting in my trenches than is visible to the eye. 

Looking uphill. That's the old swale in the foreground.

Continuing uphill. The green is one of our goat
paddocks. My forest garden is uphill from that.

Over the years, Dan and I have talked about putting in a pond, although we never thought about putting one here. Yet thanks to a shovel, we've made some interesting observations about our land and how it responds to rainfall. Will we ever actually dig a pond? I have no idea. When I took my online permaculture design course, Bill Mollison and Geoff Lawton had really interesting things to say about what happens after the land is re-hydrated by swales and ponds. They also discussed how productive aquaculture can be. So, a future pond for us? It's definitely something to consider.

October 8, 2021

Forest Garden: Poking Around in the Dirt

While Dan has been working on the outdoor kitchen cookstove, I've been working on the forest garden (you can see photos and read my planning post, here). As with all gardening projects, the first step was to grab a shovel and take a good look at the soil.

The area of the forest garden is located at a high point on our property (see link above). It is roughly triangle shaped. Contour-wise, I'm looking at this:

High and low spots in the future forest garden.

In the above photo, the yellow line represents a small, shallow ridge. This is the highest spot. The blue oval is the lowest spot, which is dish shaped. In walking the area and looking closely at the ground, I observed several things.

The ground along the ridge - no topsoil.

Trees and brush have grown here for many years. After we fenced in the pasture, the goats ate the brush, which opened up the area. Dan took out a few trees, but most of them have remained and will form our forest garden canopy layer. That means a lot of leaves are dumped on the ground every fall, yet, the top soil is pretty much washed away. 

A little farther down on the ridge the soil seemed softer, with a few bricks lying around. I started poking around with a shovel.

Sand and buried bricks.

Under the thin veneer of decayed leaves, I discovered pure sand and buried bricks. The sand looked like builders sand, and it seems this spot was a dumping ground long ago for leftover materials from a building project.

Also found, homestead relics?

Neither absence of topsoil nor sand hold water, so I'm going to have to do a lot of work on the soil here if my forest garden is going to thrive.

In the low spot, the surface soil looked much, much better:

The ground in the blue oval in the first photo - lovely black topsoil.

When I dug here, I discovered the soil looks like this:

Thick black topsoil and clay subsoil.

The topsoil is black (indicating a lot of decayed organic matter), sandy (which is typical of our cecil sandy loam topsoil), and about five to six inches deep. That was a pleasant surprise because in most places around the homestead, black topsoil (if there is any) is less than an inch deep.

What to make of this? My theory is that most of the fallen autumn leaves are washed off the little ridge in heavy rains and deposited in the low spot. That would explain the absence of topsoil on the ridge and the thick layer of black topsoil in the low area.

I found another relic while digging in the soil here.

It was buried about 6 or 7 inches down.

The other observation that is noteworthy, is that even after several inches of rain in previous days, the soil was only moist in the top three inches or so. Beneath that, it was bone dry. That surprised me too and indicates that the ground isn't getting a deep soaking, even with a lot of rain. This information tells me that our conditioning the pasture soil with a subsoiler was a good decision. For the forest garden, the subsoiler isn't feasible, so I'll need to work on other ways to deep soak the soil.

So, this is my starting point. Hopefully, over time, I can document positive changes in the soil in my forest garden. For now, I'm pulling out all the soil building strategies I can muster, and getting ready to put them to work. 

September 16, 2021

Shocking Practices in Permaculture

When Dan and I first read Sepp Holzer's Permaculture, we were quite surprised at the heavy equipment Sepp used when he was setting up his farm. He totally rearranged the side of a mountain with a variety of earth moving equipment. At that time, we were meandering down the path of more natural farming and gardening and had come to see massive plowing and tilling as destructive. Because of that, his massive earthworks were shocking.

Thanks to my online permaculture design course, I'm learning that earthworks are the foundation of permaculture design. I'm starting to understand the when and why of earthworks, and how it differs from traditional uses of equipment and machinery. Plowing and tilling are seasonally repeated actions that destroy the soil ecosystem. Permaculture earthworks are carefully planned one-time projects with a specific purpose in mind. That purpose usually revolves around capturing and keeping as much water on the land as possible. Two common examples are ponds and swales. A less common one is ripping the soil.

Ripping is a soil conditioning technique. Have you ever dug a hole in the ground after a heavy rain? I have, and have been shocked to discover that after a good, long, soaking rain, the soil is only moist in the top few inches. The soil under that can be bone dry. This is common anywhere plant growth has been kept short, and/or the area sees a lot of traffic from either herds of animals or heavy equipment. Plants compensate for being mown or eaten by pruning their roots to match the top-growth. If that top-growth stays short, the roots stay shallow, so nothing penetrates the soil including water and oxygen.

In a natural system, deep-rooted trees and plants keep the subsoil from becoming compacted. They also pull up minerals from deep within the soil, for the benefit of the plants and everything that eats them. 

In Australia, a Wallace plow is used to recondition compacted soil. It is designed to specifically open a line in the soil at whatever depth it's set to. It doesn't necessarily tear up and turn the soil, but slices the soil to allow plant roots, air, and rain to penetrate. The soil ecosystem is preserved. The following are from an illustration in Bill Mollison's Permaculture: A Designer's Manual (PDM), page 218, figure 8.11.

Short grasses (from mowing, grazing, or heavy traffic) cause short roots.
The soil is dense and without the structure needed to hold water and air.

Forage growth from 3 rips with the Wallace plow at various 
depths: 2-4 in (5-10 cm), 5-8 in (12-20 cm), 9-12 in (23-30 cm).

I've dug into our soil in numerous places and know how dense and dry the soil is, even one shovel-depth deep. So, I tried to research Wallace plows in the US but came up with nothing. What we did find, was a subsoiler. It's only single shanked, but Dan says the depth can be adjusted somewhat, although not as much as the Wallace plow. Still, something is better than nothing.

Soil ripper aka subsoiler.

Action shot.

Parallel rows in the pasture, made on contour.

Being on contour, rain heading downhill will be caught in the rips and soak deeper into the ground. I sprinkled a fall forage seed mix into the rows, where the roots can now reach deeper depths in the soil. This will then cut or grazed, causing the plants to prune their roots back underground. The living roots push into compacted soil and the pruned roots decompose and add organic matter to deeper levels of the soil. This can be repeated several times.

In the spring, we'll add more rips at hopefully different depths. I'll seed with a summer forage mix. In the PDM, Bill says this technique creates deep humus soils over one or two growing seasons. If that's the case, we've found a great technique to kickstart soil building where it's badly needed.

February 14, 2020

Book Review: A Soil Owner's Manual

About a year and a half ago, I enthusiastically started a series of blog posts on soil building. Dan and I had just found several video series by regenerative farmer Gabe Brown and agronomist Ray Archuleta. That was the beginning of a completely new phase of homesteading for us because it offered solutions to problems we were having. Since that time I've gleaned more bits and pieces of information, but it wasn't until now that I've finally been able to connect all the dots and see the big picture. And this is the book that did that for me.

by Jon Stika

It's not a very big book, only 88 pages, but it lays out the principles of improving soil health and their application clearly, logically, and to the point. No fluff, just facts.

Chapter 1: What is Soil Health and Why Should I Care?

As a lifelong organic gardener, I thought I had a handle on soil health. What I didn't realize was that, even though organic gardening is an improvement over industrialized chemical farming, it still follows the wrong paradigm. This chapter helps the reader understand nature's paradigm by explaining the five functions of the soil, why we don't need to feed the soil, and why a new fundamental understanding of soil is needed. 

Chapter 2: What's Wrong With My Soil the Way It Is? 

Explains why most soil in the United States (and the world) is dysfunctional. Explains how tilling the soil damages the soil ecosystem. 

Chapter 3: How Is Healthy Soil Supposed to Function?

We're all familiar with dysfunctional soil. The problem is that it is so familiar, that its dysfunctional state is now considered "normal." For example, my highly deficient compact red clay soil is considered normal for the southeastern U.S. This chapter explains why that is a fallacy. It defines healthy soil by describing properly functioning soil. Discusses water cycling, nutrient cycling, physical support, and biodiversity.

Chapter 4: Biology of the Soil

This quote from chapter 4 says it better than I could, "Soil microbiologists have determined that roughly 90% of the functions we expect soil to perform are biologically driven . . . Appreciating soil biology and all that it does is essential to improving soil health and becoming an economically and environmentally sustainable producer." Clue: soil biology is not just about earthworms! This chapter defines the Soil Food Web (SFW), describes the inhabitants that populate this web, how they function, and how they are fed.

Chapter 5: How Do I Restore the Health of My Soil?

"If the soil is managed with an understanding of the habitat requirements for the SFW, the capacity of the soil to function can be restored." This chapter details the keys to restoring soil health and how to make them work for you. I now understand why I have weeds! And I now know what to do about them. Also explains how the carbon:nitrogen ratio of cover crops and mulch affects soil microorganisms. Very useful information. Includes specifics for tailoring the principles of healthy soil to crop land, hay growing, pasture, rangeland, woodlands, and your yard, garden, orchard, or vineyard. 

Chapter 6: Goals and Tools

Explains how understanding healthy, fully functional soil can help you choose the best tools and equipment to meet your goals. 

Chapter 7: How Will I Know If My Soil Health is Improving?

This is an important question! Explains three simple, easy-to-do tests to get you started and help you monitor progress. Also discusses more sophisticated lab tests that can help measure the state of the soil's biologic activity. 

The book includes an appendix listing useful soil resources and a chart of the carbon to nitrogen (C:N) ratios of soil mulches and cover crops. Explains how to choose these based on your goals. A glossary and bibliography complete the book. 

The only thing that's missing is an index. I have a paperback copy, so no search feature. But this is the kind of book I will search through and refer to often. Even so, it's definitely a 5-star addition to any homesteader's, gardener's, rancher's, or farmer's home library.

You can find A Soil Owner's Manual at Amazon or your favorite book seller. It's available in paperback, Kindle, and audiobook. You can follow that link for a "Look Inside."

September 9, 2018

Soil Building Experiment #1

Last month I shared what I've been learning about soil building ("Carbon: What I Didn't Know"). The nutshell version is that soil microorganisms are what make (build) new soil. Here's what I've learned summarized:
  • Soil bacteria break down compost and mulch into organic matter
  • Soil fungi build organic matter into new soil
  • Both feed on carbon provided by
    • the plants
    • the mulch
  • Conclusion: Feeding soil microorganisms = building the soil

Building soil in a small area such as a garden is relatively easy. The gardener applies compost and mulch, and the microorganisms do the rest. We can further facilitate the process by allowing the mycorrhizal fungi to grow and create a network. This is where the no-till technique comes in, because tillage destroys the network.

I will readily admit that we have been tilling, so a big part of these experiments is trying to figure out how to switch to no-till, especially for larger production areas where garden beds aren't practical.

The area we chose for our first soil building experiment is where our row of fruit trees grow, outlined in red in the map below.

See "Carbon and Soil Building: Designing a Plan" for map details.

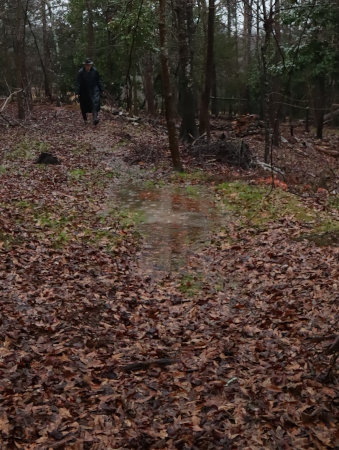
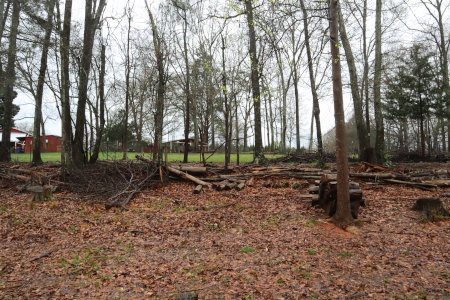
There are two apple trees, two pear trees, and a small cherry tree down the middle with elderberry bushes along the fence. In the past we've cut the grass there and dried if for hay. Here's how it looked from the bottom of the slope (right edge on the map) before we began.

Planted with sorghum-sudan grass for a hay crop.

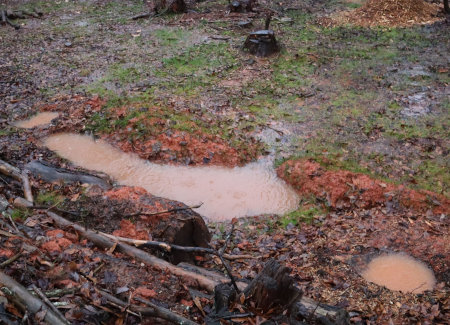
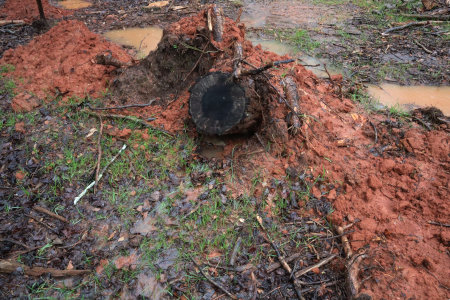
Before we did anything we took a look at the soil itself. We dug two samples, one at the top and one at the bottom.

Sample dug at the top of the area.

This sample is typical of soils in the southeastern United States. Any place on our property where we've had to dig (for fence posts, huglekulture swale beds, etc.) this is what it looks like: sandy loam topsoil and red clay subsoil. The sand doesn't hold water, so in hot weather our topsoil dries out quickly after a rain. And it contains just enough silt so when it dries out, it's as hard as concrete!

The bottom sample looks a little better.

Sample dug at the bottom of the area.

The top inch or two has roots and clumps of soil clinging to the roots (clumps are good; they mean soil microorganisms have been busy), but it contains little organic matter and is mostly the same sandy loam.

Excellent soils are said to look like black cottage cheese, and obviously we have a long way to go! It is possible to build soil with only cover crops, but we hoped to give it a jump start. We took stock of our own resources and decided to add some of this...

Aged manure from cleaning out the old goat barn.

This is what Dan scraped out of the former goat barn after we moved the goats. Some of that manure is years old, but it's been under roof, so there has been no nutrient leaching.

Also this...

Mulch pile from the tree trimming company.

Earlier this summer our electric company hired tree trimmers to clear everything away from the utility lines. Dan asked if we could have some, and they dropped off two loads of chipped wood and leaves. Here's what we decided to do.

First I trimmed back the trees and bushes. Then I broadcast a cool season cover crop mix of wheat, oats, winter peas, Daikon radishes, and crimson clover. The fibrous roots of the small grains add biomass below the soil surface, the peas and clover are legumes which fix nitrogen in the soil, and the large roots of the Daikons help loosen the soil. I also read they are nitrogen accumulators and store nitrogen in their roots.

Next Dan cut the grass back with our mulching lawn mower.

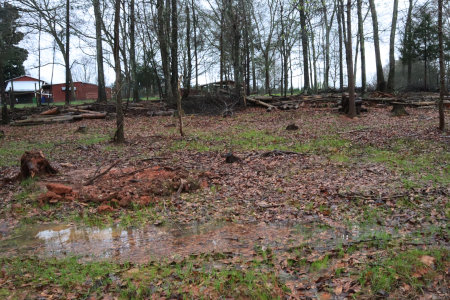
Trimmed back, planted, and mowed. The brown patch
at the bottom wasn't from tilling. That's the grass you
saw in the "before" photo, dead and brown from mowing.

The grass clippings covered the seed like a light layer of mulch. I covered that with a layer of the old manure,


then a layer wood and leaf chips.


A week later it was starting to grow.


We hit a hot dry spell about that time, so I was concerned about the seedlings drying up. Even with hot days and no rain for three weeks it continued to grow well.


Here's how it looks now.

One month after planting.

The plan is to let this cover crop grow all winter, then underseed it in the spring. The cover crop will be cut down, leaving the clippings to mulch the new seed and add more carbon to the soil. The idea is to alternate cover with harvest crops to build healthy, productive soil.

Soil building is a slow process, usually measured in years, so I realize it may take awhile to see improvement in future soil samples. Even so, we've  already seen a response.

Ten inches of new growth.

New growth on one of the apple trees! I can't tell you how much that lifted my spirits.

This is a long post, I know, but it will serve as a record of what we did, as well as our starting point for measuring progress in the future.

Soil Building Experiment #1 © September 2018

August 24, 2018

Carbon: What I Didn't Know

For as long as I can remember, gardeners have focused on nitrogen as the key element for a healthy garden. Followed by phosphorous and potassium (potash), most organic gardening books place a great deal of emphasis on nitrogen sources and compost to feed plants. One of the most important jobs our homestead critters have is to provide manure for compost. This has been my mindset ever since my very first garden.

I can't tell you how surprised I was, then, to watch a number of videos by rancher Gabe Brown. In video after video the emphasis wasn't on nitrogen to feed the plants, but on carbon to feed the soil. Or more specifically, to feed the soil microorganisms. His message was loud and clear: Feed the organisms and the rest will fall into place.

What ?????

The results were irrefutable. Gabe farms thousands of acres in arid North Dakota without any soil amendments. Yet he has rich moist soils, consistently lush growth, and excellent soil test results. His secret? Carbon.

How could I not have known this?

I had to go through my organic gardening books to look up carbon. While whole sections are devoted to nitrogen, about the only thing they say about carbon is a blurb about photosynthesis: plants take in carbon dioxide from the air and give off oxygen with sugar as a by-product.

carbon dioxide + water + light energy → oxygen + water + glucose

Glucose (C6H12O6), we're told, feeds the plant and accounts for the sweetness in the fruits and vegetables they produce. Excess glucose is stored in the roots, and that's where most explanations end. I'm not arguing that, but there's more. Plant roots don't just store it, but secrete it as liquid carbon to feed soil fungi, specifically mycorrhizal fungi.

Mychrrhizae are truly amazing. They form symbiotic relationships with plants and exchange that liquid carbon for other nutrients the plant needs. They do this by extending the root system of the plant so that these nutrients can be harvested from other areas and transported to the plant. More amazing, the fungi can network with one another to extend their resource harvesting in areas covering acres and miles.

Soil bacteria are the other key player. Most of us have heard of nitrogen-fixing bacteria (rhizobia) that form nodules on the roots of legumes to convert atmospheric nitrogen into a form that plants can use. Other bacteria (actinomycetes) are decomposers. They are soil builders, turning carbonaceous mulch into organic matter. Both kinds of bacteria feed on - carbon, either from the plant or from organic matter in or on the soil (i.e. mulch). 

Why had I never made the carbon connection?

But there's still more.

!!! Combined with water, soil carbon forms carbonic acid (H2CO3) which extracts rock minerals from the soil. This is the same principle as used in making bone broth. An acid such as vinegar is added to the stock pot to slowly dissolve the minerals from the bones. Carbonic acid is nature's way of mineralizing soil.

!!! Carbon stabilizes soil nitrogen. Nitrogen is volatile and if not utilized will escape into the atmosphere. Carbon is able to tie nitrogen to the soil, so to speak, keeping it stable until soil microbes need it. The magic ratio is 25 to 30 parts carbon to 1 part nitrogen. That should sound familiar to anyone who takes their composting seriously.

So how does Gabe Brown get all that carbon into his thousands of acres? Is it possible to mulch that much ground? Nope, he doesn't use mulch, he uses no-till cover cropping. Most of us are familiar with no-till in the context of raised bed vegetable gardening, but over acreage? That's a different challenge.

I'll stop with that while I'm contemplating that challenge for our homestead. But I do want to give you some links to the videos I mentioned:

Gabe Brown: Keys to Building a Healthy Soil
Sustainable Farming and Ranching in a Hotter, Drier Climate

Here's one by someone Gabe refers to frequently, agronomist Ray Archuleta.

Soil Health Principles

I also highly recommend Salad Bar Beef by Joel Salatin. It helped me put together several pieces of the carbon puzzle.

Next: "Carbon and Soil Building: Designing a Plan"

April 10, 2017

Double Digging for Rainwater Collection

Last summer was a doozy in terms of too much heat and too little rain. If you're a regular reader, than you know we're working on additional measures to harvest more rainwater including a larger collection tank and garden swales. One day Geoff Lawton had a link in his newsletter to this page (second video down), and it got me thinking about double digging.

Double digging is a biodynamic (French intensive) soil preparation technique. In permaculture terms this could be classified as "earthworks," i.e. the arranging of the earth to effectively capture and utilize water. What I'm actually creating are hugelkultur swales.

Why not just make regular hugelkultur beds by building them on top of the ground?  Let's answer that by starting with a look at the soil in my garden.

Shovel included for size comparison. I tried to get a cat to volunteer for
that, but for some reason none of them were interested in posing in a ditch.

The soil in my garden is classified as cecil sandy loam. It, along with the other cecil soil types, are typical for my part of the country. This soil type has a light brown sandy loam topsoil and a red clay subsoil. Diagrammed, it looks like this ⬇

The degree of topsoil darkness is an indicator of the amount
 organic matter present. The red in my subsoil is from iron.

In the garden, my topsoil is typically about four to six inches in depth. Being mostly sand, it doesn't retain moisture very well. Water drains quickly and the soil dries out quickly. It has just enough silt and clay so that it dries rock-hard during drought-like conditions.

When it rains, the topsoil quickly becomes saturated and water drains down to the clay subsoil. The clay absorbs some of the rainwater, but because my garden is on a gentle slope, the rest is drained down to the bottom of the garden.


During prolonged periods of rain it's a big muddy puddle down there and it retains water for a long time. We discovered this by accident our first winter here. We wanted to plant an almond tree at the bottom of the garden and hit water while digging the hole. This wasn't a tree that liked having wet feet, so we planted it elsewhere. At the time I didn't understand what was going on, but after researching and observing, I see the patterns and the problems and want to take positive action to solve them.

The flip side is that the top of the garden dries out very quickly. It seemed to me that double-dug beds would be a good way to harvest more rainwater to benefit the summer garden.

Here's what I've been doing. It starts by hand digging a trench about two shovelfuls deep. The first shoveling removes the topsoil, which is set to the side. The second shoveling removes a layer of clay, which goes into a separate pile to be used elsewhere.


Unlike my swale, which was filled only with logs, branches, bark, and corn cobs (no soil), this trench is filled with layers of rotted wood and bark, biomass, compost, and topsoil. I'm also adding dolomitic limestone and soft rock phosphorous because my soil is poor in those two minerals.


Warm weather planting is upon us, so that's the next step.


Now when it rains my double-dug bed should catch and retain some of the subsoil runoff.


Will it work? Shortly after I took the photo at the top of this blog post it rained. One and a half inches later, my little trench had collected and was holding four inches of rain runoff.


Of course, once the trench is filled in it won't hold this much, but between that trench and the organic matter I'm adding, this should do much to help my poor garden during dry spells.

One last comment, this plan won't work in all types of soil. The particulars of my cecil soil generously facilitate it. Plus, in addition to rainwater catchment, double digging adds much needed organic matter to my soil in a way that should keep it productive for many years to come. Additional soil building and nutrients will be added as topdressed compost and mulch, where rain can deliver them to the roots as nature intended. No more hitting the clay and washing down the hill! Also, I have to admit for some renewed hope for root crops as well. Things like carrots and mangels were never able to penetrate that heavy clay subsoil and have been stunted for me. I'm counting more room for good root growth as another plus.

Speaking of soil types, this might be the time to do a quick plug for my little eBook, How-To Home Soil Tests: 10 DIY tests for texture, pH, drainage, earthworms & more. Click the link or the book cover to learn what it contains and where to find it. These are the same tests I used to learn about my own soil! All of them are easy, inexpensive ways for learning more about your own soil, including tests and charts for everything listed in the subtitle, plus how to read your soil color and weeds.

I've only just begun this project and don't anticipate having all my rows double dug before it's time to plant this year. It will be something I'll just keep working on for awhile to come.